Heads up! I’m obligated to tell you all that this is a sponsored post for Capri Sun through Social Stars. 😉 But as always, my thoughts, opinions and awesomeness are 100% my own! #CapriSunMomFactor
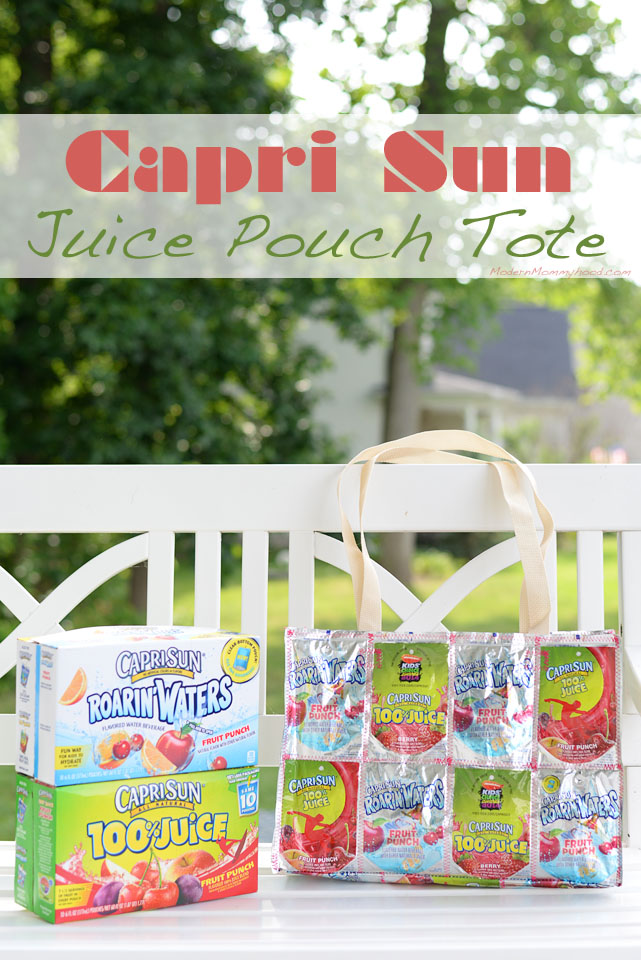
As you all already know, my family has been super busy over the past couple of weeks! From selling our house (we’re still technically under-contract), getting everything all packed up to move, and trying to maintain our sanity at the same time…it’s safe to say that we’ve been on the go constantly!
But it’s just about summer…and between the packing (and stressing) we’ve been sure to take breaks to enjoy life.
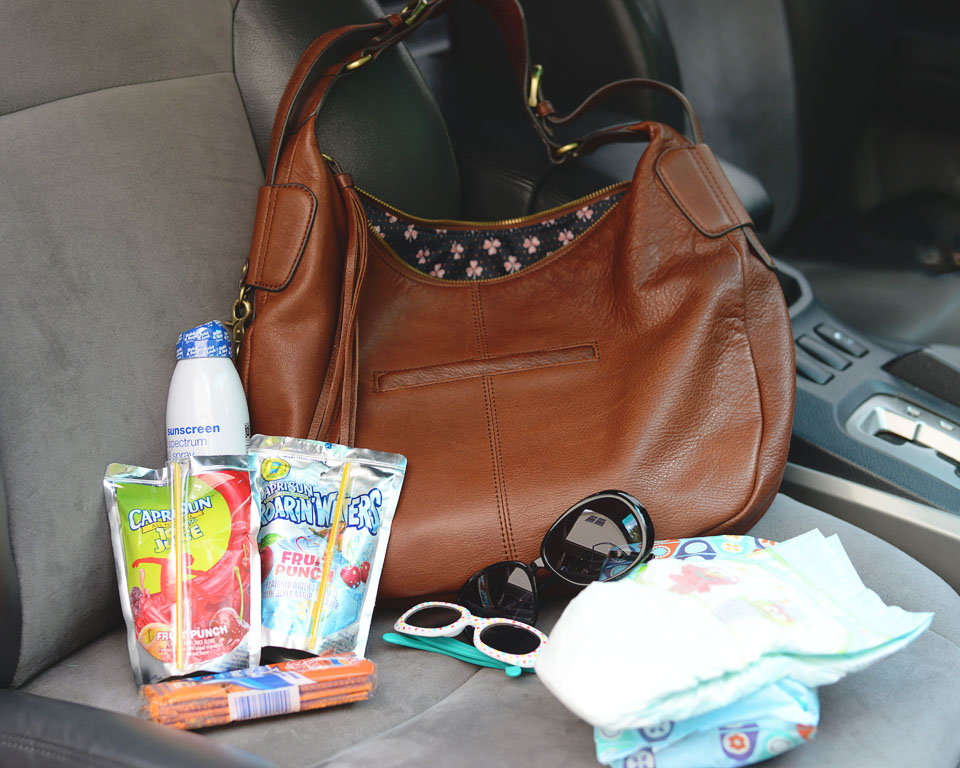
And right now, I’m pretty excited about not having to lug a diaper bag around anymore on our little excursions. All I have to grab on the way out the door is a diaper, some wipes, a snack, and a Capri Sun for Mabel…and we’re set to go!
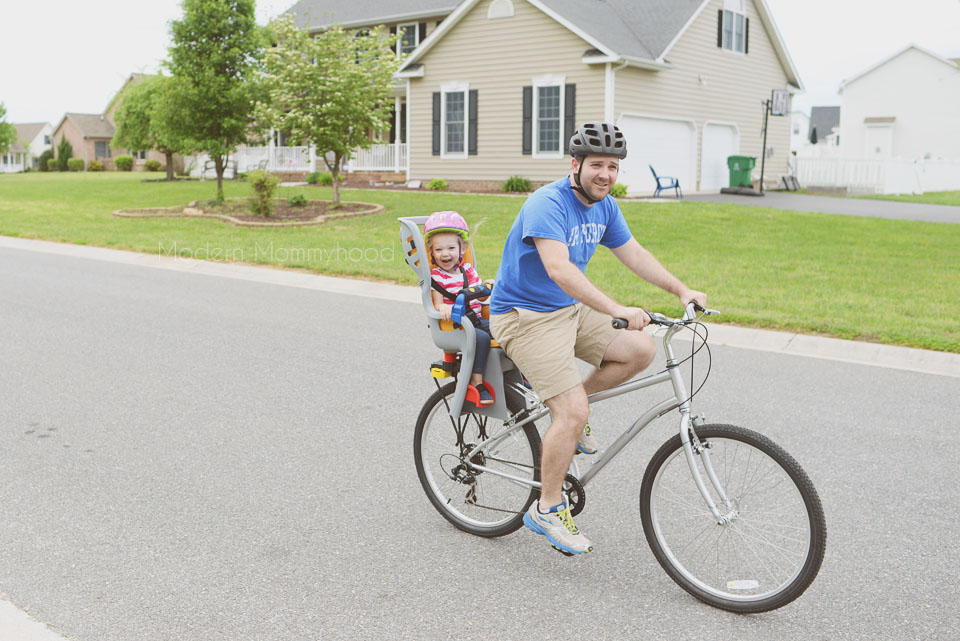
When we’re not away from the house, we enjoy our time outside! Mabel actually got her first ride on big bike with her father the other day. And every time they rode by she would let out little squeals of happiness. Best investment ever!
Then on the hot days, we’ll bust out the little kiddie pool. I am the master for blowing those things up (maybe I lie…I felt like I was about to pass out by the time I was done…yikes!). But Mabel absolutely loves the water so it’s all worth it!

And I had a Capri Sun on hand for her. “Juuuiiicccceeee”!

But if you’re a super busy momma like me, you might need an extra bag to help carry all the summer essentials around, right?
Well, you’re in luck because I’m about to show you how to make a small tote with recycled Capri Sun juice drink pouches!
I remember in middle school seeing a girl who had a Capri Sun lunch bag that she said her mother made for her…and to this day I never forgot about it. I was reminded about it the the other week when I stumbled upon a bunch of people on Etsy selling them. Soooo, I figured why not try to make one myself?!
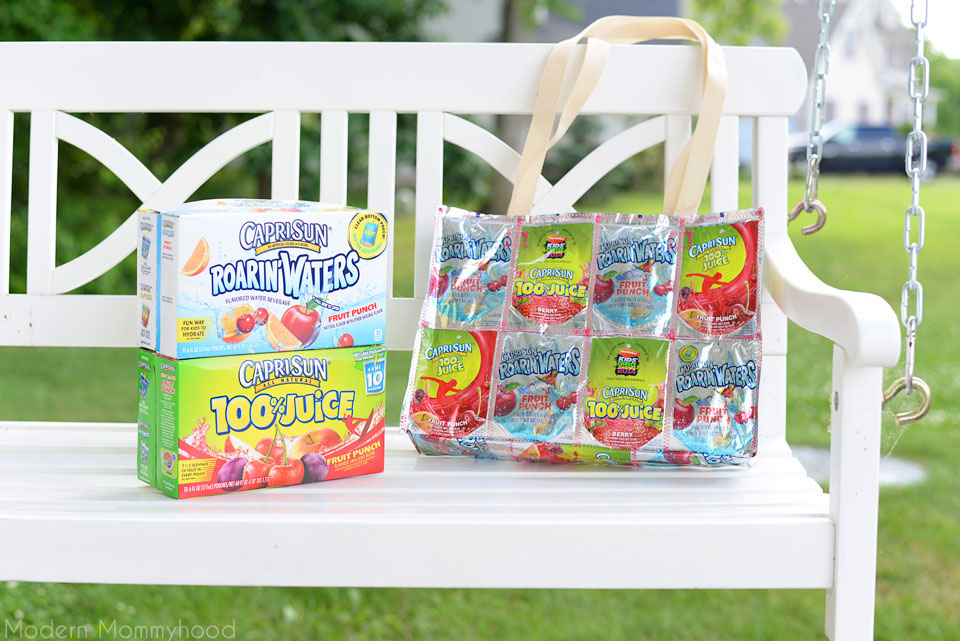
Capri Sun Juice Drink Pouch Tote
What you need:
- 23 Emptied and Cleaned Pouches of Capri Sun
- 62 inches on nylon webbing in any color
- a pair of scissors
- sewing machine
- thread (any color you like)
Directions:
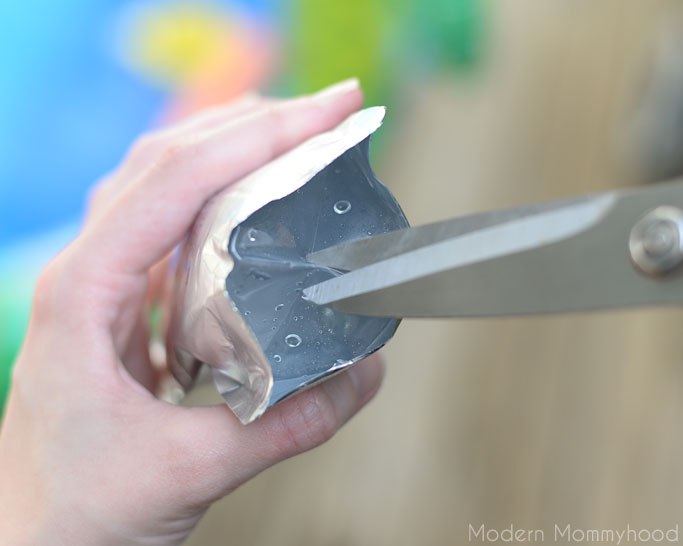
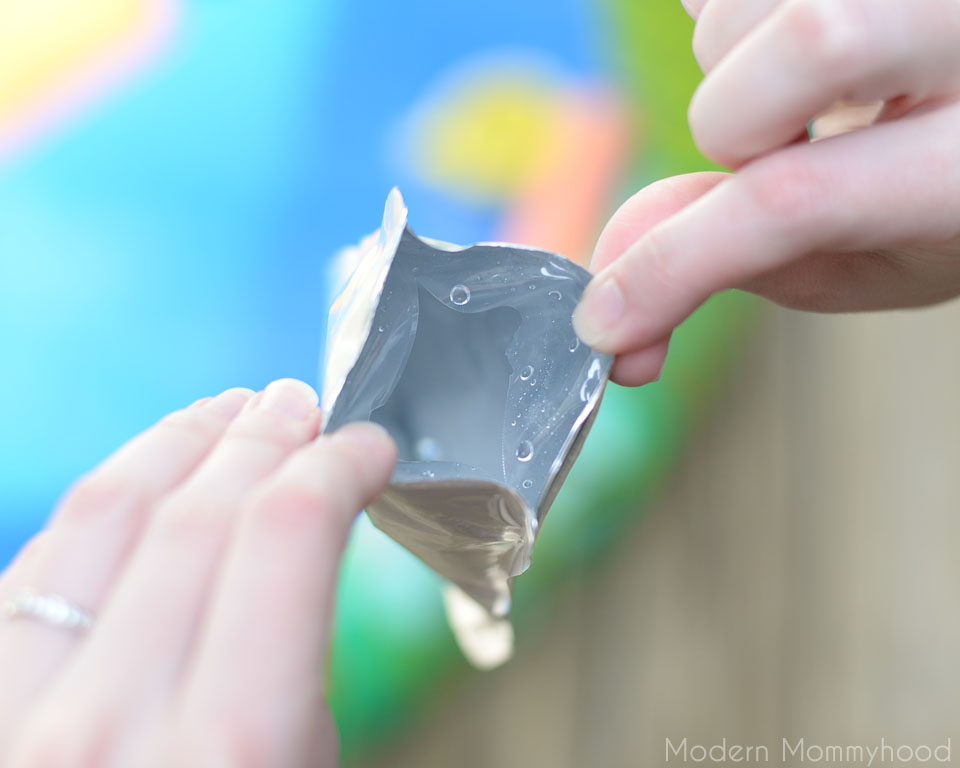
1. Empty and clean your juice drink pouches. You’ll probably have to save up the pouches over time unless you plan on having a party for kids! Pinch the bottoms of the pouch, and clip it with your scissors. You’ll then be able to cut the whole wider. Rinse/wash the pouch with water and let them air dry.
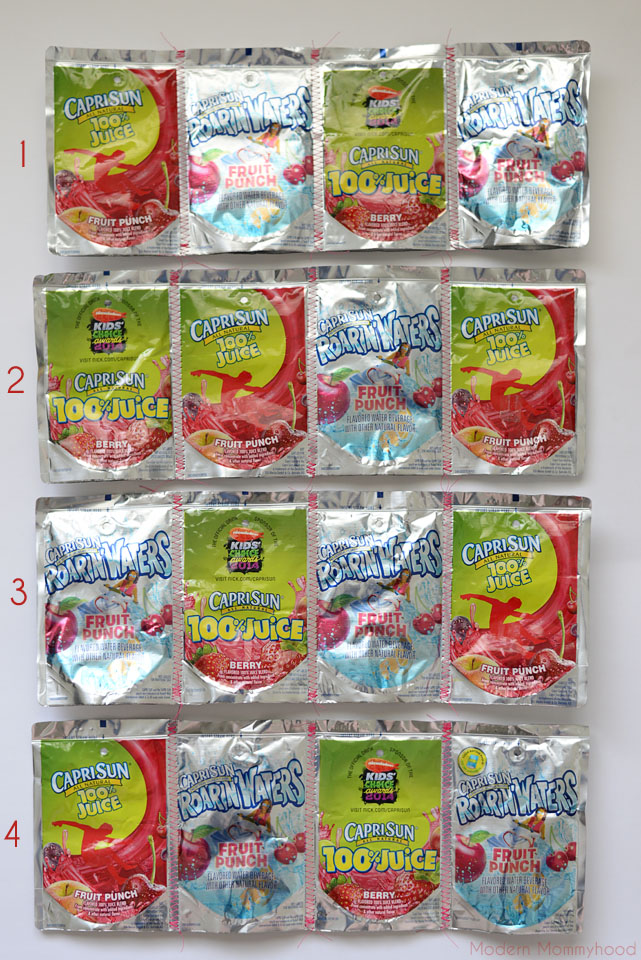
2. Now it’s time to sew! I used a zig-zag stitch because it’s a sturdier stitch for a bag like this made out of pouches (a straight stitch might look prettier but it’s weaker on paper/thinner plastic!). Overlap the side edges of the pouch (I just eyed it and used the visible edge of the pouches as my guide) and zig-zag from top to bottom. MAKE SURE TO BACK STITCH AT BOTH ENDS TO PREVENT THE STITCHES FROM COMING OUT! Do this until you have 4 pouches sewn together (see photos below).
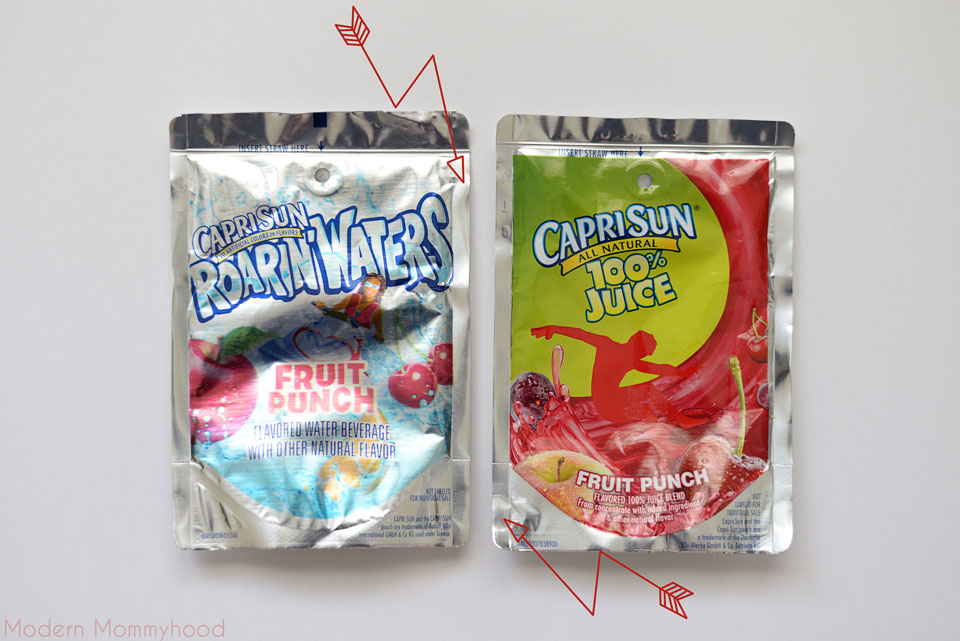
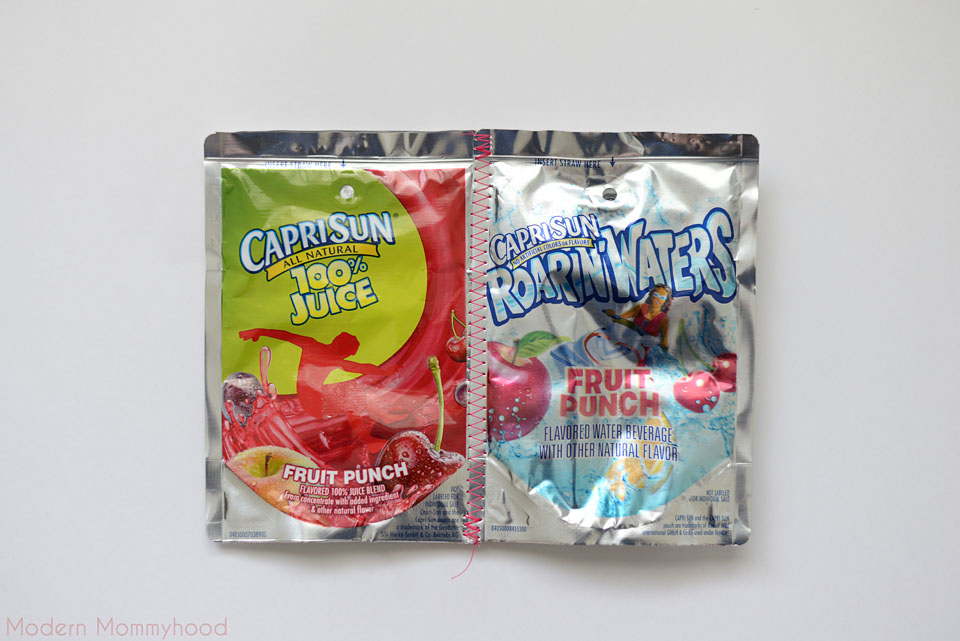
3. Make 4 strips of 4 pouches.
4. Sew a top zig-zag seam onto two of those strips.
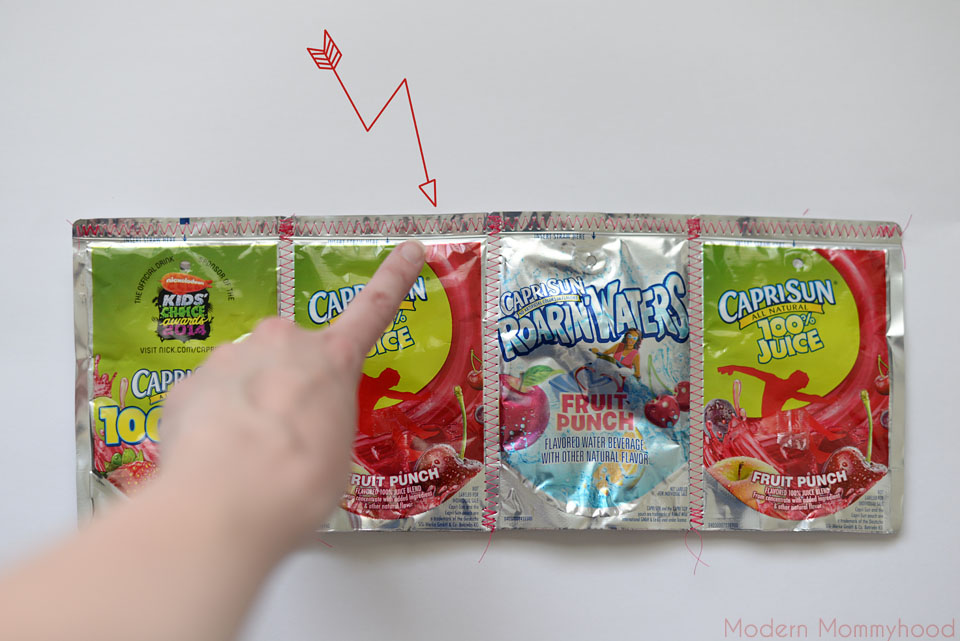
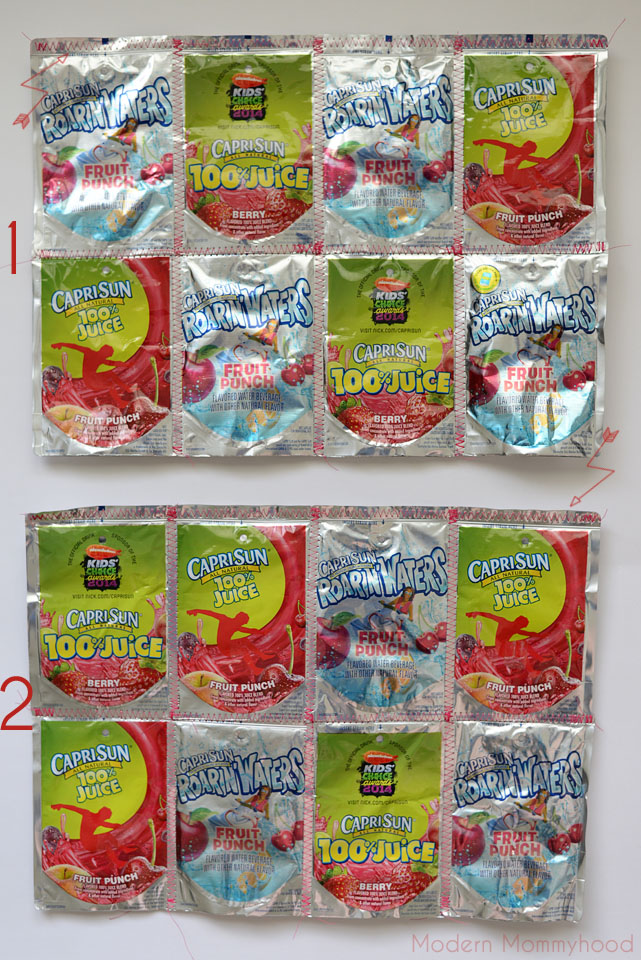
5. Now, take one of the strips with the top seam and sew one of the other strips below it (you’ll see a little top edge of the pouch that you can use as a guide). Repeat with the other strips. These make the bigger sides of your bag.
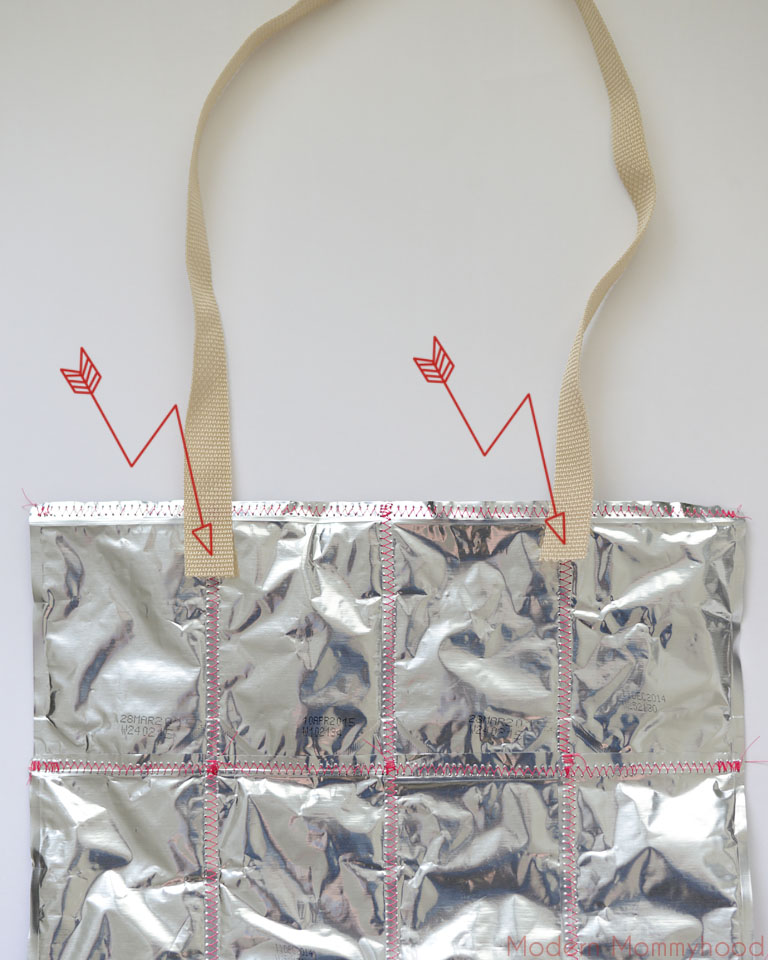
6. It’s time to sew on the handles (I originally didn’t do this step until the end of my bag…big mistake!) So get your nylon webbing and cut two strips, 31 inches each. Then you’re going to place the nylon edges by the two seams (shown below) about an inch and a half from the top and sew a square. Mine didn’t look so pretty but it’s okay, you won’t notice when the bag is done.
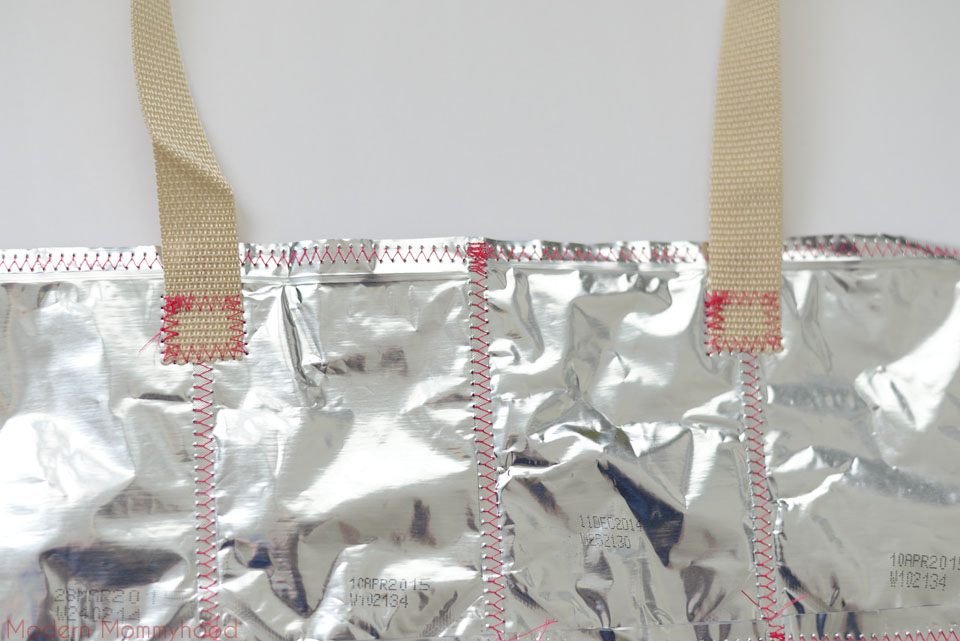
7. To make the bottom of the bag, overlap 3 pouches, but this time overlap the tops/bottoms of the pouches. Sew three together (see photo below).
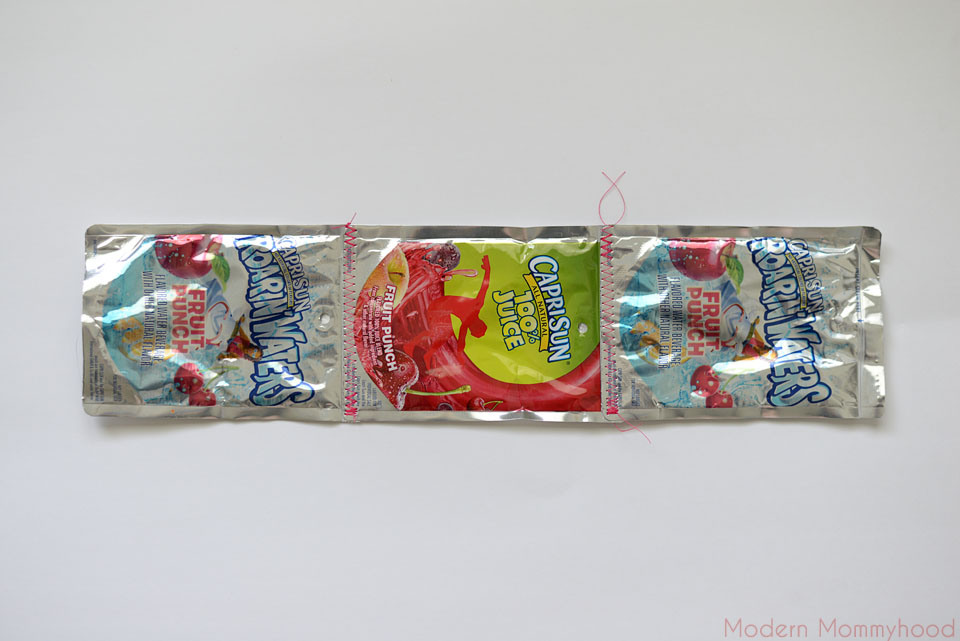
8. Now let’s sew the big sides of your bag onto the bottom. You’re going to lay both of the printed sides of the pouches together. This pic is upside down because this is how I found it easier to lay out the bag before sewing it. You’ll see how the bottom overhangs the side…and that’s okay! Make the overhanging bits equal on each side (the arrows illustrate). Then sew.
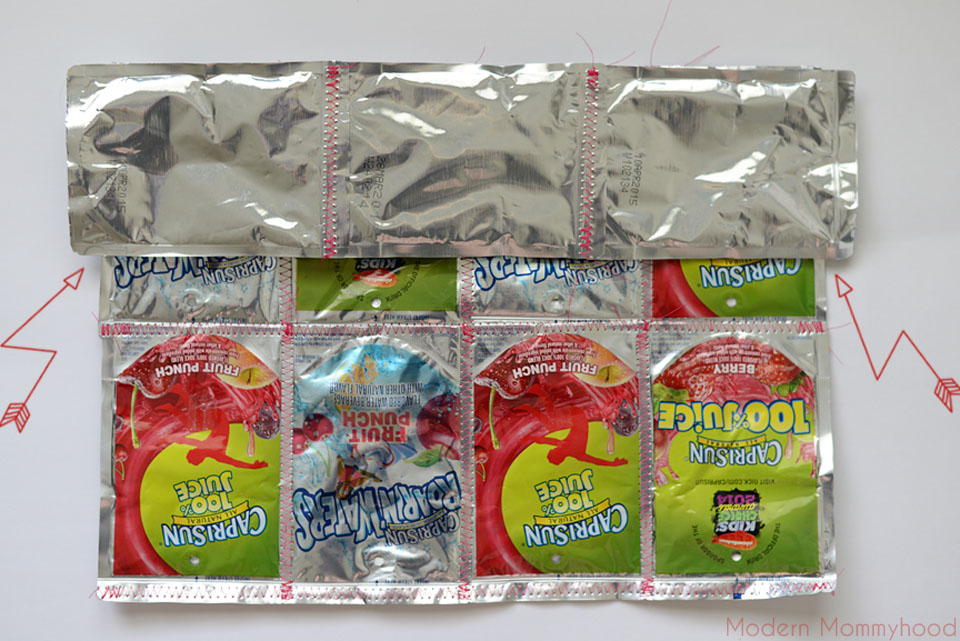
This is the pic flipped the correct way after the seam was sewn.
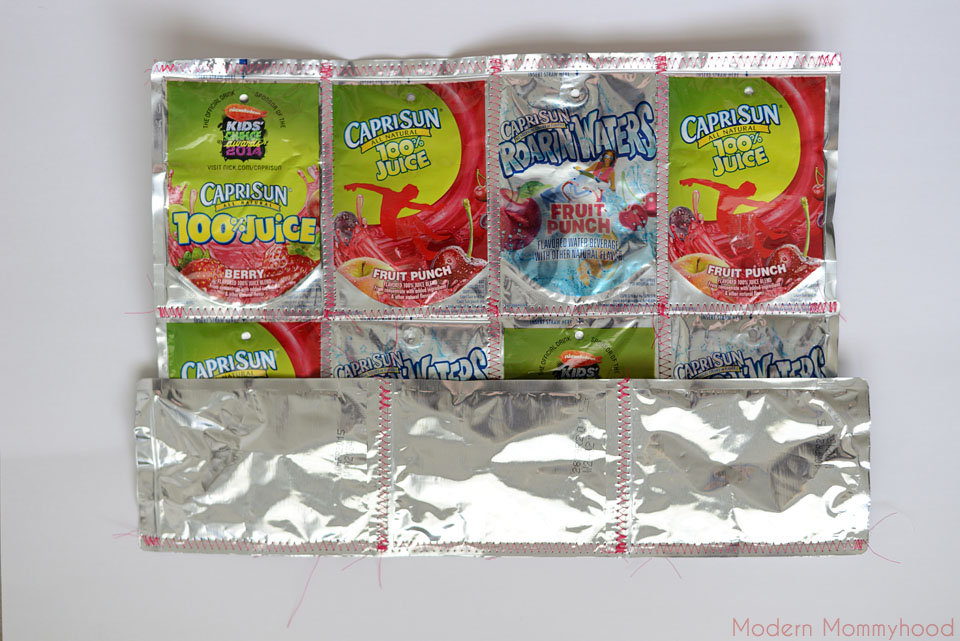
Repeat this with the other large side and this is what your bag should look like when you’re done:
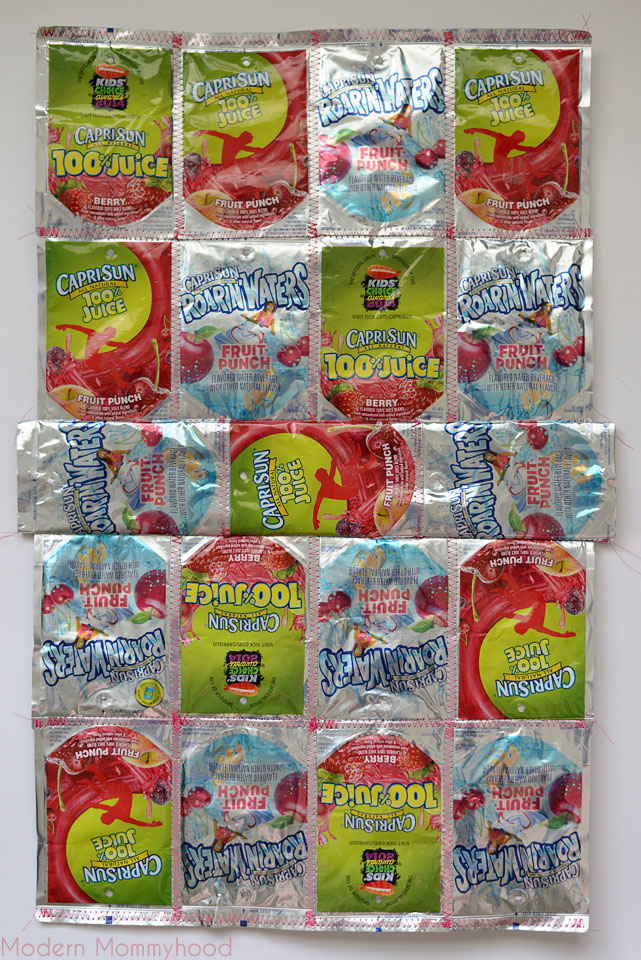
9. To make the thin sides, overlap and sew two pouches together. Also, sew the top edge like you did with the larger pieces. Make two of these (see photo below).
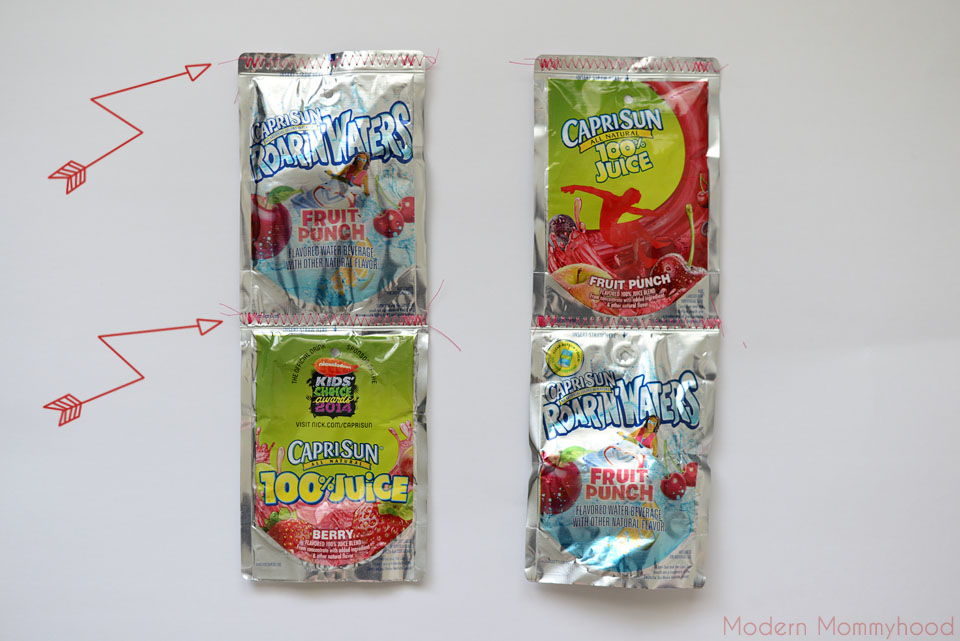
10. To attach the sides, lay the bottom edge of the thinner sides of the bag so that they are equal to the other sides. Ugh, that probably sounds confusing so see the photo below! The bottom of the bag will stick out, but that’s okay.
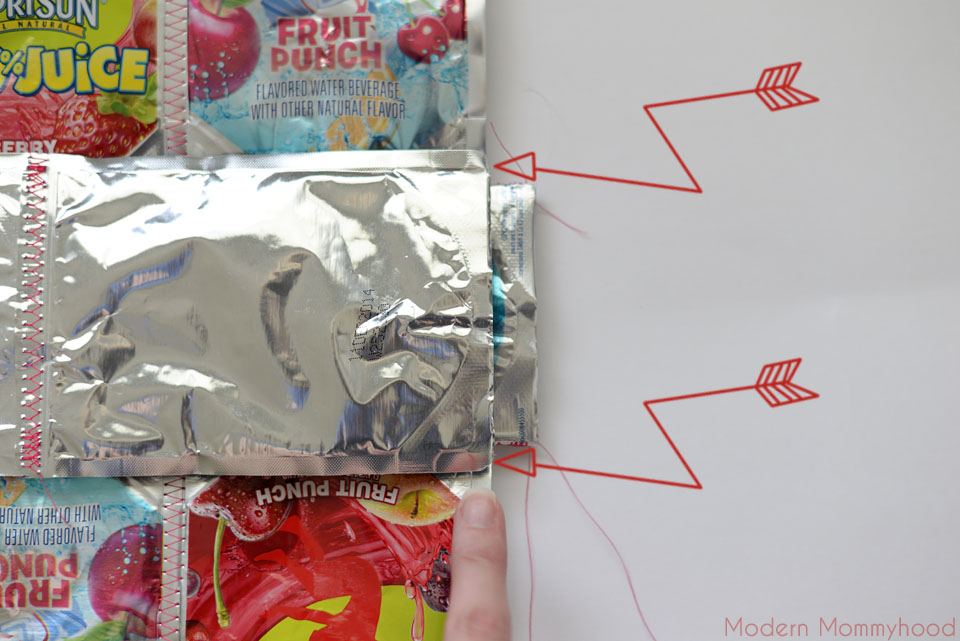
Sew the seam ONLY where you see the bottom of the bag sticking out (once again, look at the photo below with the arrows of where to start and stop!).
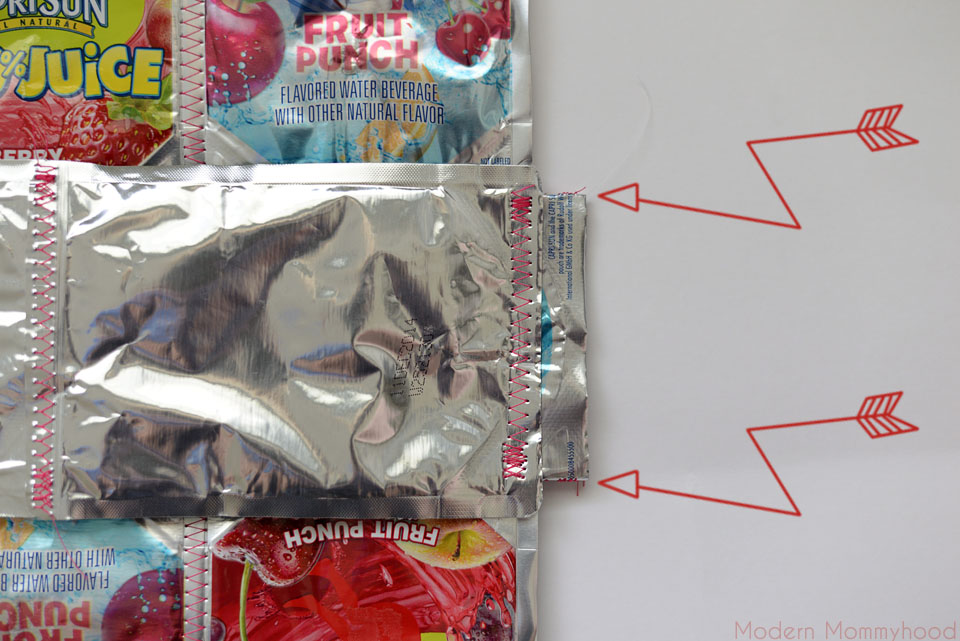
11. Okay, now you have to cut out the corners of the pouches you just sewed to the bottom. Just a tiny snip by the stitches. This will allow you to be able to fold and sew the final edges of the bag. Do this on all four corners at the BOTTOM of thin sides.
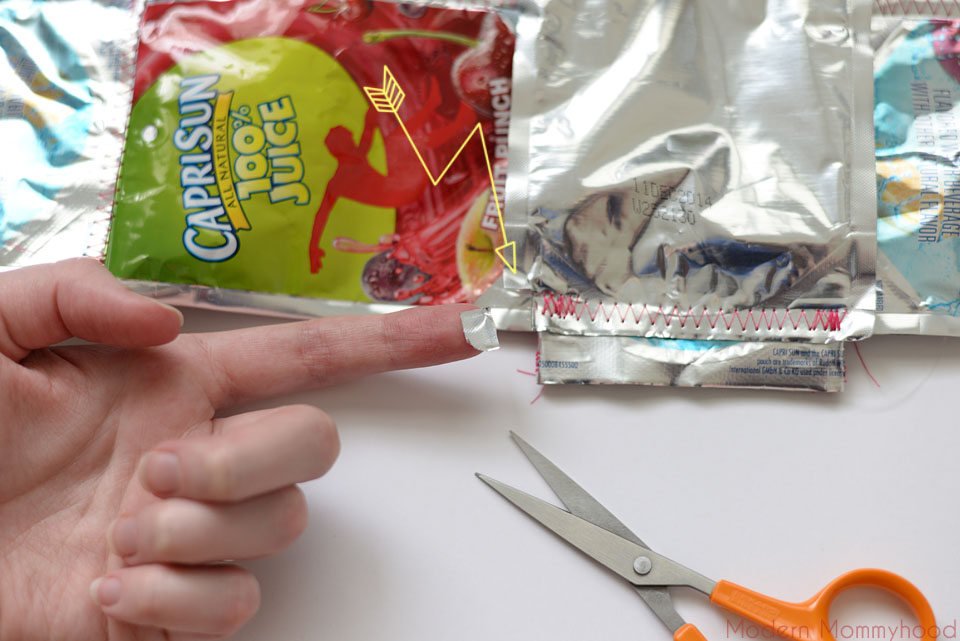
12. One last cut…put a little straight cut into the pouch right below the corners you just cut (see pic below). Do this to all four sides.
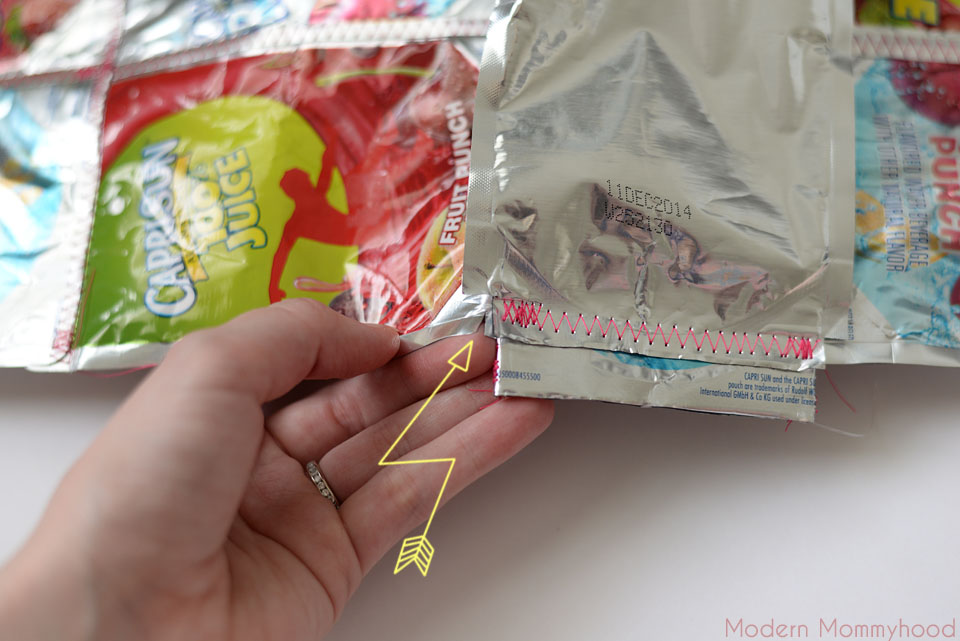
13. This is what your bag should look like right now (yours should have handles too, lol!):
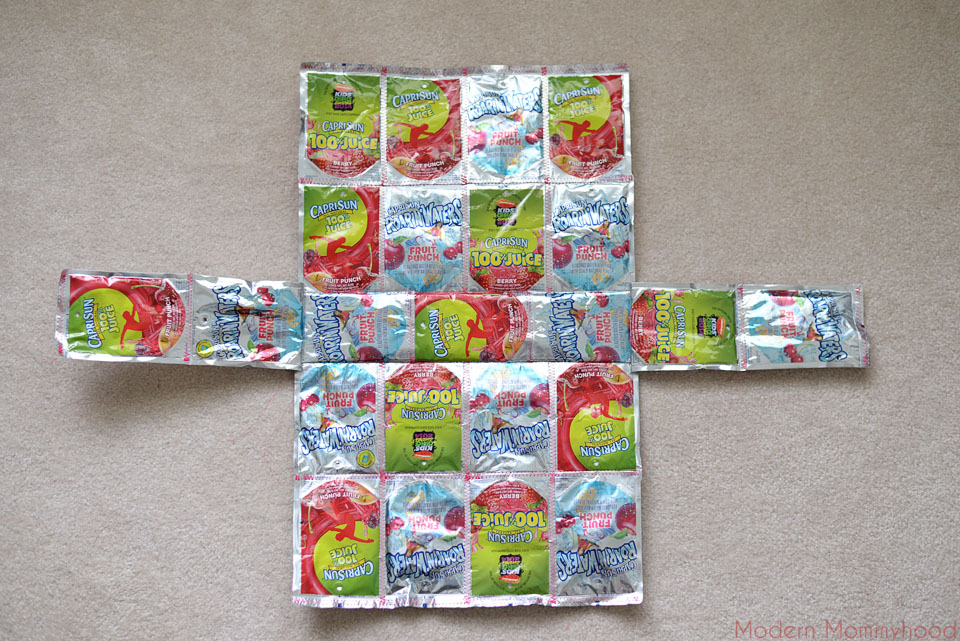
14. Last step! Time to sew the sides together! Basically, you’re going to fold the bag together. 🙂 Pinch the seams together like this:
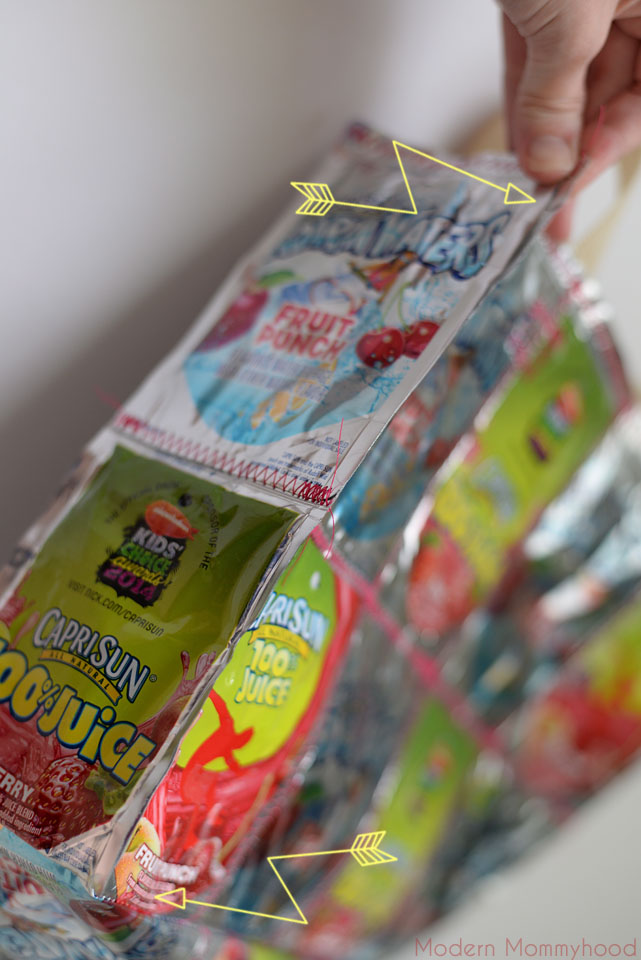
And you’re going to lineup the top seams and start sewing there. Sew down to the bottom of the bag (don’t forget to back stitch). I’m not going to lie, this was probably the most difficult step since you have to hold the seams together while sewing and when I got to the bottom corners, I had to smash them under the sewing machine foot. But don’t worry, you’ll be able to get it done! Do this for all four sides!
15. Snip all the leftover threads and you’re done! Enjoy your recycled juice drink pouch bag!
Do you think you’ll try making this tote? If you do, please let me know if you have any suggestions or tips to make my instructions better!

Oooooh! I want to make one!
omg! this is adorable! would make a perfect beach bag!!!!
This looks awesome! Thanks for the tutorial.
How fun!!
I remember these from when I was in school! I always wondered how they made them! So cool!
Love this idea! We are huge fans of Capri Sun!
By far, the coolest thing I have ever seen!!
This is pretty much the coolest bag ever, I LOVE it! Kind of makes me wish I had a sewing machine!