

One thing that I’ve really enjoyed when it comes to putting together nurseries for my little girls has been creating personal touches that I just can’t buy in a store. I made button letters for Mabel’s nursery and for Millie I decided to go with glitter letters.
They were super easy to make and affordable too!
*This post contains several affiliate links.
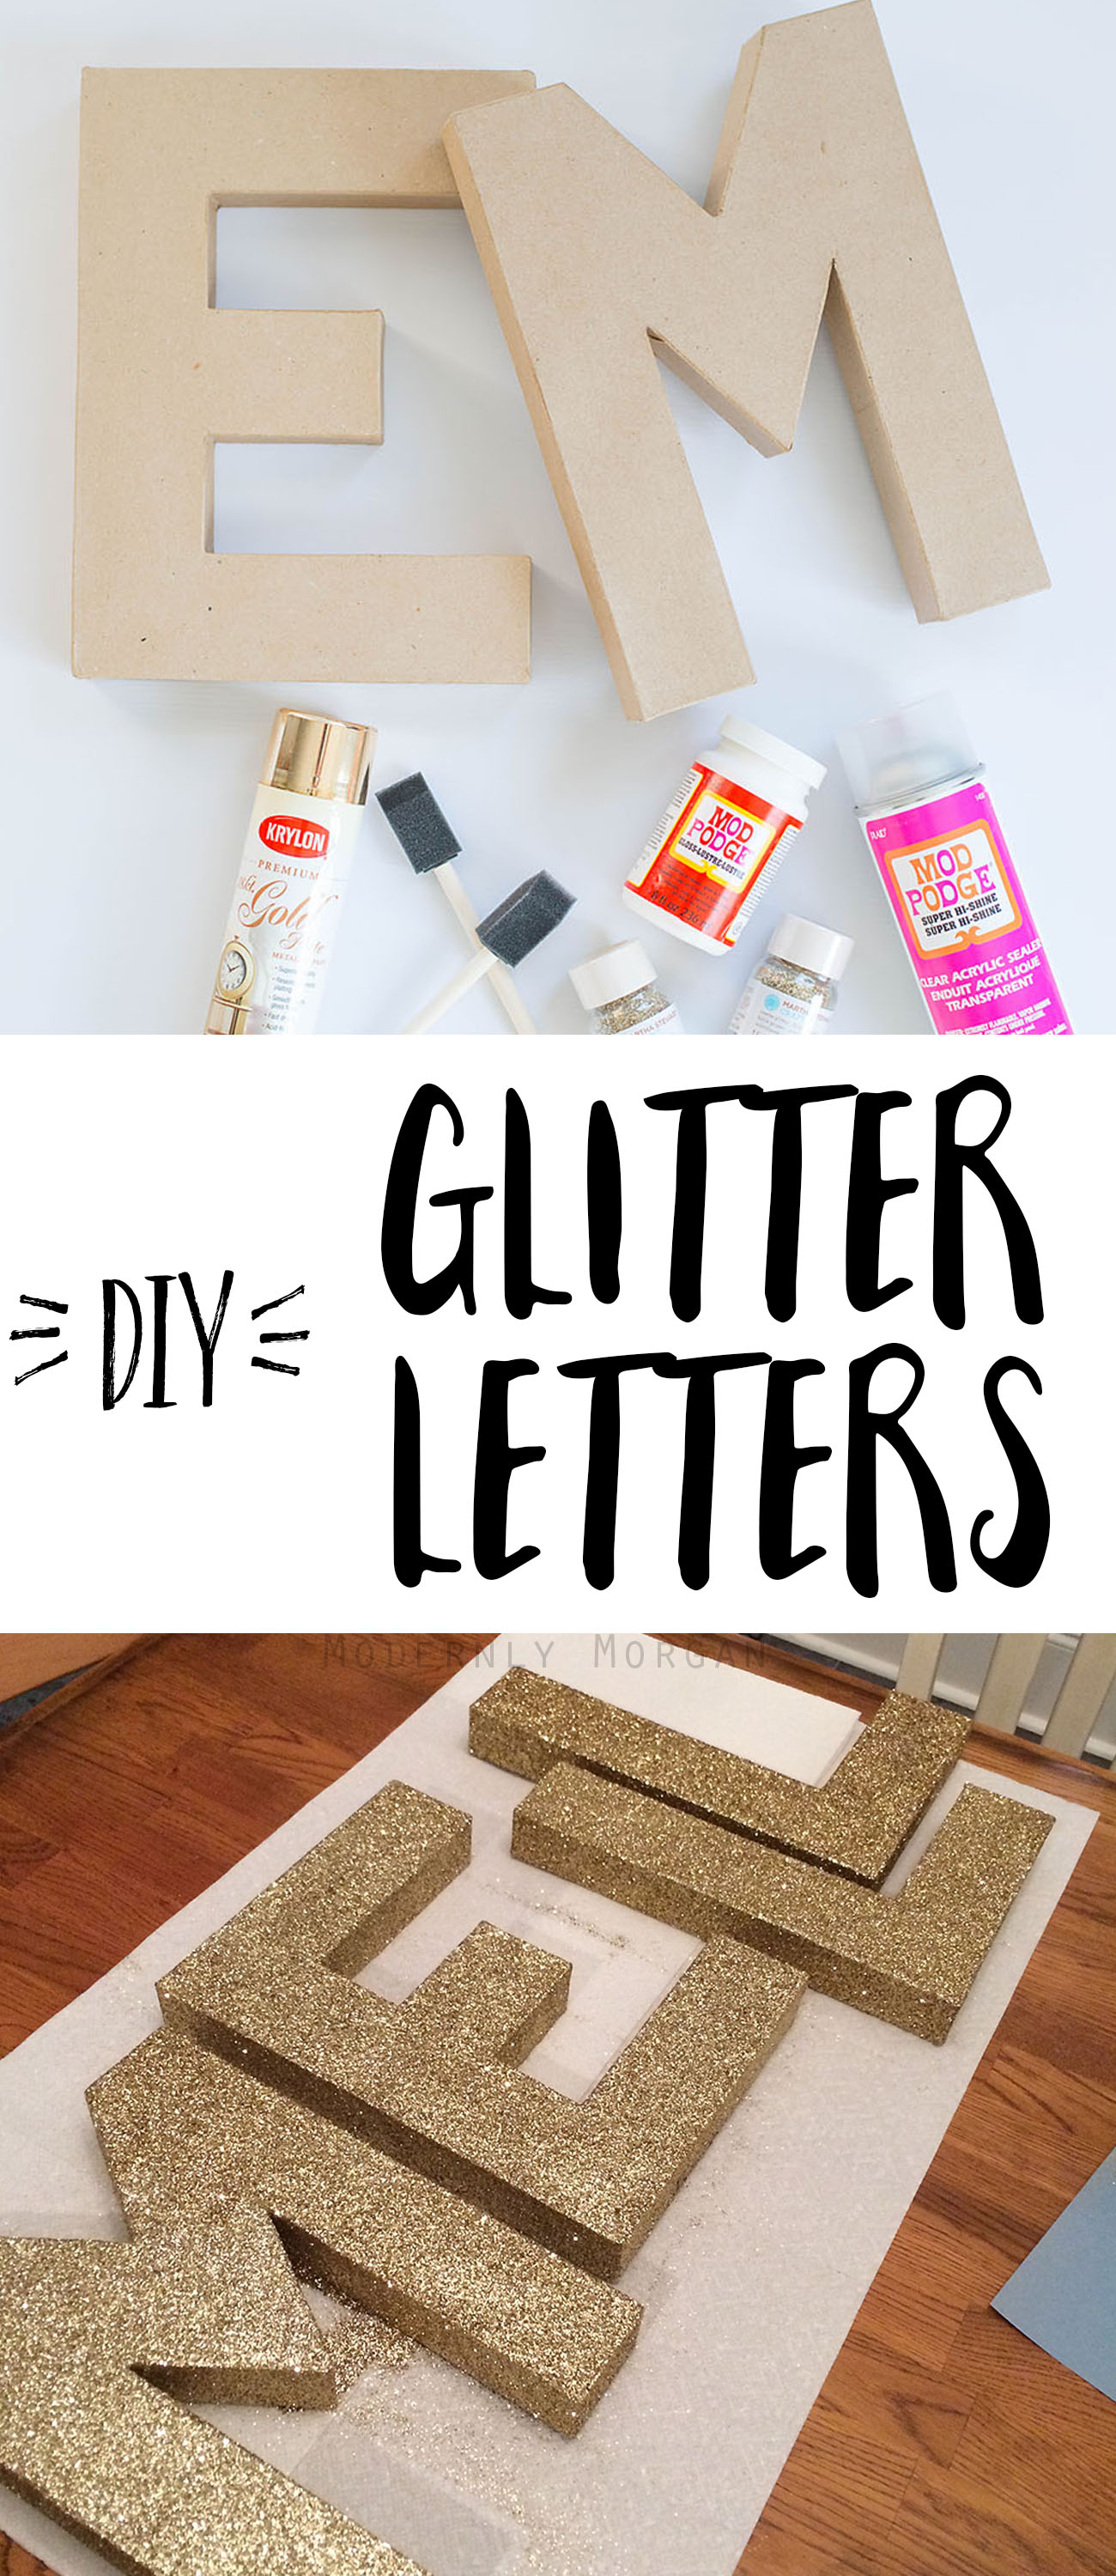
Here’s what you’ll need to make the letters:
- Paper Mache Letters (I went with the 12 inch letters/$2.97 per letter)
- Spray Paint (make sure it matches the color of glitter you are using and make sure it’s a shiny finish, not matte).
- Glitter (I used the Martha Stewart glitter and needed 4-5 bottles…this will depend on how many letters you are covering in glitter.)
- Mod Podge Gloss (1 bottle)
- Mod Podge Super High Shine Spray (1 can)
- Foam Brushes
And here is how I made Millie’s letters:
Get your paper mache letters and take them outside…trust me, you don’t want to spray paint them in your house.

And find a surface that you can spray paint them on that you don’t care about getting covered in paint (or use newspapers 😉 ).
When spraying the letters I found that it’s best to spray about 12 inches away and quickly move the can so that you don’t get drip marks on the letter from the paint.

After doing all of your letters, let them completely dry outside and if needed, go back for a second coat. Then of course let them dry again!

Now the real fun begins (AKA: you’re gonna get glitter everywhere…and I mean everywhere!)
Do one letter at a time…take your foam brush, dip it into the Mod Podge Gloss and paint a thin layer on your gold letter. Then take your glitter and cover the entire Mod Podged area…BUT make sure you’re doing this over paper so you can collect the excess glitter and reuse it for the other letters later.
*TIP = It is easier to do one side of the letter with Mod Podge, glitter it, and then Mod Podge another side of that same letter and repeat until done. I found when trying to Mod Podge an entire letter, it would start drying before I could completely cover it with glitter.*

Then let them dry overnight…you can touch up any spots you might have missed the next day. Also, the spray paint coat that you did earlier will help hide any super tiny spots you might have missed.

After they’re completely done drying…once again take the letters outside shake off any excess glitter. Then spray with a coat of the Mod Podge High Shine Spray. This will help protect from glitter fallout! DO NOT FORGET THIS STEP! I went back after they dried and put a second coat on to guarantee no extra glitter will fall off in the nursery.
And finally when they are completely dry, you can hang them up!
Here they are in the nursery…

And if you’re curious…these are what I used to attach them to the wall.
Pardon the state of the nursery in this photo…it was far from being completed (and still isn’t finished…oops!)
So there you have it! Super easy DIY glitter letters!
Have any questions? Want to share the letters you’ve made? Leave me a comment!
Pingback: 30 Gift Ideas You Can Create With Monogram Letters
i love these! about how long does it take the spray paint to dry?