
Quilt, Quilting Basics, Tutorials
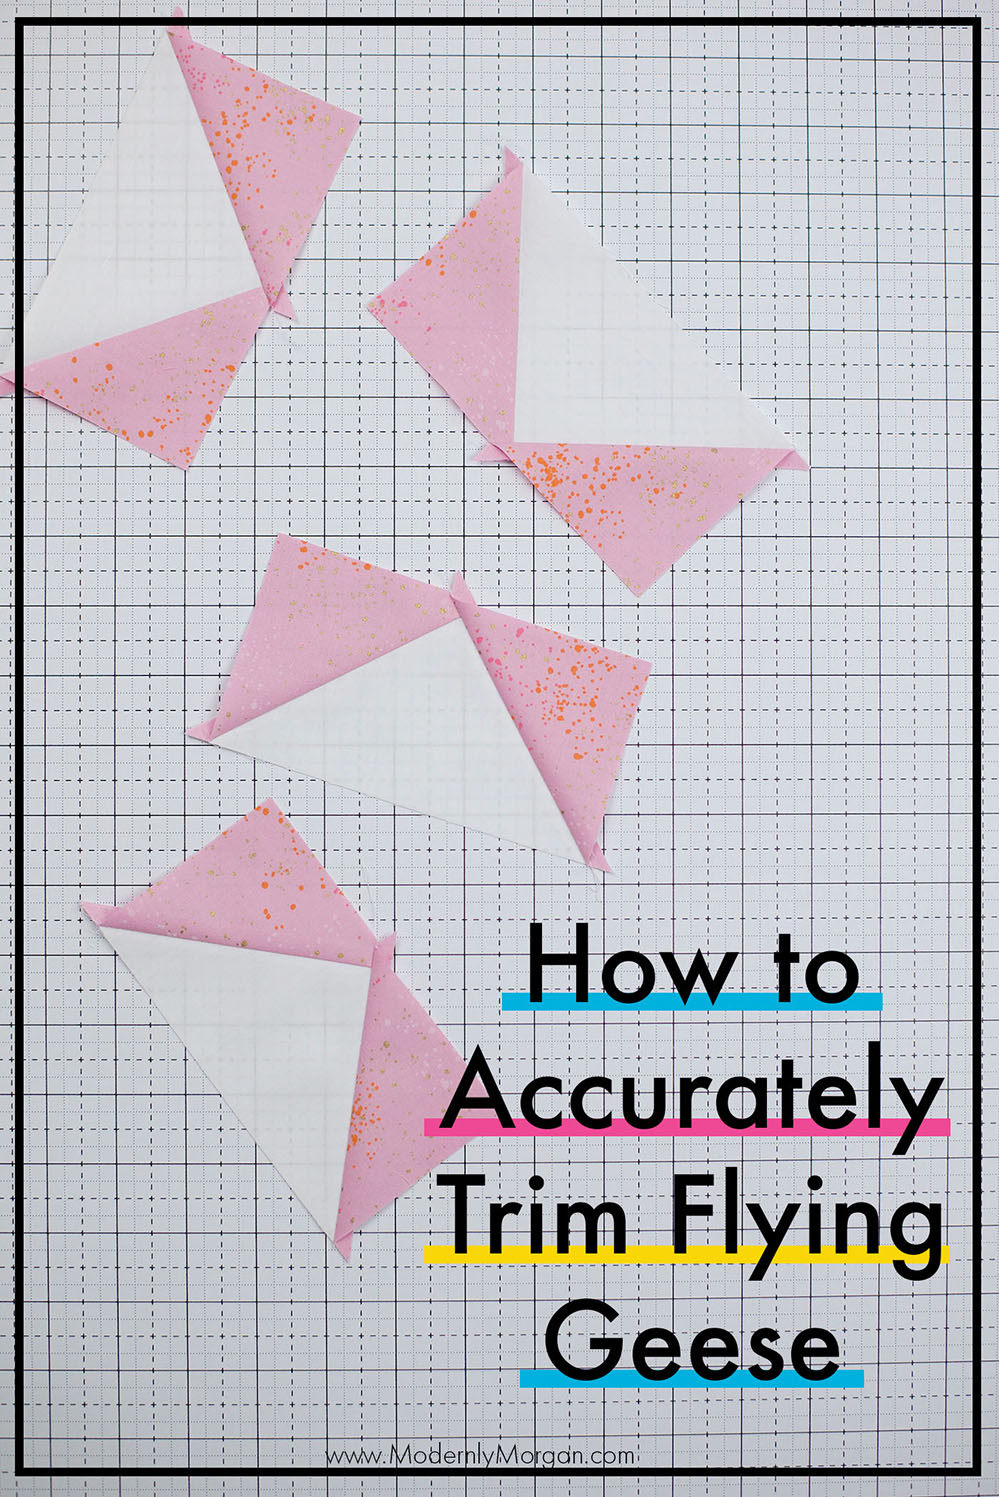
How to Trim Flying Geese
Flying geese…they are everywhere! Well, not everywhere but they are in a lot of quilt patterns and there are lots of ways to make them. In this tutorial, I’m going to show you two ways to accurately trim flying geese to the size you need! These two methods are perfect when making my Hodgepodge Quilt.

Like I said at the top of this post, there are multiple ways to trim flying geese and these two ways are the easiest for me. For trimming oversized flying geese, I recommend that you get one of the two rulers shown below:
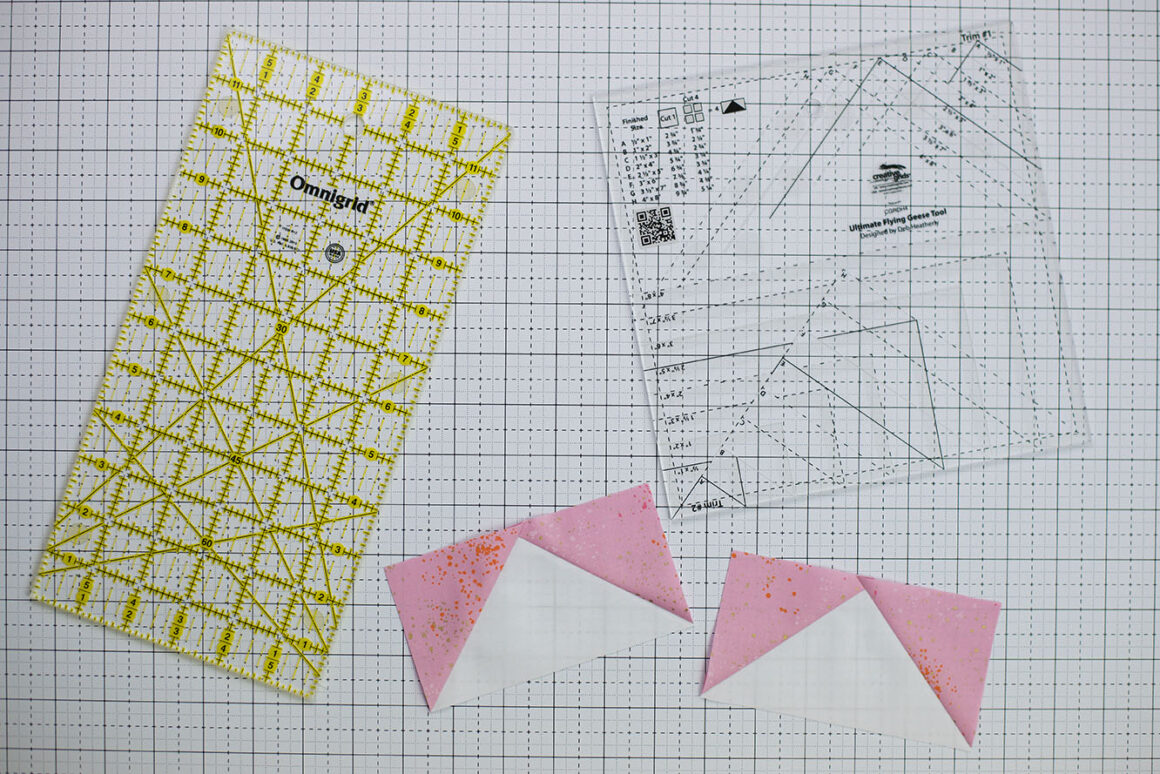
To the left is a basic Omnigrid ruler…I like this one because it’s affordable and easy to read. Any ruler will do as long as it’s got grid markings every 1/4″. To the right is a flying geese ruler and is what I’m partial to. I absolutely love it (yes, it’s what I call a splurge but it’s worth the investment if you make a lot of quilts with flying geese). I’ll get to why it’s my favorite a little further down in this post.
Let’s start off with an untrimmed flying geese block:
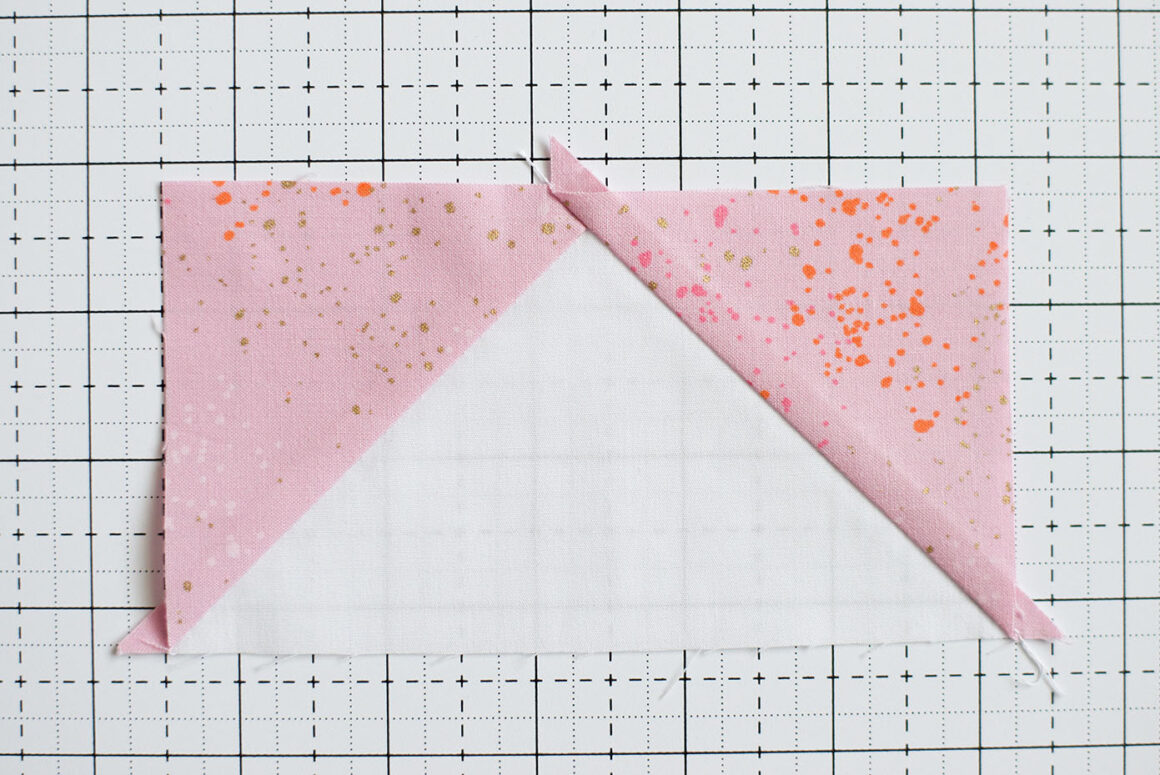
You can see that it’s pretty wonky and a trimming will easily make it perfect!
One very important thing that I want you to keep in mind is that you ALWAYS need to make sure you have 1/4″ above the point to guarantee pointy points and accuracy! The photo below shows what I’m talking about and the little purple marker is 1/4″:
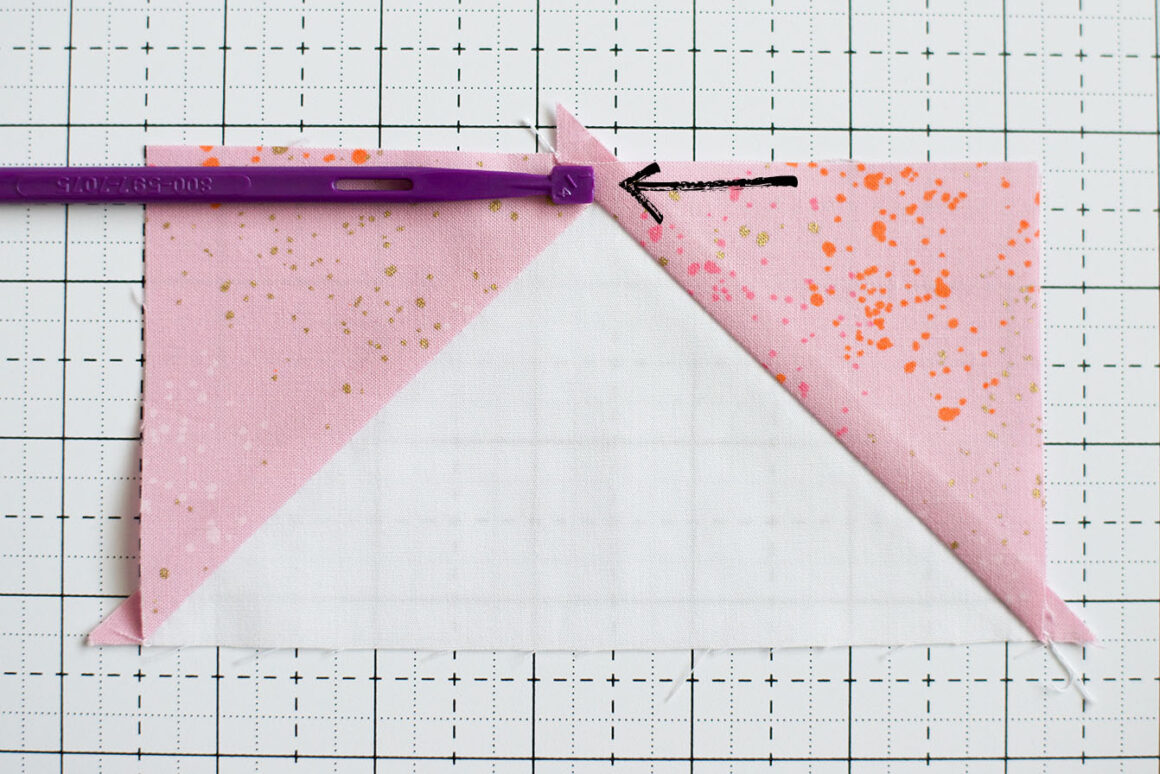
Anything less than 1/4″ above the point is going to result is losing your points when sewing in your blocks. Just be mindful of this!
ALSO…no matter which method you use, I always recommend testing it first on some scraps before cutting/trimming your blocks! It’s a pretty horrible feeling to cut all your blocks the wrong size…trust me, I’ve been there!
Basic Ruler Trimming Method:
Like I said earlier, any quilting ruler with grid markings every 1/4″ will do and this Omnigrid ruler makes it really easy to see where you need to cut. It’s also a great size so you’ll be able to use it for a lot of cutting, not just for flying geese.
With this method you have to de a little math…but don’t worry, it’s not too hard! First, you need to figure out where the middle of your block should be. Take the size flying geese width that you’re trying to get and divide it in half (make sure you’re using the actual block size and not the ‘sewn in/finished’ size). EXAMPLE: my block in this tutorial needs to be trimmed to 3″ x 5.5″ (keep in mind that the sewn in/finished size will be 2.5″ x 5″ because you lose 1/2″ total from the sides once it’s ‘sewn in’ 😉), so I’ll take the width of 5.5 and divide it by 2. That gives me 2.75 or 2 3/4.
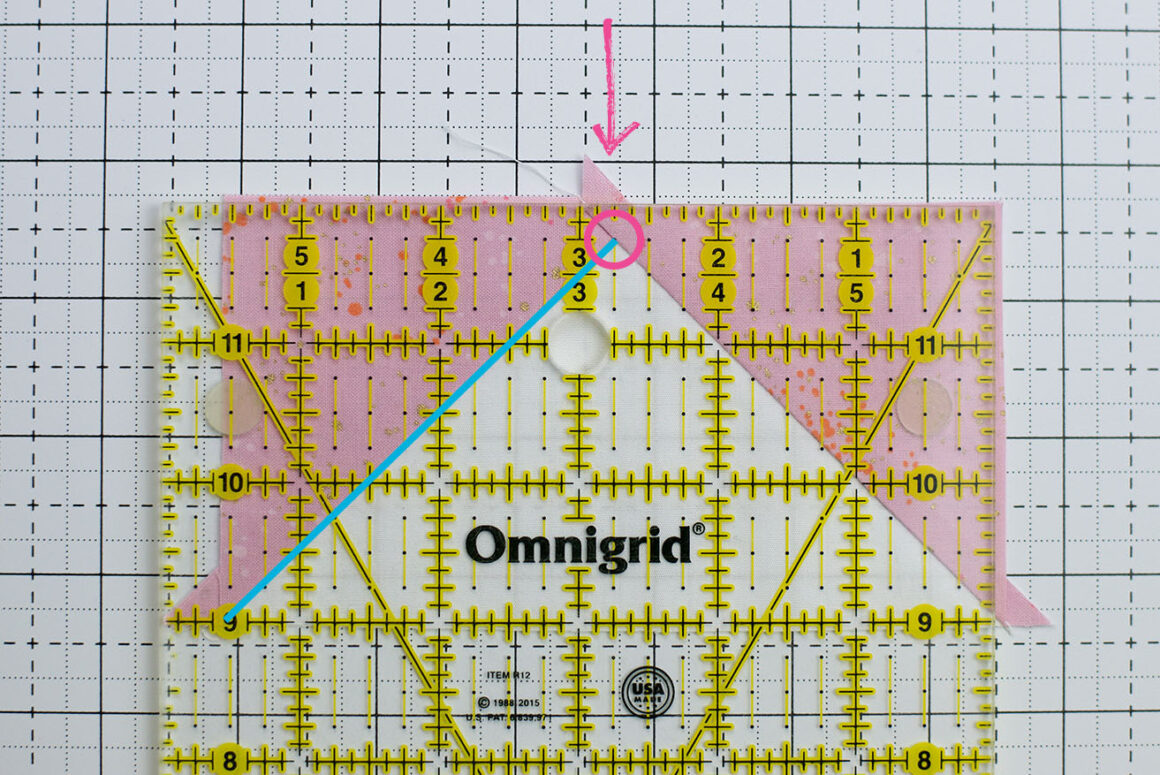
Once you’ve figured out the middle point for your flying geese, you are going to put the point of your flying geese 1/4″ below the top edge of the ruler (this is circled in pink)…you do this because you need that 1/4″ for your seam allowance as I mentioned earlier. For this example, the center point is on 2.75. ALSO, you will line up the inside flying geese angles along the dots shown in a 45 degree angle (I illustrated this with the blue line on one side but left the other side blank so you can see the dots and how they line up). Some rulers have these angles marked but I want to show how to do it if you’re ruler doesn’t.
Once everything is lined up, trim off fabric that overhangs past the edge of the ruler to the top and right sides.
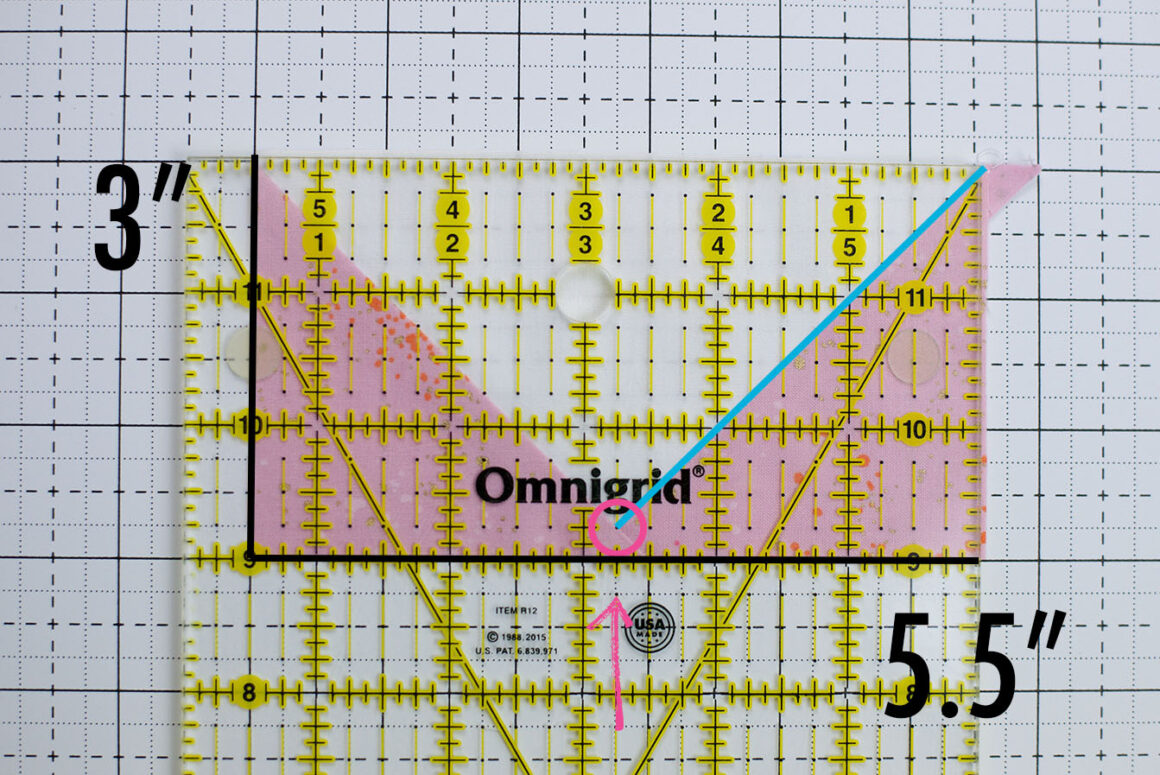
Now the remaining two sides need to be trimmed so flip your block so that the point is now facing downward. We already know where the center should be (2.75″) BUT this time we need to consider the height of the flying geese we are trying to get. Since the example is 3″ x 5.5″, I’m going to line up the edges we just trimmed along the 3″ and 5.5″ marks (shown below with the black lines). Make sure your flying geese point is still on the 2.75″ mark and is 1/4″ above the edge of the geese (seam allowance)…this is illustrated with the pink circle and arrow. The last step is making sure your inside flying geese angles line up with the dots (45 degree angle) and I’ve illustrated this with the blue line on one side and left it off the other side so you can see.
Once everything is lined up, trim off the fabric that overhangs past the top and right side of the ruler. Now you have a perfectly trimmed flying geese!
And here is a quick rundown on middle points for common flying geese sizes:
2″ x 3.5″ – middle is 1.75″
2.5″ x 4.5″ – middle is 2.25″
3″ x 5.5″ – middle is 2.75″
3.5″ x 6.5″ – middle is 3.25″
And on and on! Remember, just divide the width by 2!
Flying Geese Ruler Method
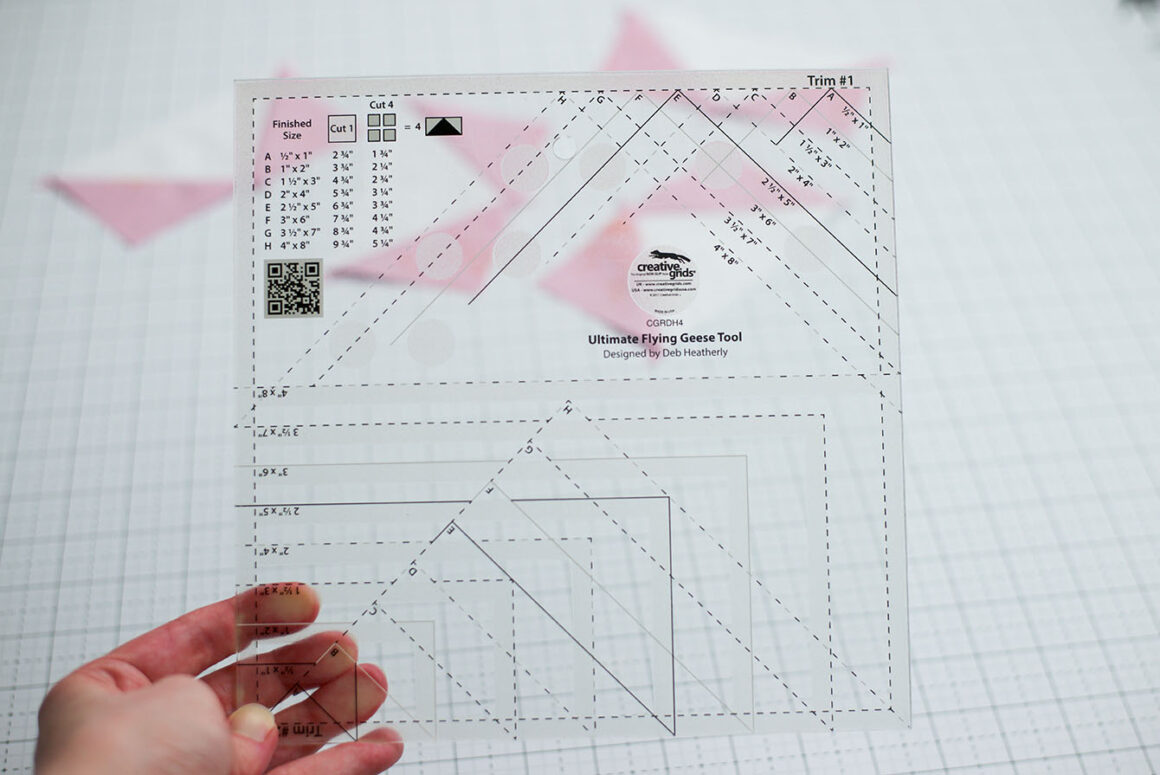
Now if you’re wanting something a little faster…hands down, I will always grab my Flying Geese ruler! It’s quick and has multiple sizes so even though it is a little pricier, you’ll be able to trim flying geese from 1/2″ x 1″ all the way to 4″ x 8″!
Creative Grids will forever and always be one of my favorite brands. I’ve talked about them in multiple tutorials (how to make half square triangles and how to square up HSTs) and I just can’t say enough good things about them. The really great thing about all of their rulers is that they have a grippy texture on the bottom of them so the ruler will never slip as you’re cutting your fabric, therefore you’ll get a more accurate cut.
Let me show you how I use it…
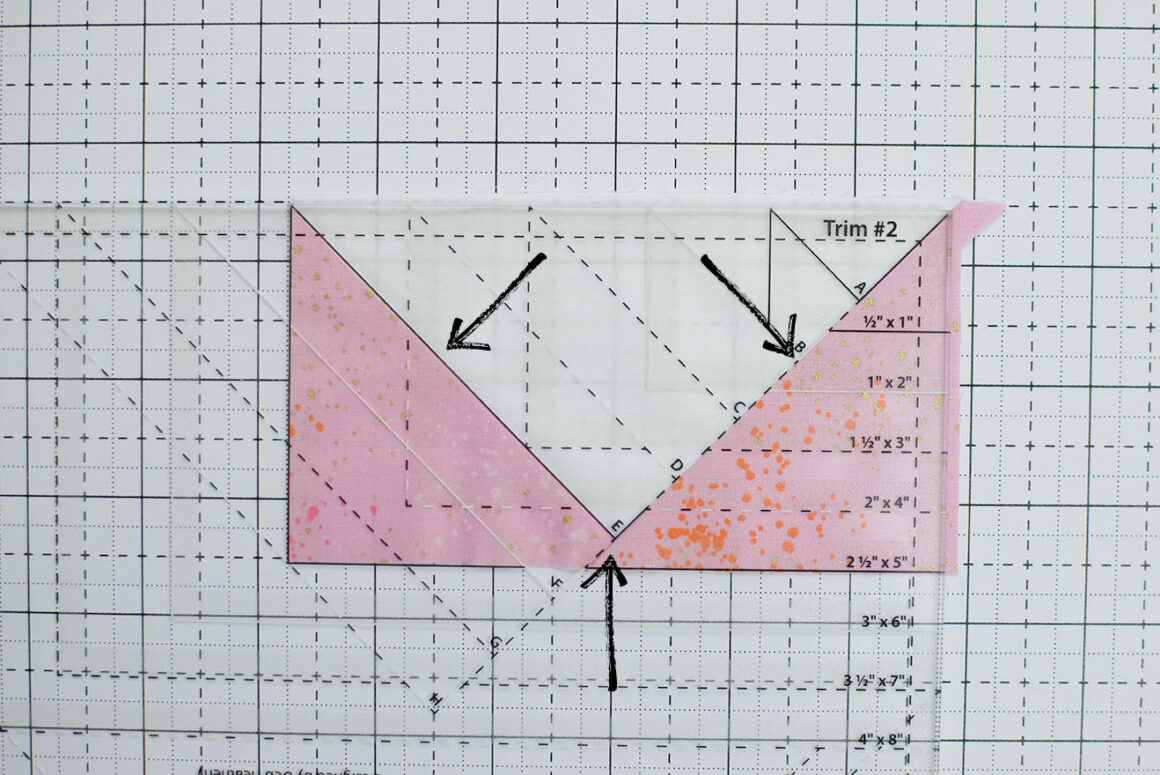
*Just a heads up…the ruler is marked with ‘sewn in/finished’ sizes so they’ve already factored in seam allowances for you. For example, if you’re told to trim to 2″ x 3.5″…you’ll see that it’s not on the ruler. That’s because the ‘sewn in/finished’ size of that flying geese would be 1.5″ x 3″ (due to subtracting the seam allowance)…so you would use that marking on the ruler.*
The first thing you need to do is turn the ruler to the Trim #1 side and find the letter that corresponds to the ‘finished’ size flying geese needed. EXAMPLE: I’m making a ‘finished’ size 2.5″ x 5″ (3″ x 5.5″ unfinished) flying geese so I make sure the point of my ‘goose’ is where the letter E is. Then you just have to make sure that the point and the angles match up with the block (arrows illustrate this). Trim the top and the right side that overhangs past the edge of the ruler with a rotary cutter.
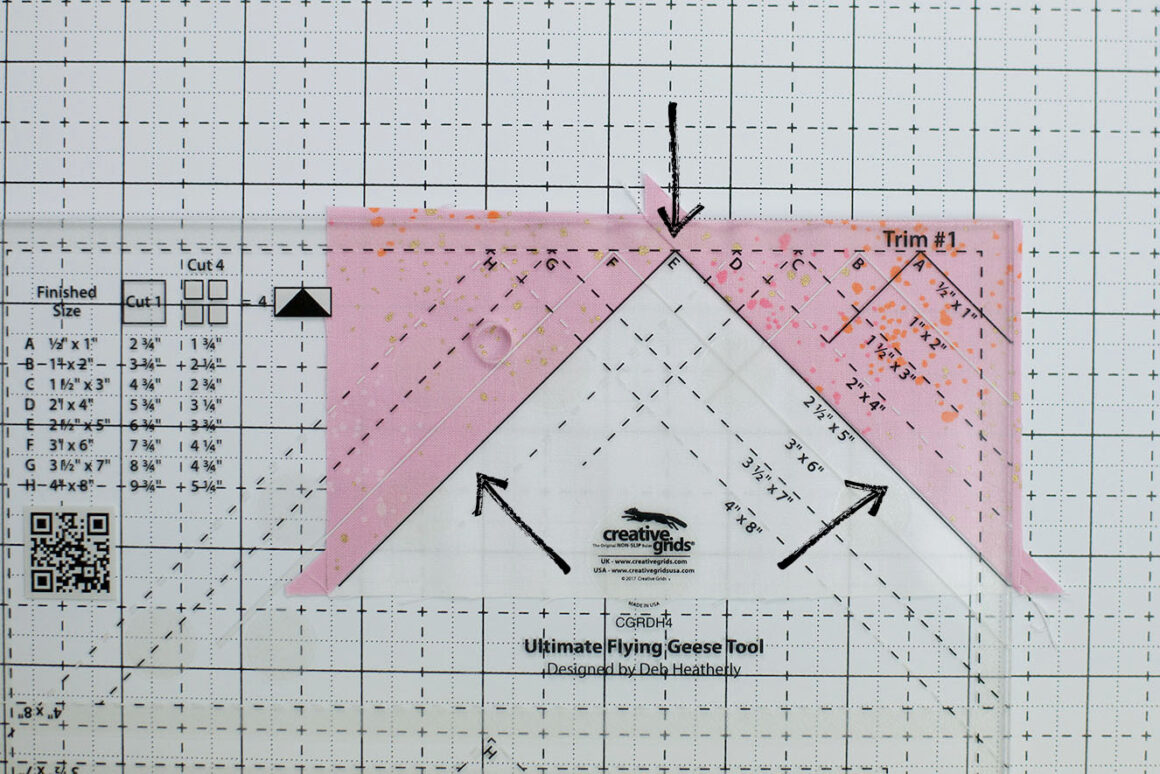
Now, flip the flying geese block so that the point aims downward. Using the Trim #2 side, do pretty much the same thing that you did with the first step, making sure the point and inside triangle angles are aligned. Then trim the top and right side edges that overhang past the edge of the ruler. Ta-da! Perfect flying geese!
Have any questions? I’m more than happy to help if you leave a comment below!