Quilt, Quilt Blocks, Quilting Basics, Tutorials
How to Make Half Square Triangles (HST) – Tutorial
Whether you’re new to quilting or just brushing up on the basics, this Half Square Triangle tutorial is quick and to the point with photographs to guide you along the way!

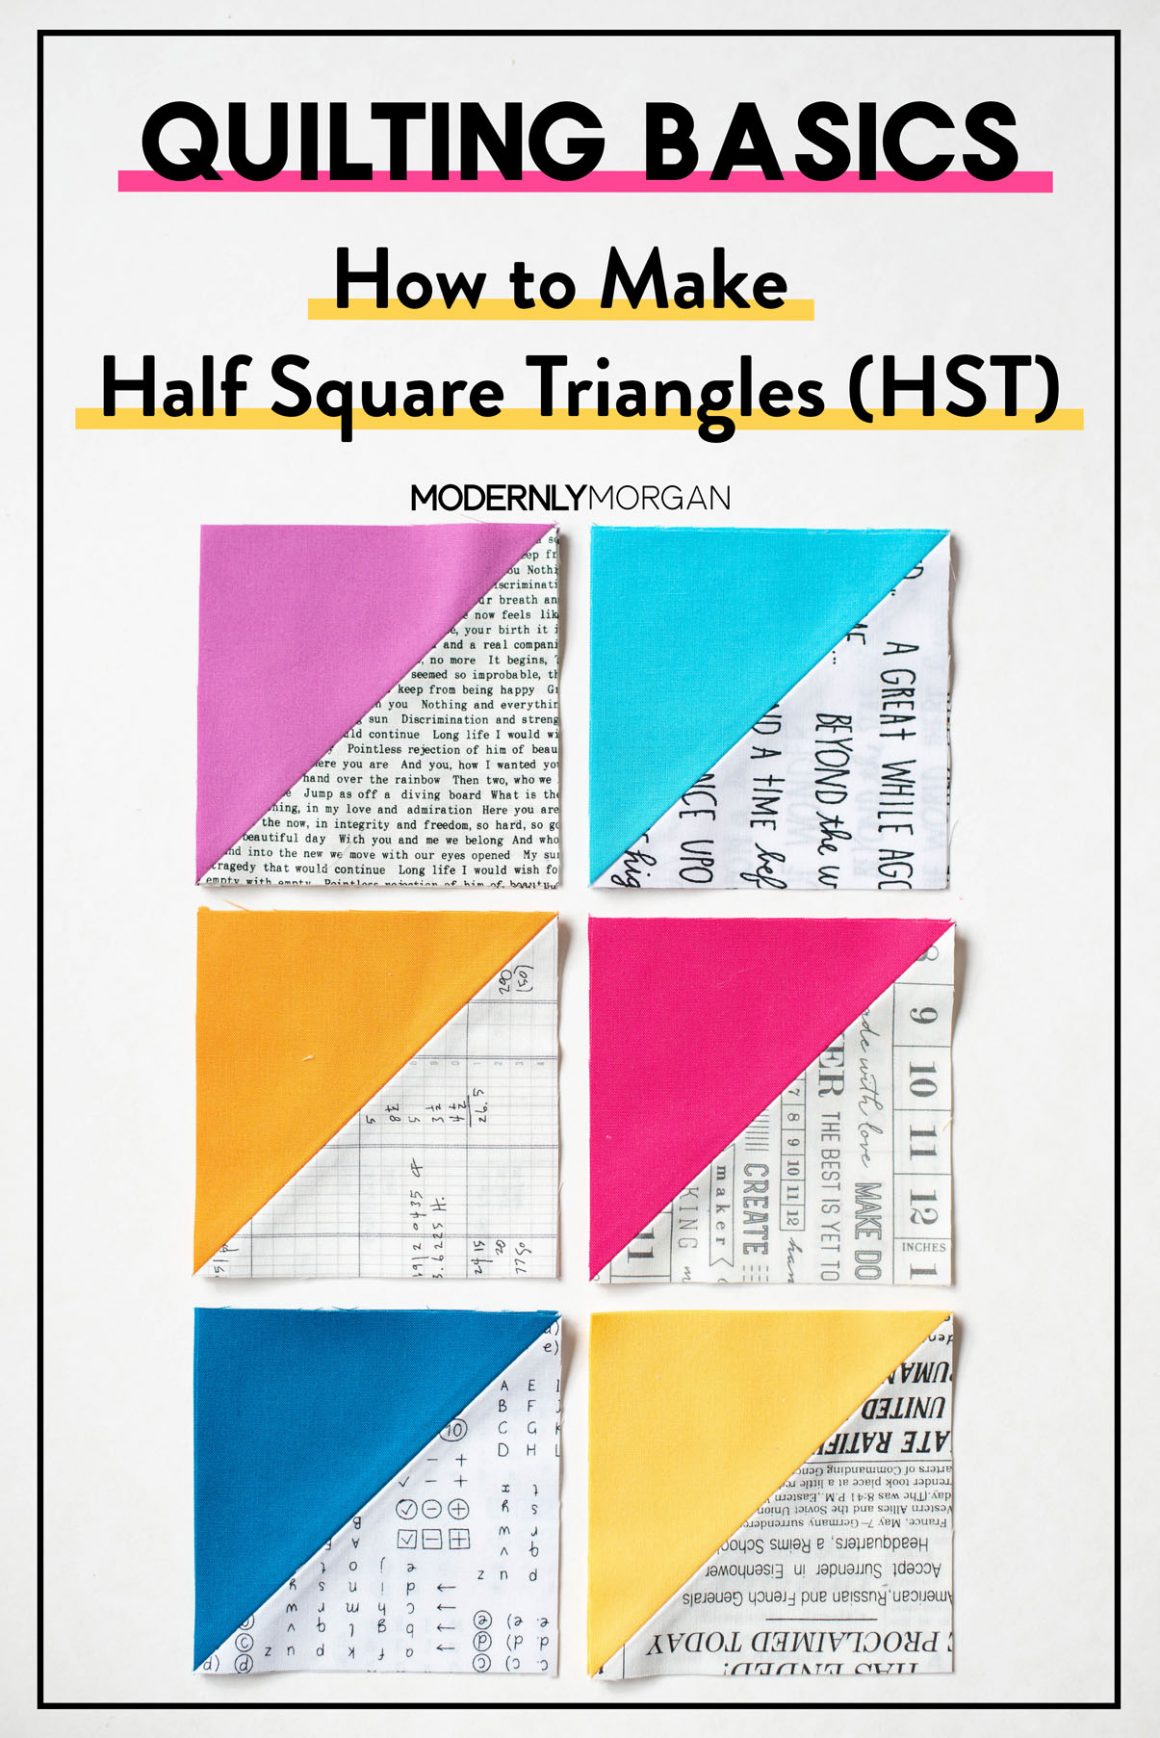
I’m sure since you’ve taken the time to look this post up that you already know Half Square Triangles (or HSTs for short) are EVERYWHERE in the quilting world. Seriously…everywhere, even in my new Half Pint pattern! So mastering this basic block is key!
Now I’ll straight up tell you there are multiple ways of cutting HSTs but I prefer to use this method to make just two at a time. Why? Well…other methods that make more than two at a time leave you with bias edges (that means your blocks can stretch and lose shape super easily)…but that’s just my preference.
Let’s get to the tutorial already…less talking, more sewing!
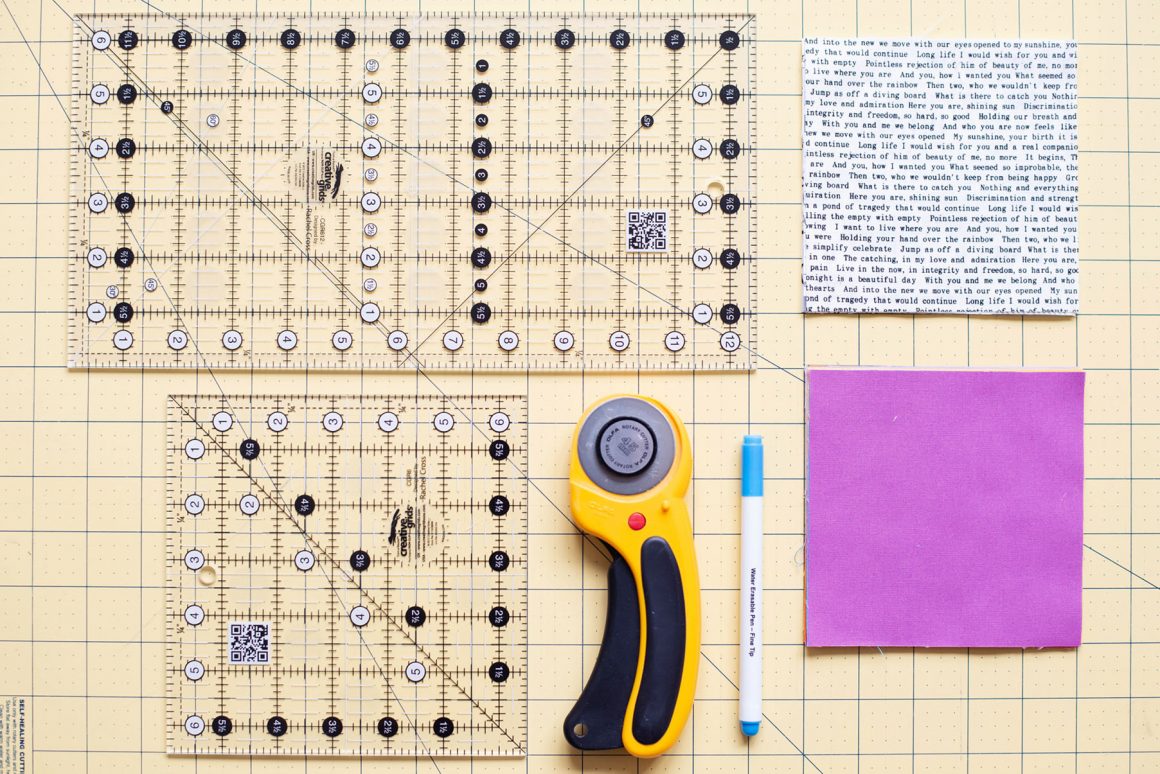
Supplies I use for making HSTs:
•Ruler (these are my favorite because they don’t slide around on your fabric!)
•Rotary Cutter
•Cutting Mat (this set is a good one)
•Water Soluble Marker
•Fabric
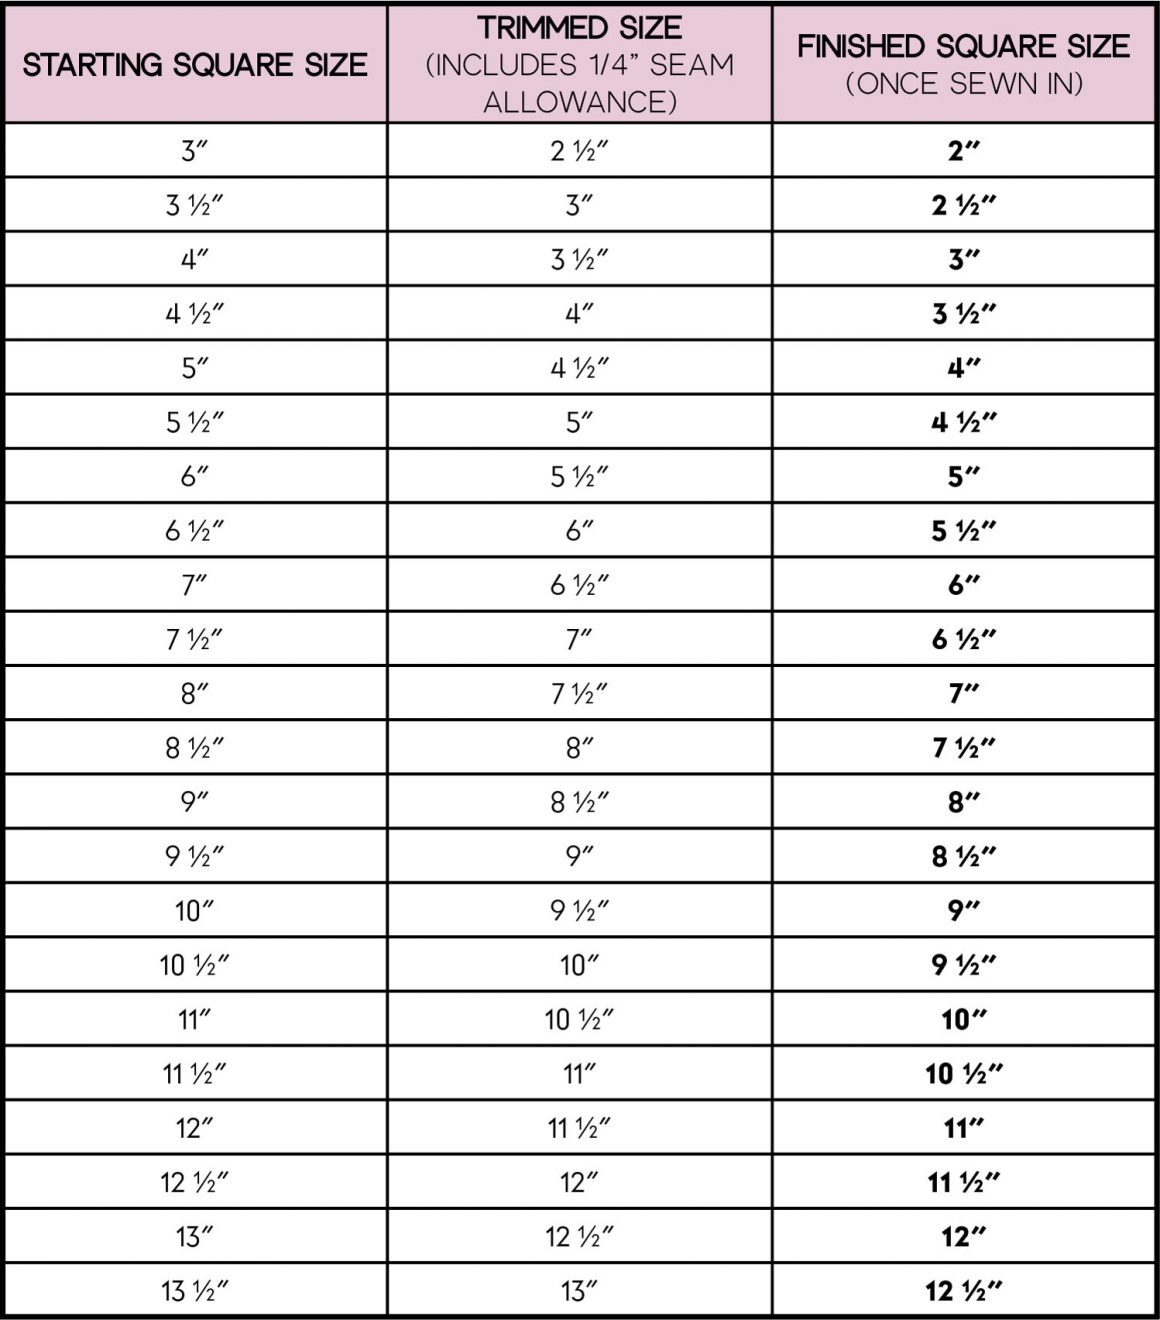
The first thing you’re going to need to do is determine the size HST you want to make; which is the ‘Finished Square Size‘ column in my chart below. Then cut out 2 ‘starting square size‘ squares from your fabrics. My chart is a tad different than most of the charts you’ll find online since I round my measurements to half inches and full inches (most chart measurements end in 3/8″ or 7/8″ but I find that doesn’t give enough room to perfectly trim HSTs…I’m a little obsessive about getting perfect points, lol!).
Now that you’ve got your squares cut, let’s make a HST!
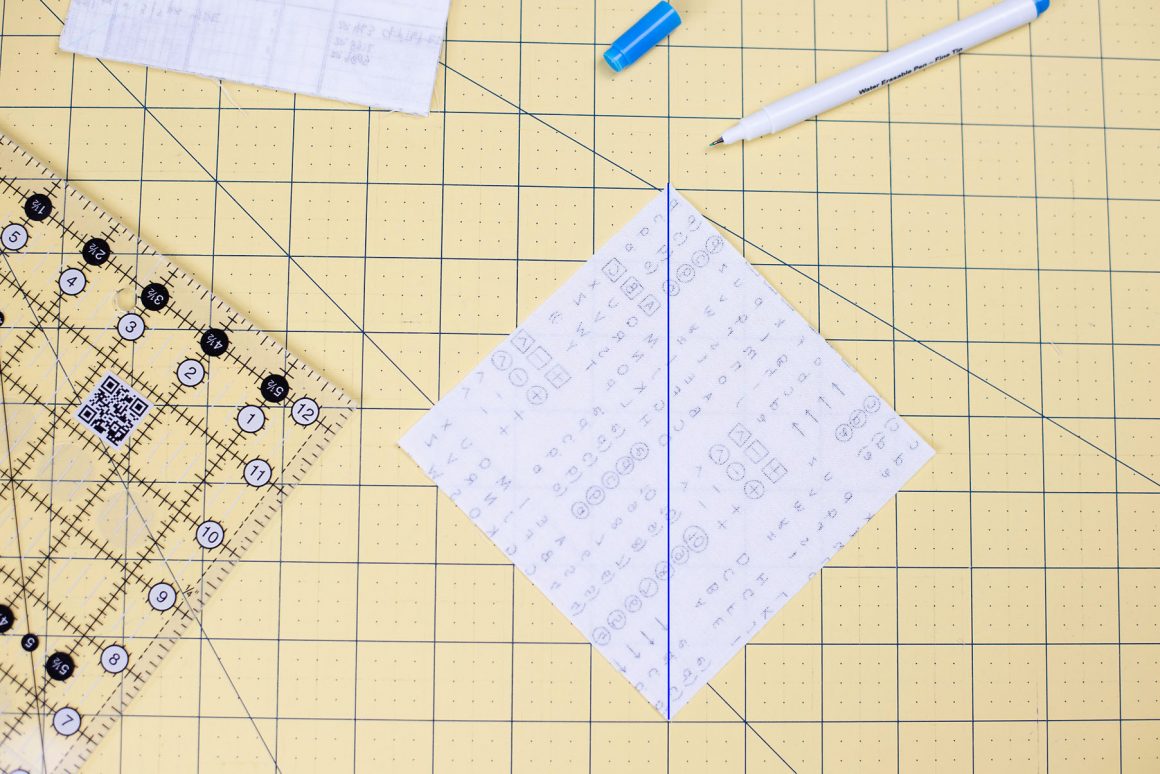
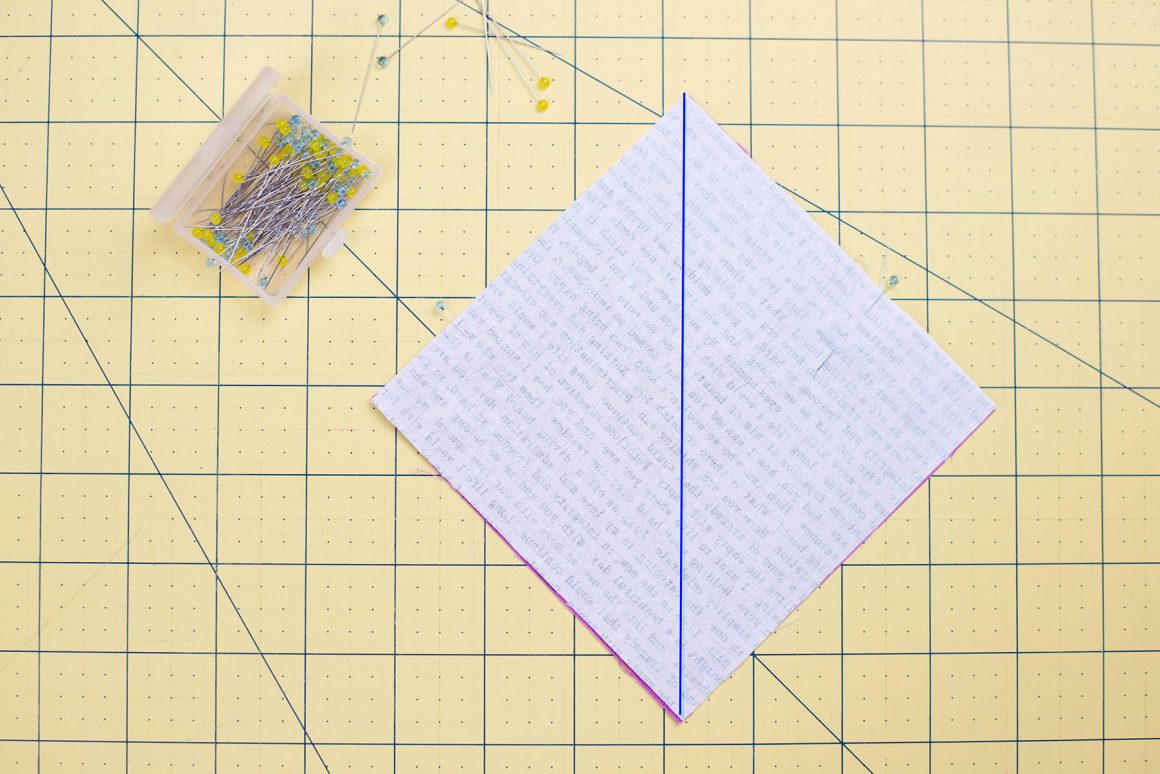
Take one of your squares and with your ruler and water soluble pen, mark a line down the center from point to point. I normally mark the lighter fabric since it’s easier to see the line. I also made the line bolder on my computer just you could easily see.
Place your square with the line on it on top of your other fabric square, making sure that the right sides of the fabric are together.
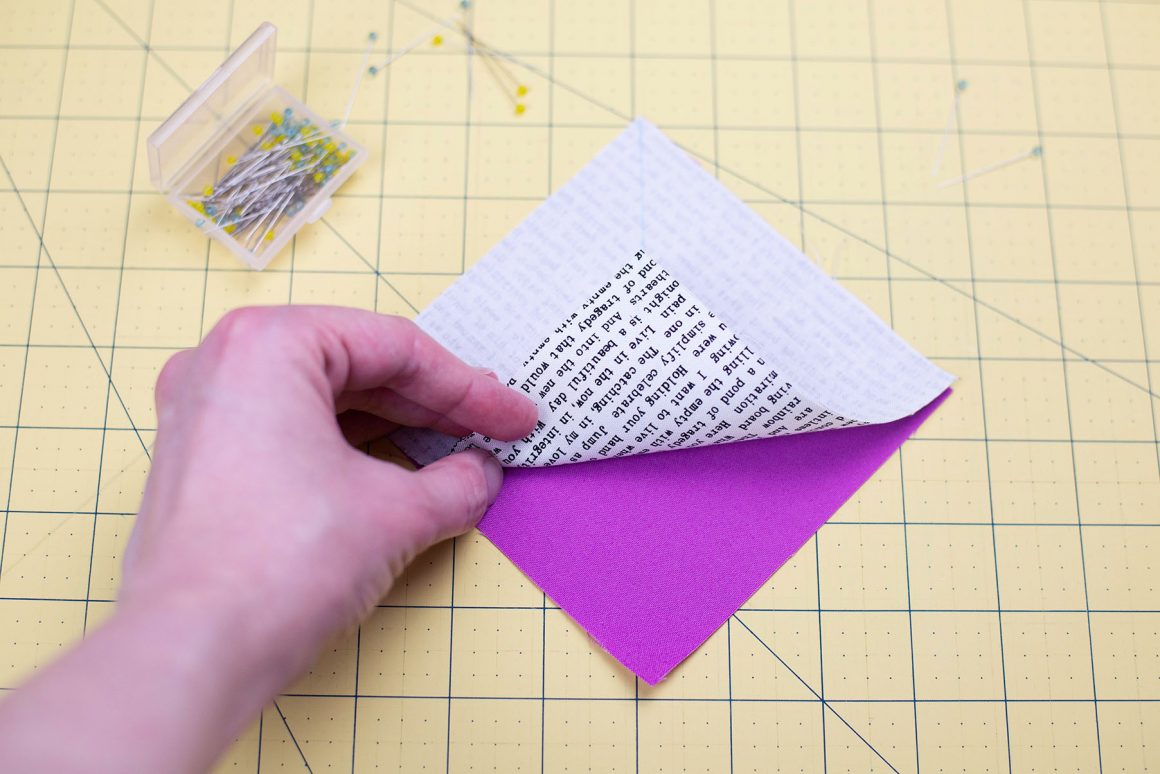
When your squares are lined up on their corners and edges, pin them in place so that they don’t shift as you sew.
Take your pinned squares to your sewing machine and sew 1/4″ away from each side of the line. Use your quarter inch sewing machine foot to make that super easy!
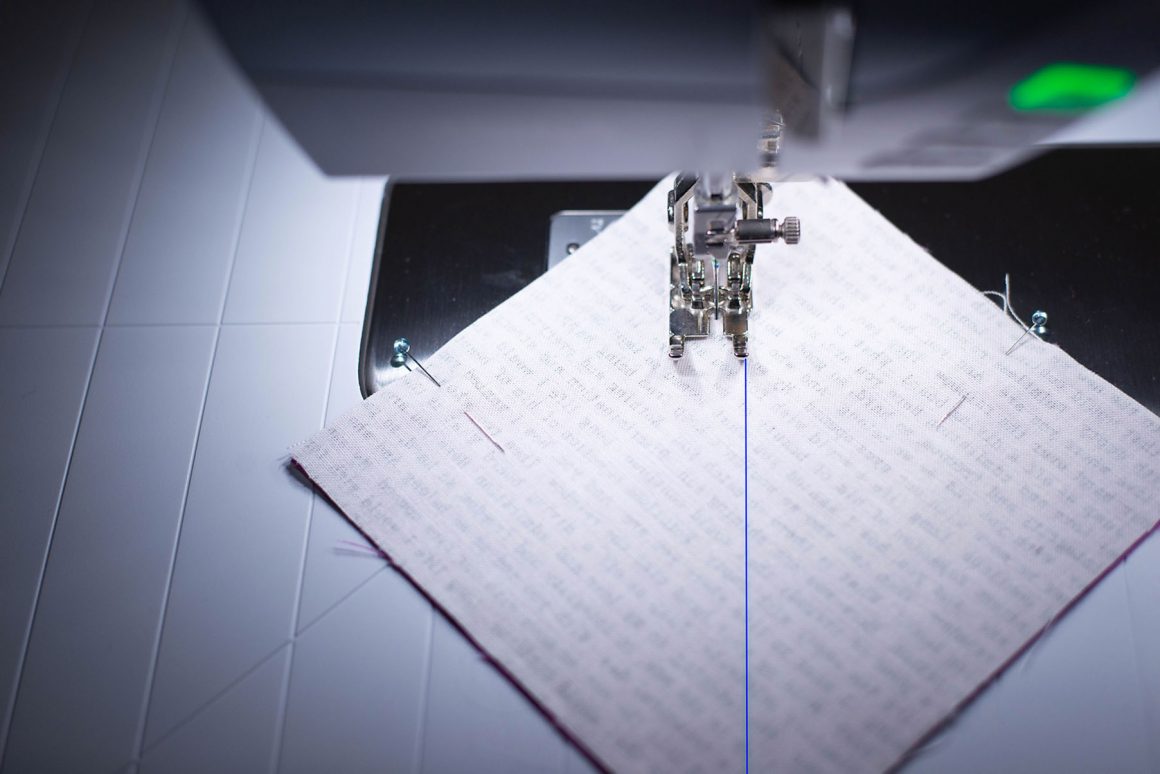
Once you’ve sewn on both sides of your line, your block will look like my block below. I used dark thread just to make it visible for this tutorial but normally I would sew with a thread closer to fabric’s color.
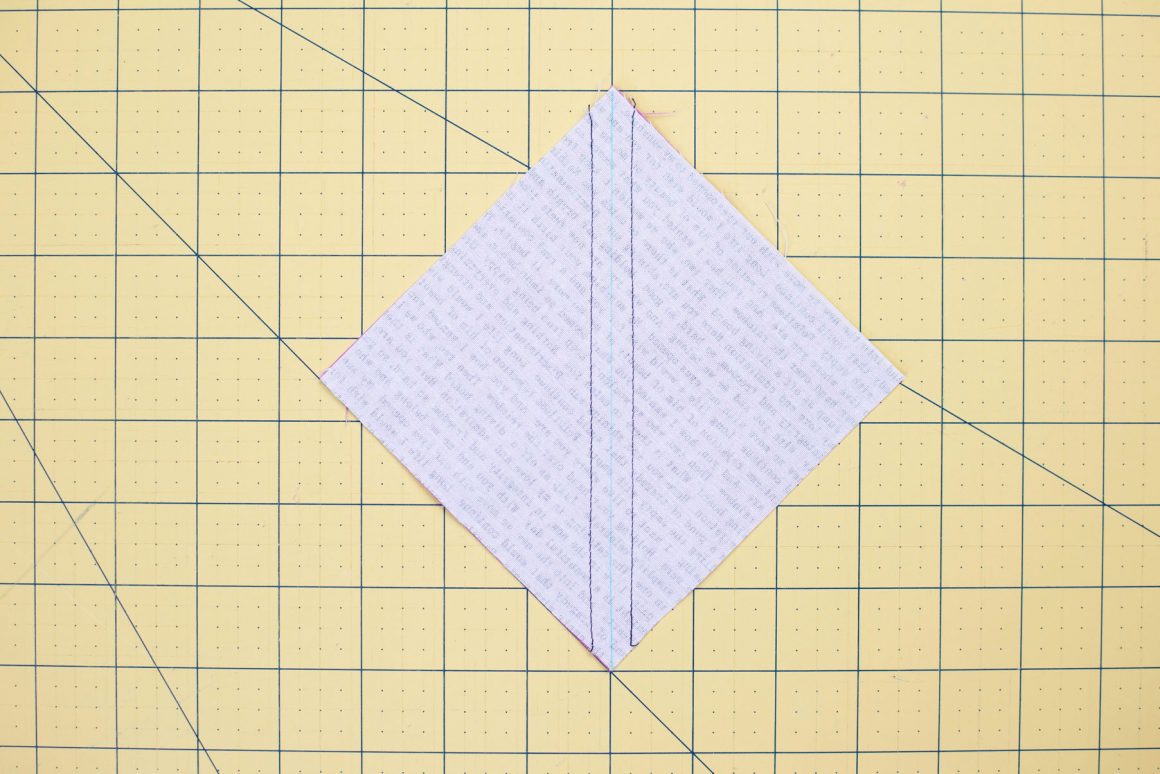
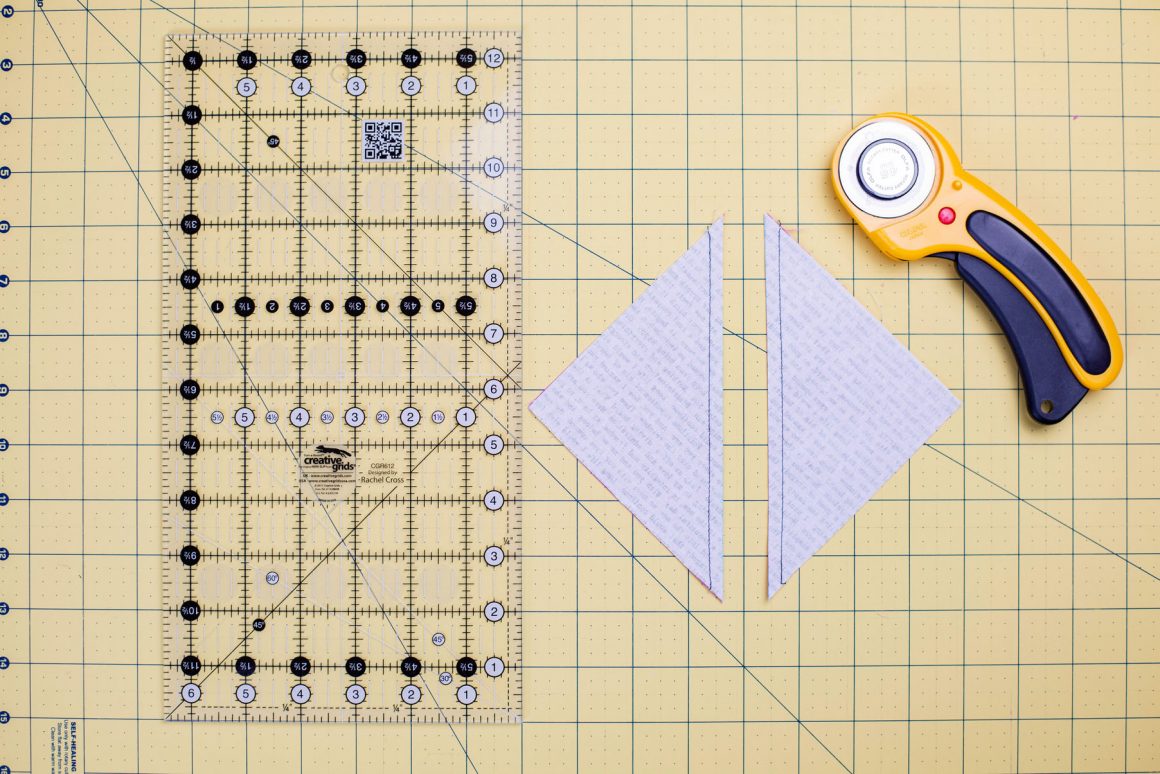
Take your ruler and rotary cutter and cut directly on the line you drew. This will give you two HSTs.
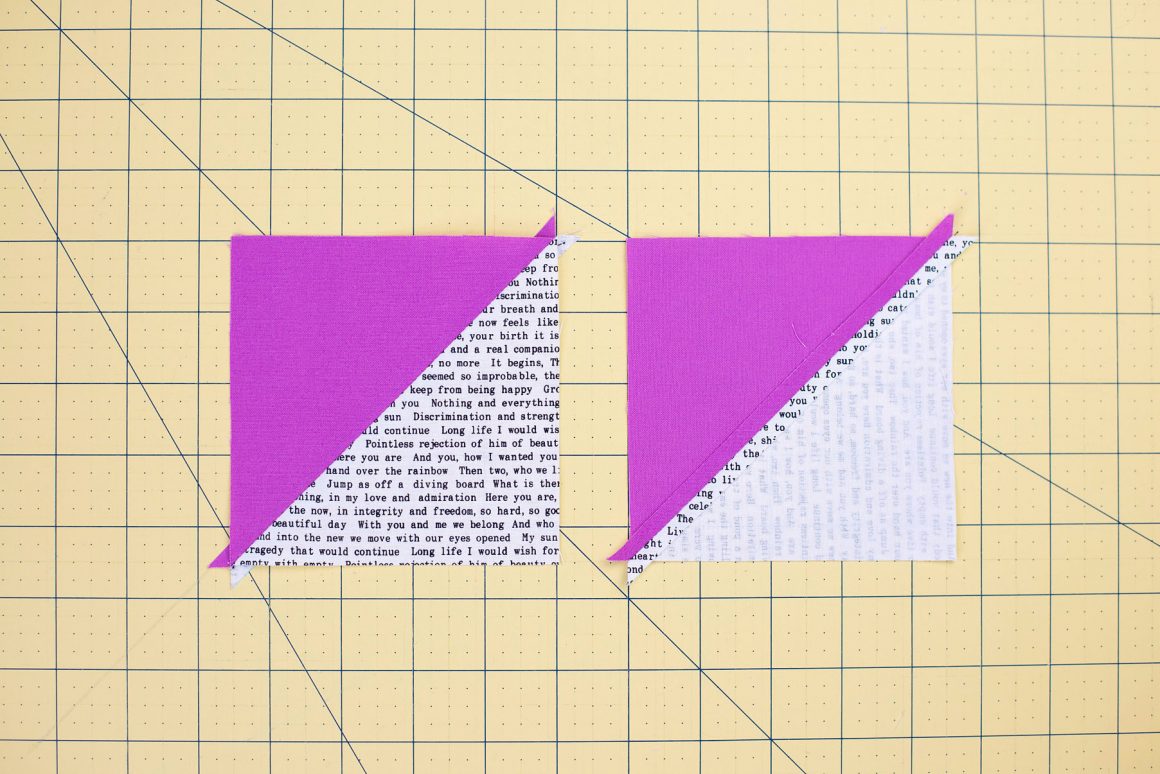
Now take those two pieces to your ironing board and press the seams to set them, and then press them open. Here’s what the front and back of your HSTs will now look like:
Refer back to the chart earlier in this post and trim your HSTs to the corresponding ‘Trimmed Size‘ number. This is called ‘squaring up’ (this is my favorite ruler for squaring up) and if you want to know a little bit more about how to do this so that your blocks give you perfect points, check out my Squaring Up HSTs Tutorial.
Repeat this process for as many HSTs as you need. 😉