Quilt, Quilt Patterns, Tutorials
Boot Room Quilt – Free Pattern
I’ve partnered up with Art Gallery Fabrics to bring you this free tutorial! The Boot Room quilt is made up of traditional quilt blocks with a modern, bright twist!

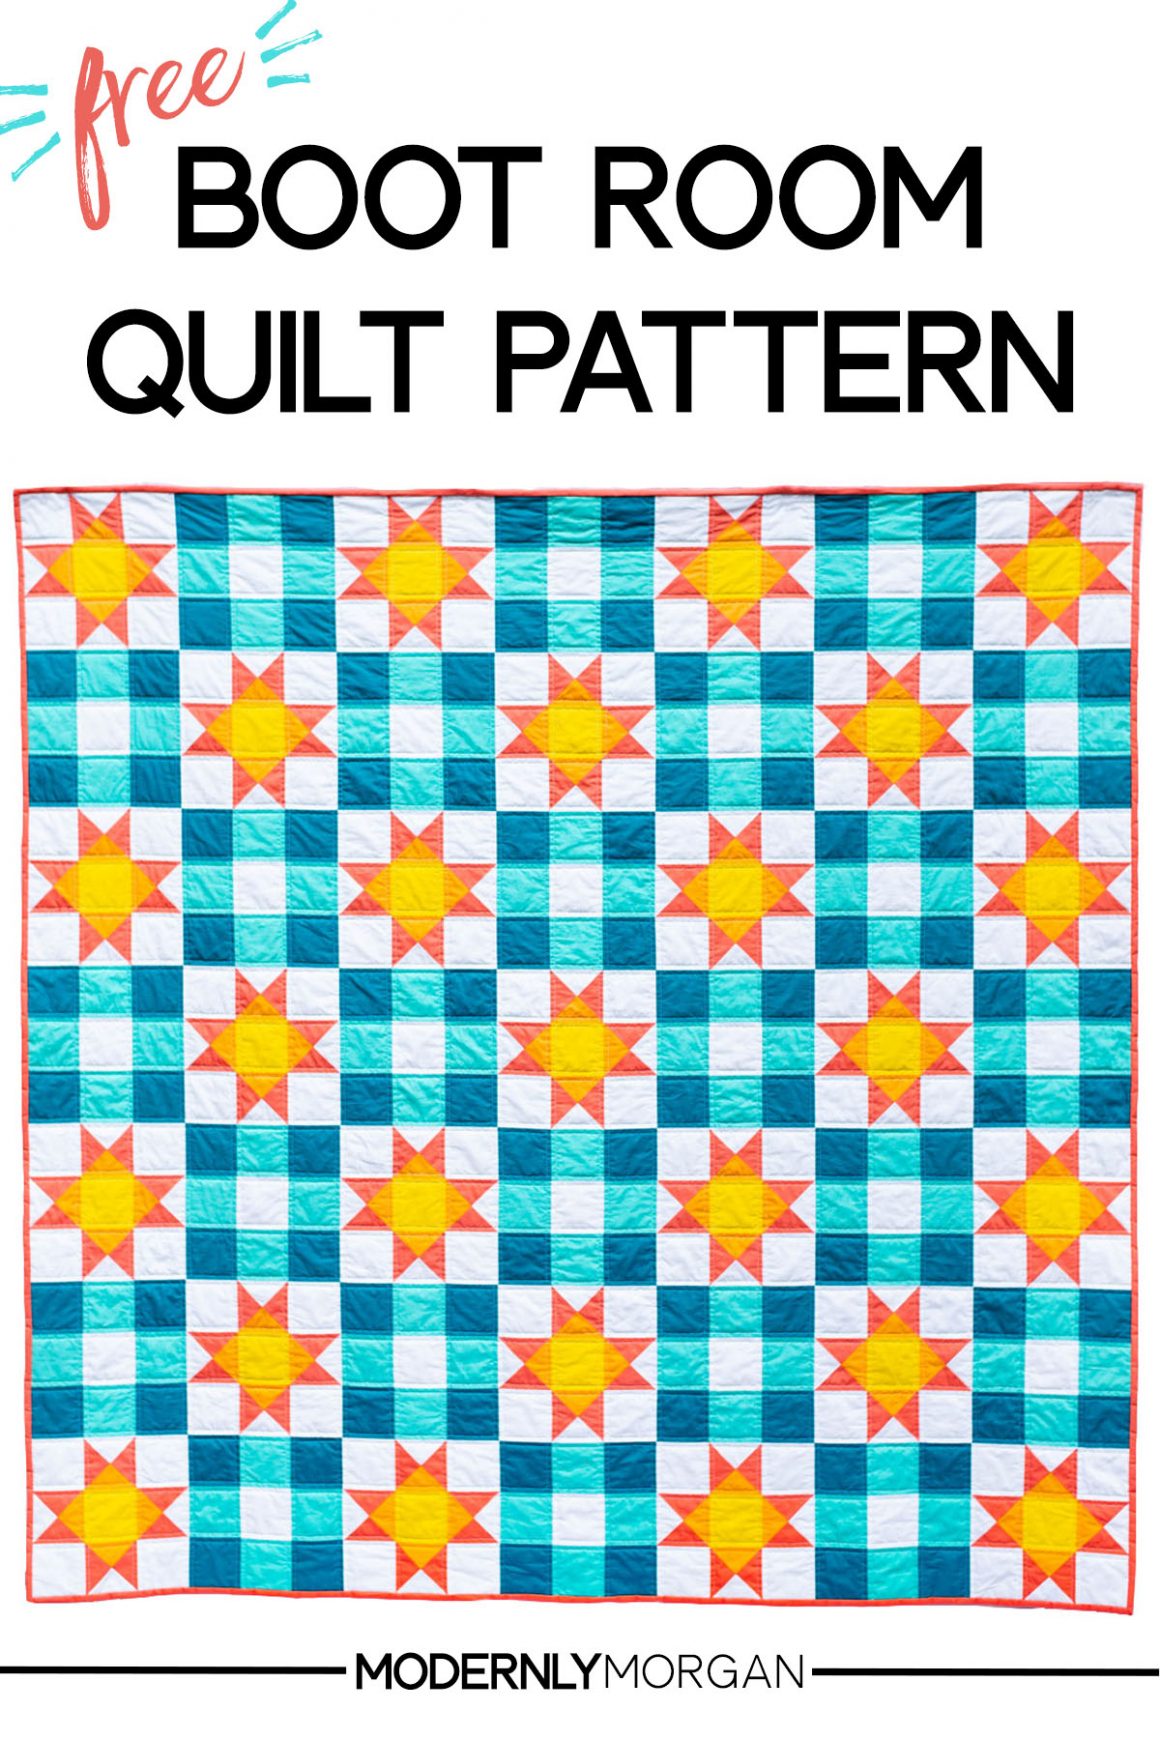
Pin this to Pinterest for later!
Okay so you’re probably thinking…why call it the Boot Room Quilt? It’s kind of an odd name…I get it, lol! We’re currently renting a very old (I’m talking the original room in the house was built in the mid 1400’s old) thatched roof house in England. And when we first moved in just about 2 years ago, I noticed the floor tiles in the ‘Boot Room’ and loved the pattern! For all of you Americans (I’m an American too, lol!), a boot room is the same thing as a mud room.
I decided to work it into a pattern and thought of it as a way to immortalize a piece of our rental so that when we move in about a year, I’ll be able to take a part of it with me. A little piece of our English cottage will come back to the States with us a quilt! I figured it would be great to share it as a free pattern and all of you can have a piece of our cottage too!
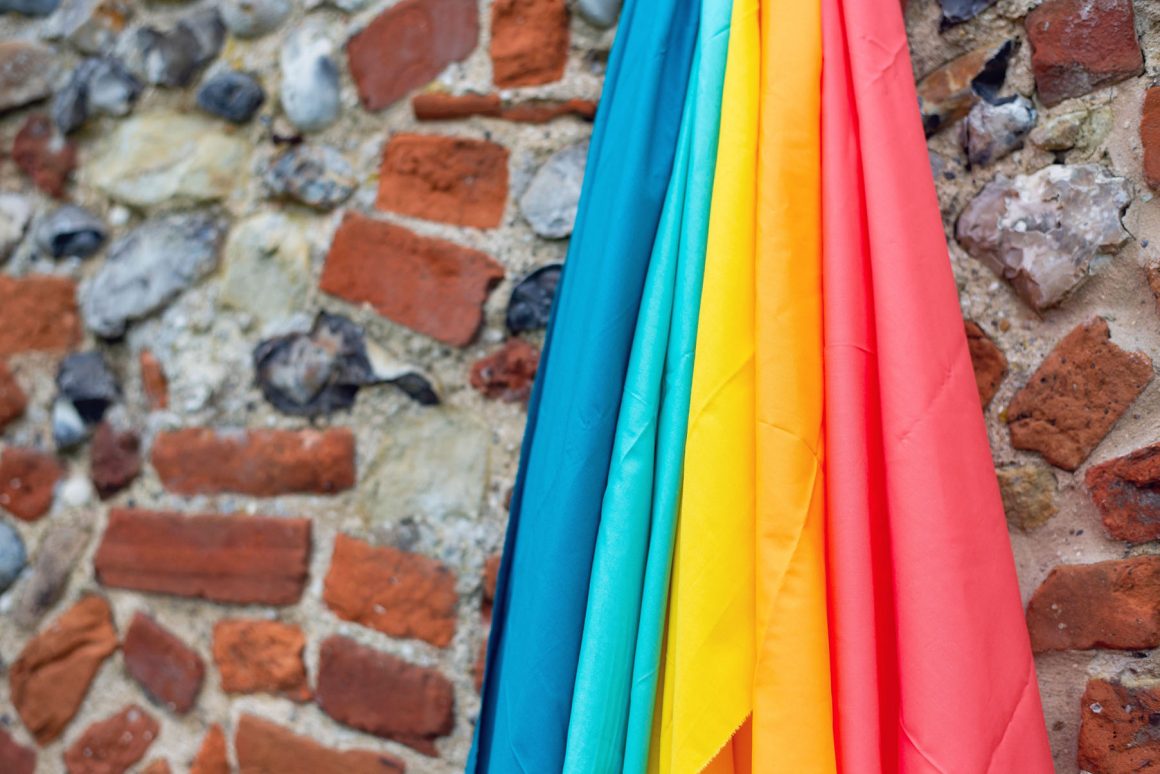
The friendly people over at Art Gallery Fabrics were nice enough help make this pattern possible and let me pick a few shades of their PURE Solids to create this quilt. The colors that spoke to me were (from left to right in the picture above): Tile Blue, Mirage Blue, Canary, Mandarin, and Coral Reef. Dreamy, right?!
Right out of the box, I was greeted with that familiar Art Gallery Fabrics feel. If you’ve ever used any Art Gallery fabric, you’ll know what I’m talking about. Just an all around super smooth almost silky feel. I was also blown away with how vibrant they were. The color saturation in each shade was intense and beautiful! And if you know me…brighter is always better!
Over the past two weeks, I cut, sewed, pressed, quilted and bound my Boot Room quilt and this was the end result:
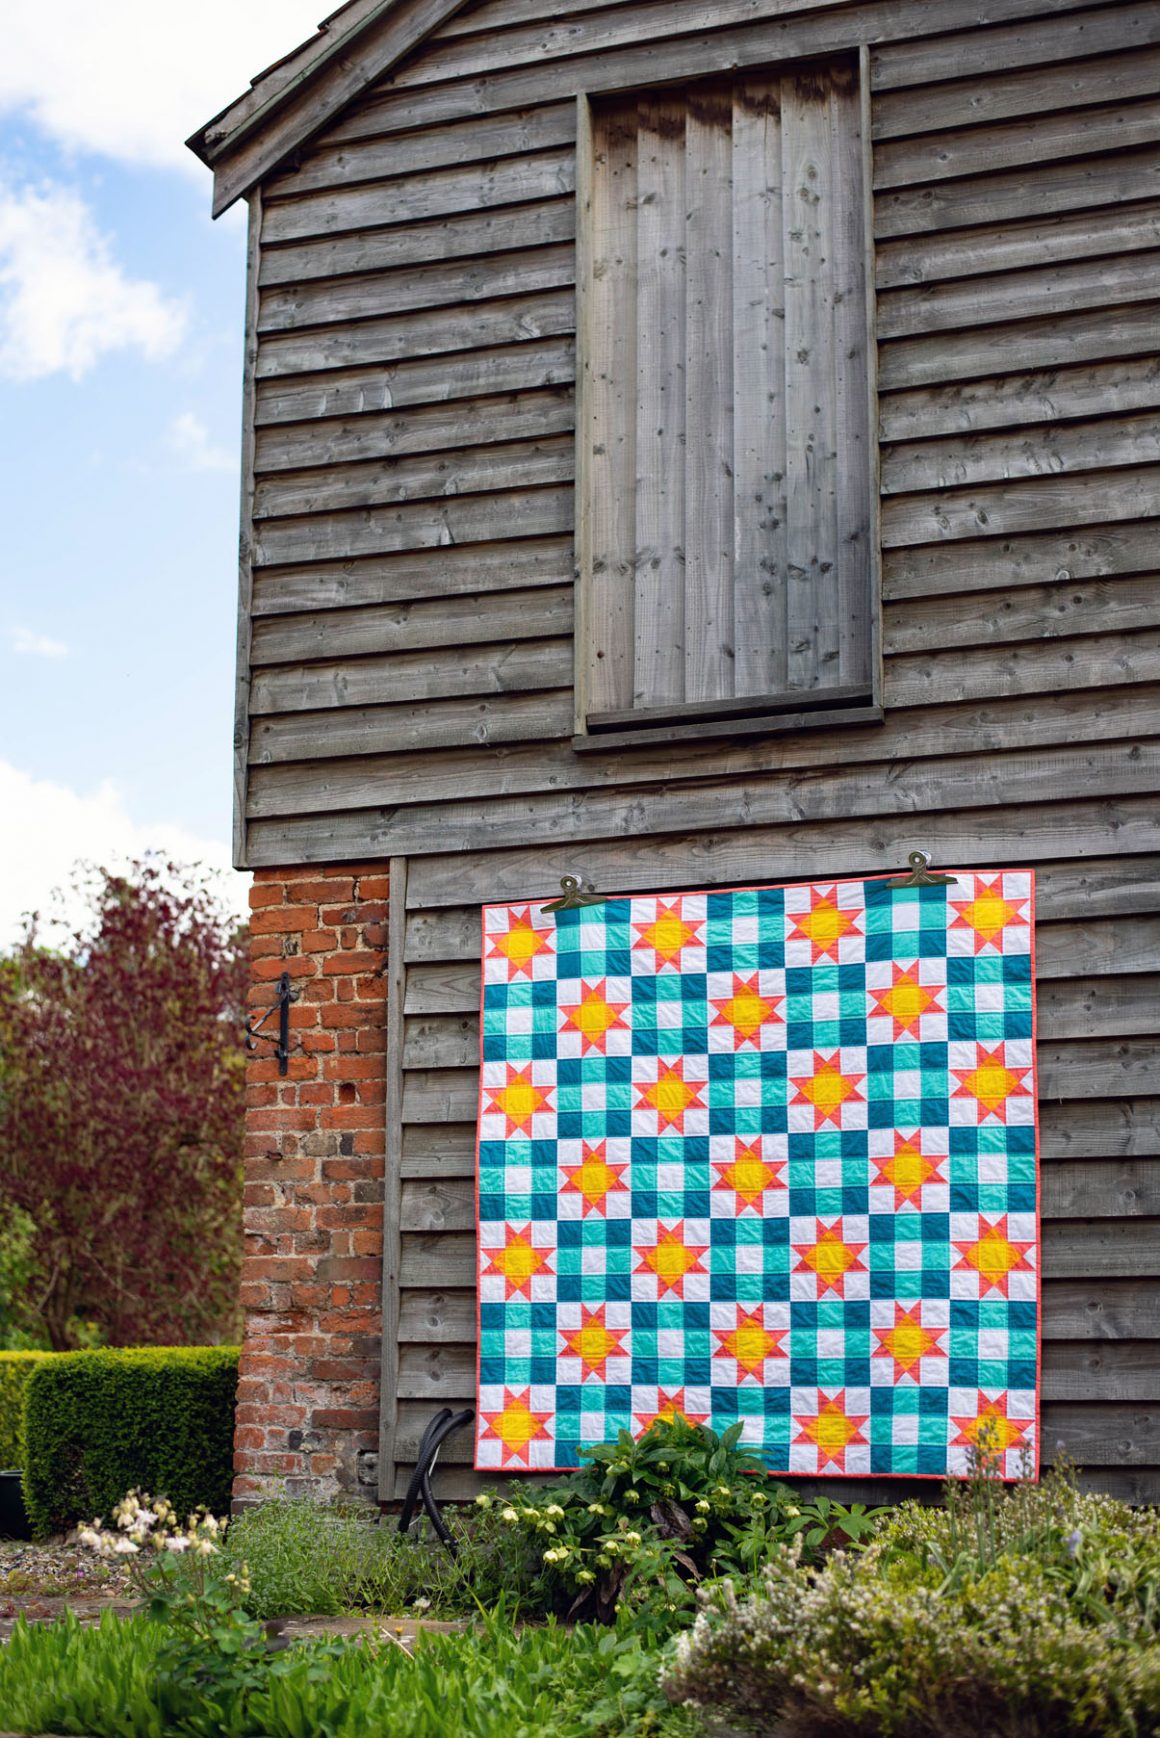
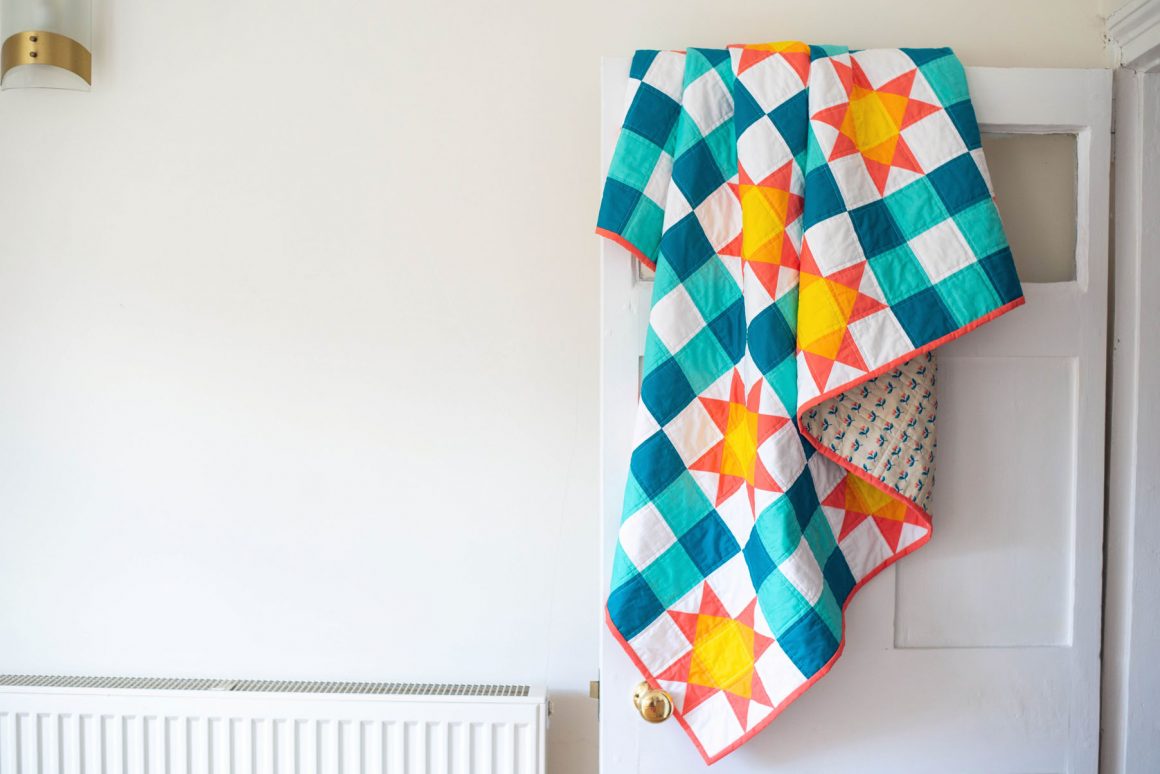
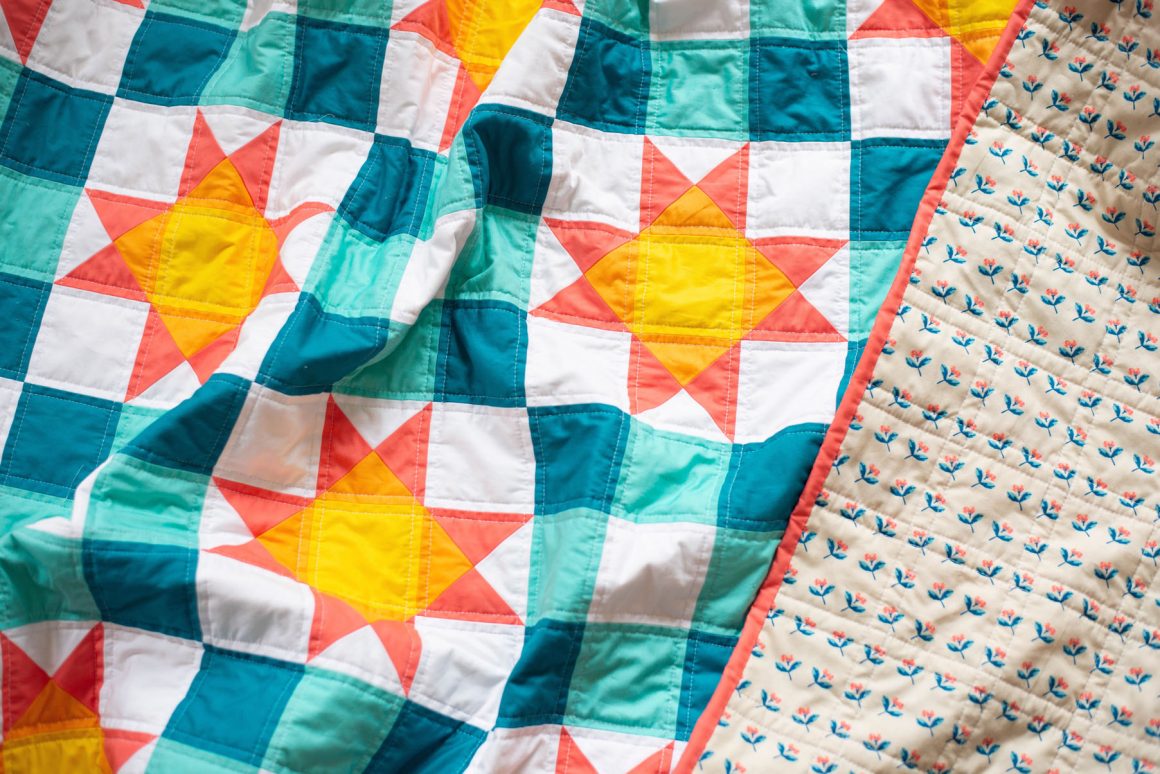
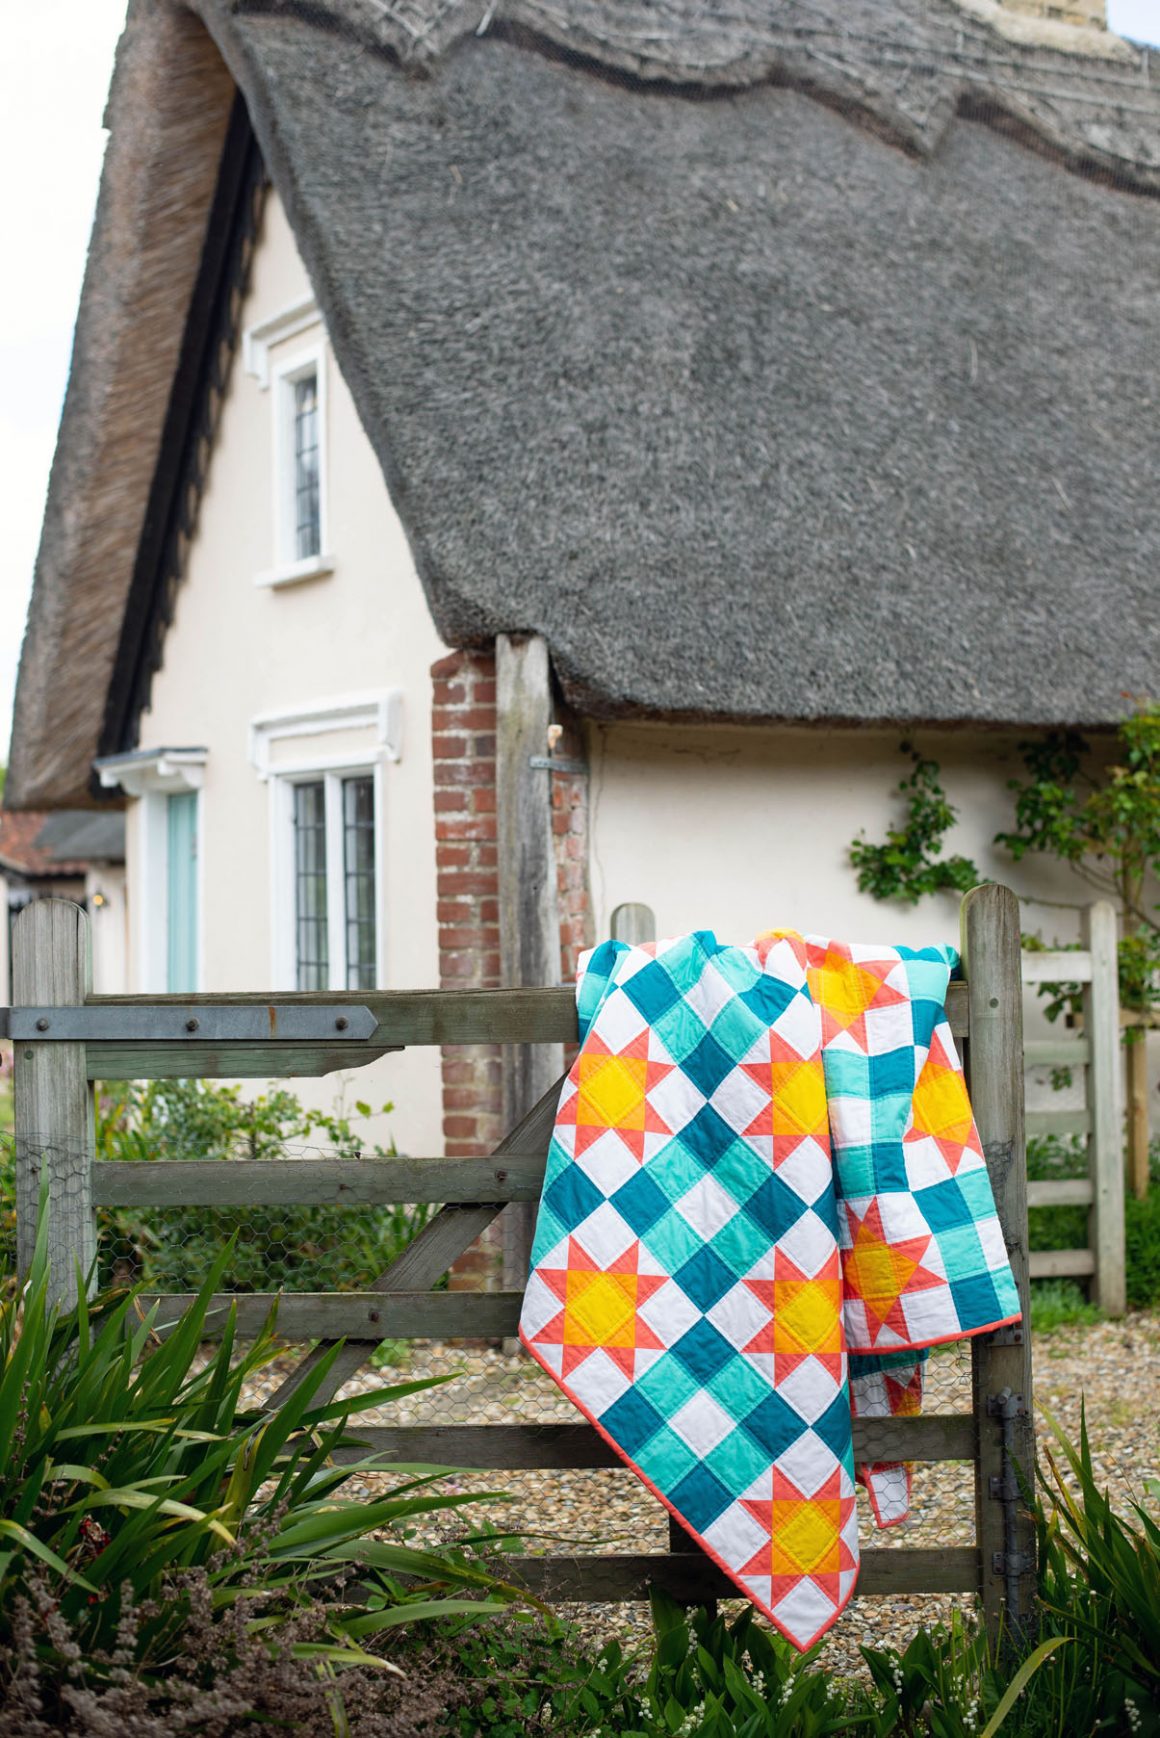
Absolutely stunning! I’m a huge fan of making traditional style quilts but with a modern look and feel…and that’s exactly what the end result was with this gorgeous quilt!
Boot Room Quilt Pattern:
Are you ready to sew one for yourself? Well, I’ve got the throw size pattern (63″ x 63″) right here for you! Grab the same Art Gallery PURE Solids I used (names are included in the Fabric Requirements sections) or check out their wide range of colors to create your own gorgeous fabric combos!
I’m also going to give you a heads up that I’m a visual learner…so I’m writing this pattern for those of you out there who learn just like I do! I’ve included lots of photos to help walk you through each step of creating the Boot Room quilt! Also, DON’T FORGET to tag your quilting photos with #BootRoomQuilt and tag myself, @ModernlyMorgan, so that I can see your fabulous quilts!
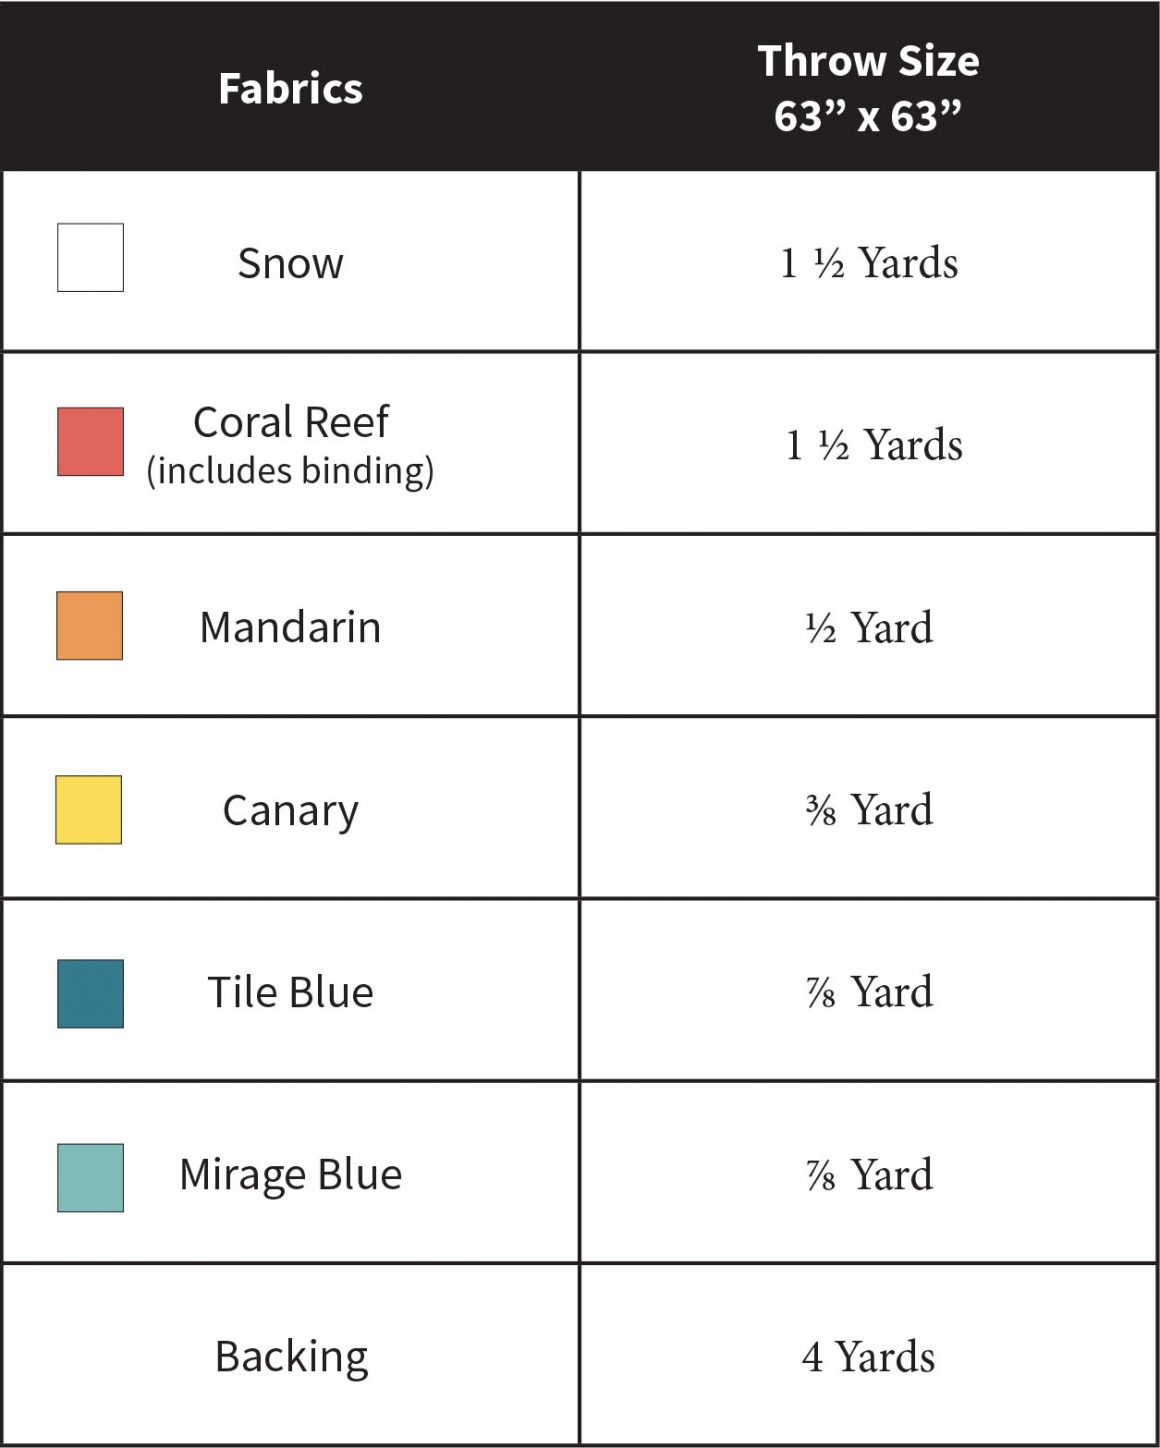
Fabric Requirements:
•All fabrics are assumed to be 42″ wide and unwashed.
•I have INCLUDED binding yardage in the Coral Reef calculations.
•All fabrics used in my quilt are fabric from Art Gallery Fabrics – solids are PURE Solids and the backing print is Basking Buds in Sand by Maureen Cracknell.
Quilting Supplies Needed:
•Cutting Mat (this is the one I’m using in the photos…perfect size!)
•Rotary Cutter
•Thread
•Square Ruler (my favorite smaller square ruler that I use in this tutorial)
•Water Soluble Pen
Helpful Information:
•Seam allowance is 1/4″.
•WOF – Width of Fabric
•RST – Right Sides Together
•Binding yardage (which is included in the Coral Reef yardage) is calculated for 2 1/2″ width binding strips.
Cutting Instructions:
•Snow/Background Fabric: Cut (11) 3 1/2″ WOF strips – then sub-cut (124) 3 1/2″ x 3 1/2″ squares. Cut (3) 4 1/2″ WOF strips – then sub-cut (25) 4 1/2″ x 4 1/2″ squares.
•Coral Reef Fabric: Cut (6) 4 1/2″ WOF strips – then sub-cut (50) 4 1/2″ x 4 1/2″ squares.
Cut (7) 2 1/2″ WOF strips for your binding.
•Mandarin Fabric: Cut (3) 4 1/2″ WOF strips – then sub-cut (25) 4 1/2″ x 4 1/2″ squares.
•Canary Fabric: Cut (3) 3 1/2″ WOF strips – then sub-cut (25) 3 1/2″ x 3 1/2″ squares.
•Tile Blue Fabric: Cut (8) 3 1/2″ WOF strips – then sub-cut (96) 3 1/2″ x 3 1/2″ squares.
•Mirage Blue Fabric: Cut (8) 3 1/2″ WOF strips – then sub-cut (96) 3 1/2″ x 3 1/2″ squares.
Block Construction:
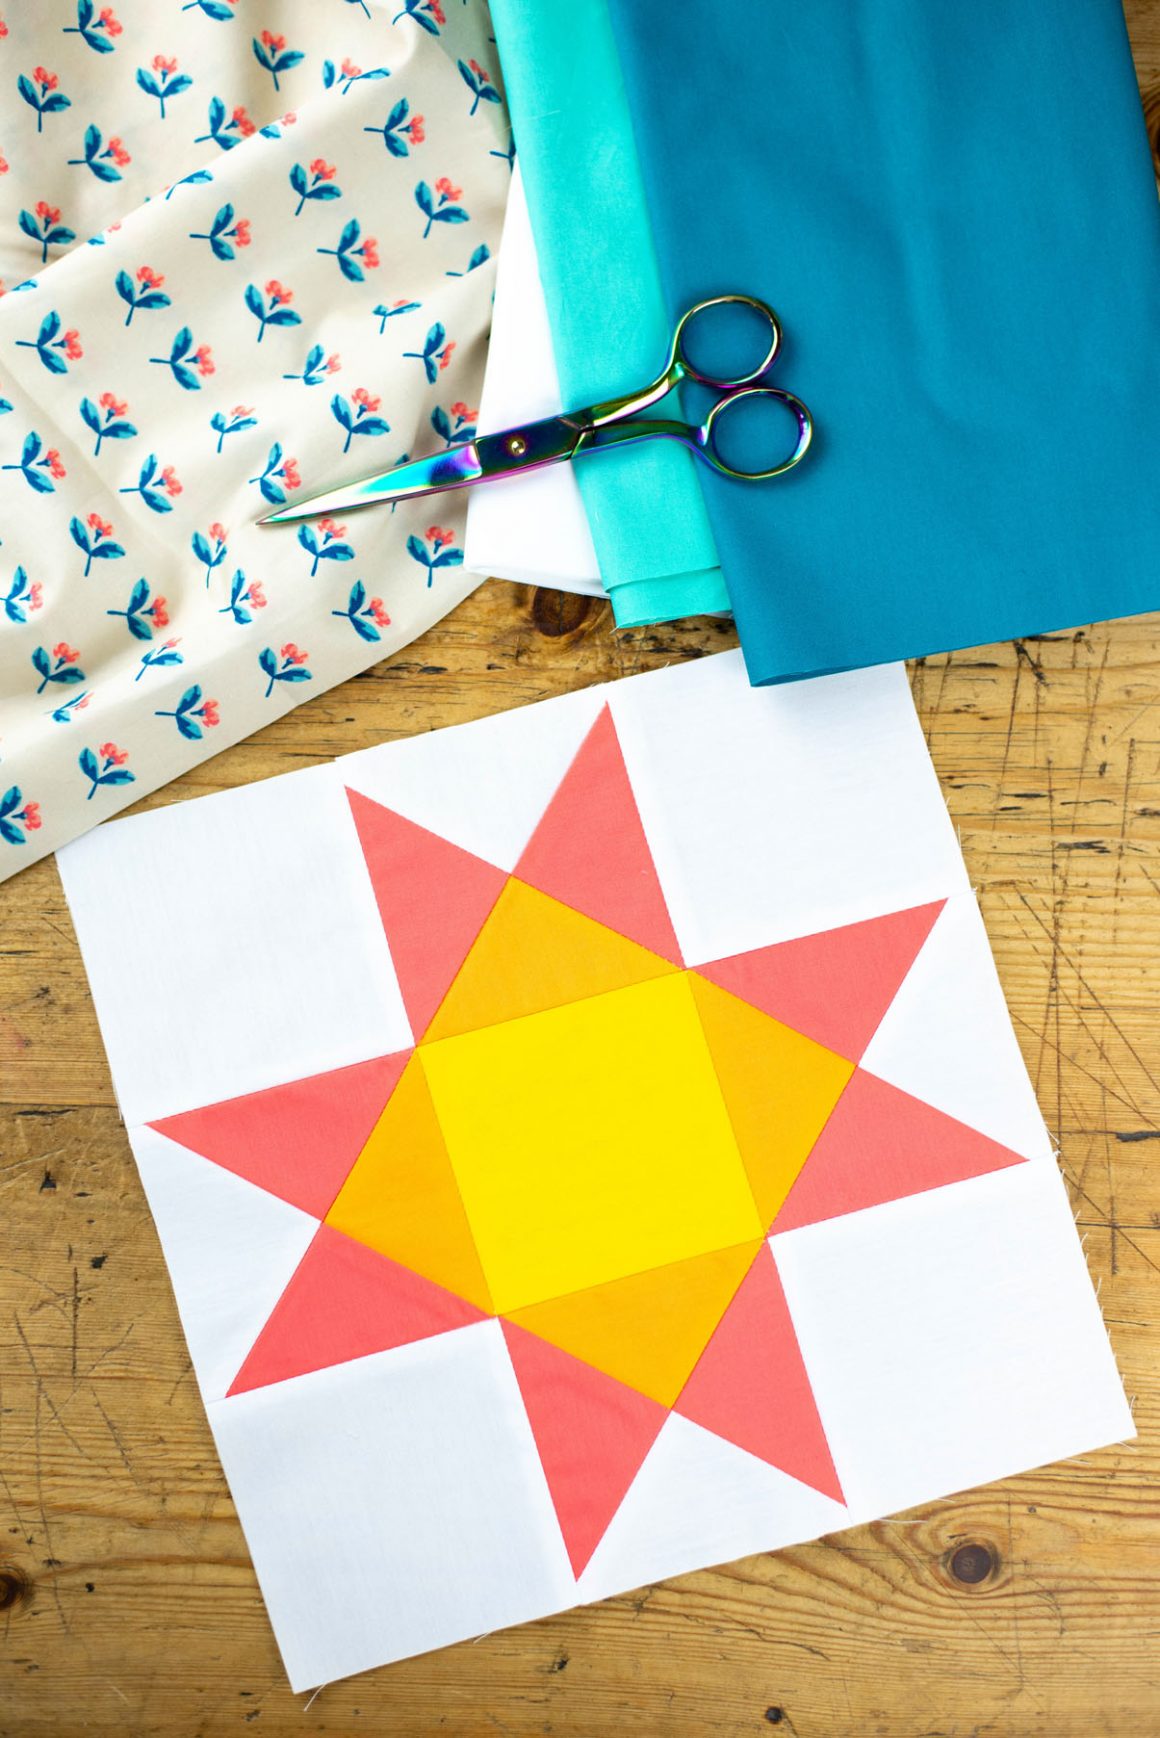
There are two blocks that make up the entire Boot Room Quilt. One is a basic nine patch block and the other is a classic Ohio Star block. Let’s start with the super easy nine patch block!
Nine Patch Block:
Gather your 3 1/2″ x 3 1/2″ square blocks in Snow, Tile Blue and Mirage Blue. Arrange them as shown below:
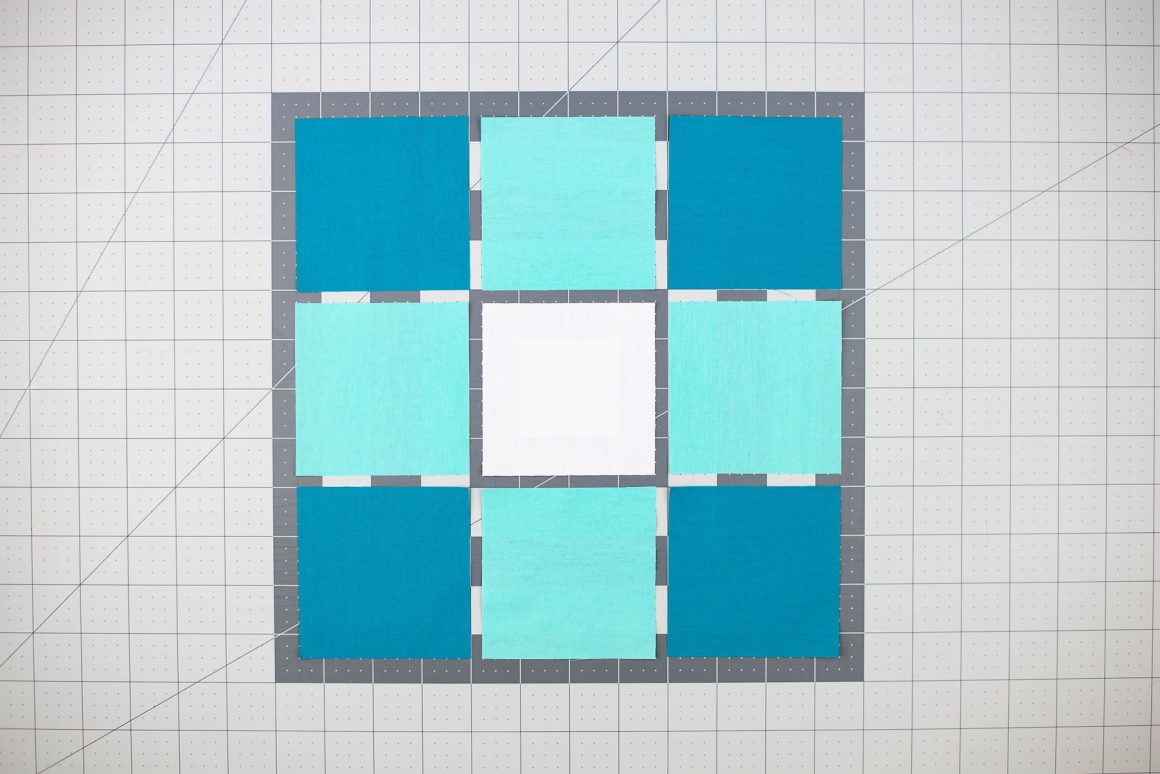
I preferred the darker blue (Tile Blue) on the outside corners. Now sew those blocks together in rows (press seams open):
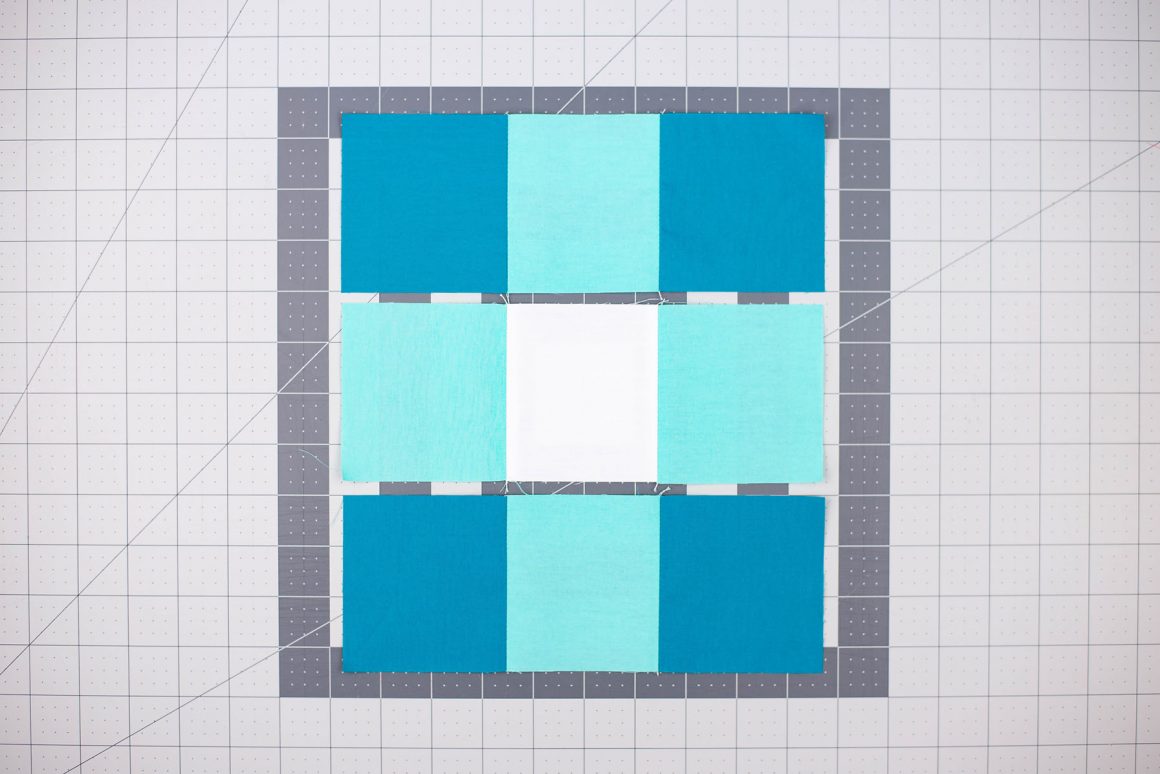
And finally, sew those rows together (press seams open). I’m a big believer in pinning so I pin at every intersection to make sure that everything lines up! You should now have a block that looks exactly like the one below:
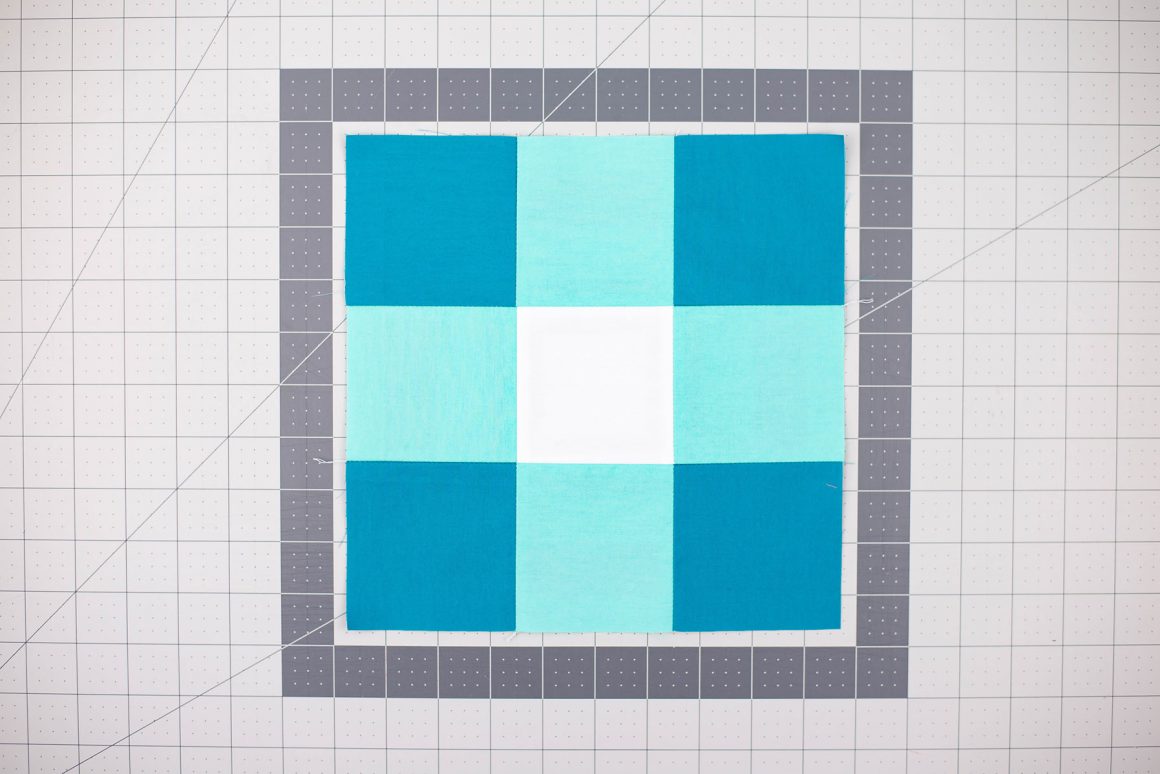
Block will measure 9 1/2″ x 9 1/2″ (before being sewn into your quilt). Continue making these blocks until you have a total of 24. Then set them aside.
Ohio Star Block:
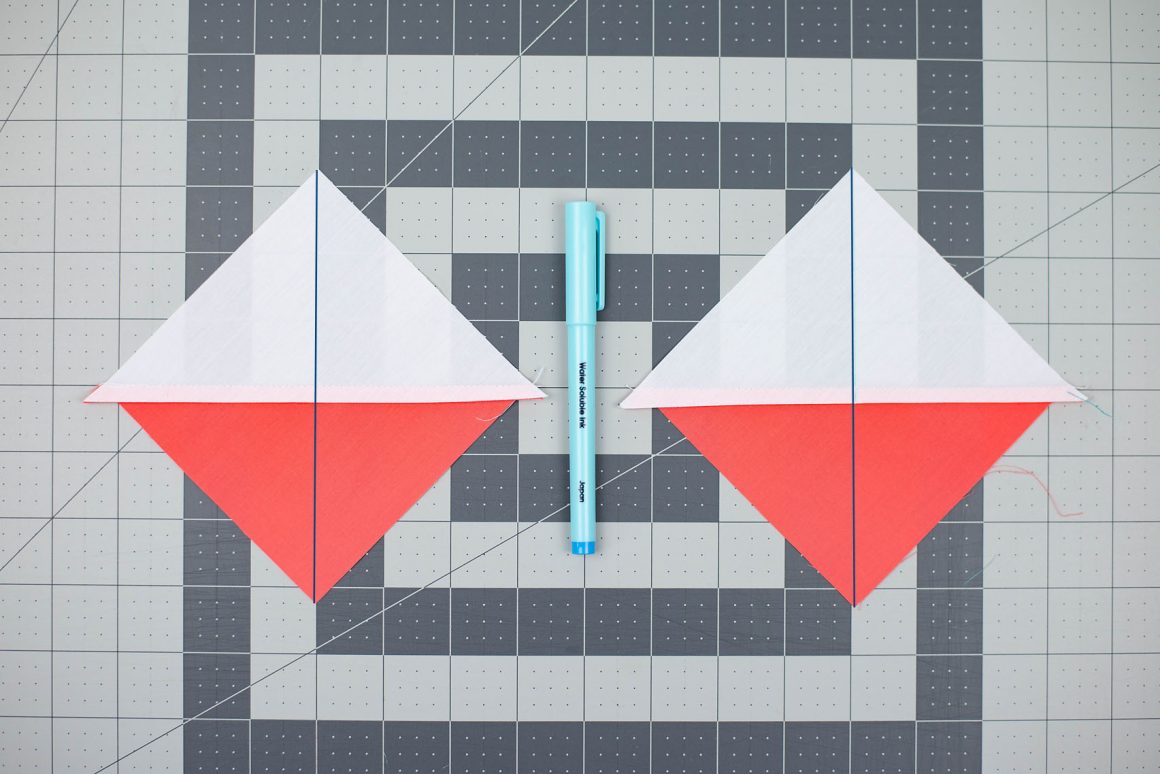
Gather (2) 4 1/2″ x 4 1/2″ blocks in Coral Reef and with your water soluble pen, draw a line down the center (from point to point) as show below. My line didn’t show up that well in the photographs so I improvised by drawing a line with the help of Photoshop so you could see it better. 😉
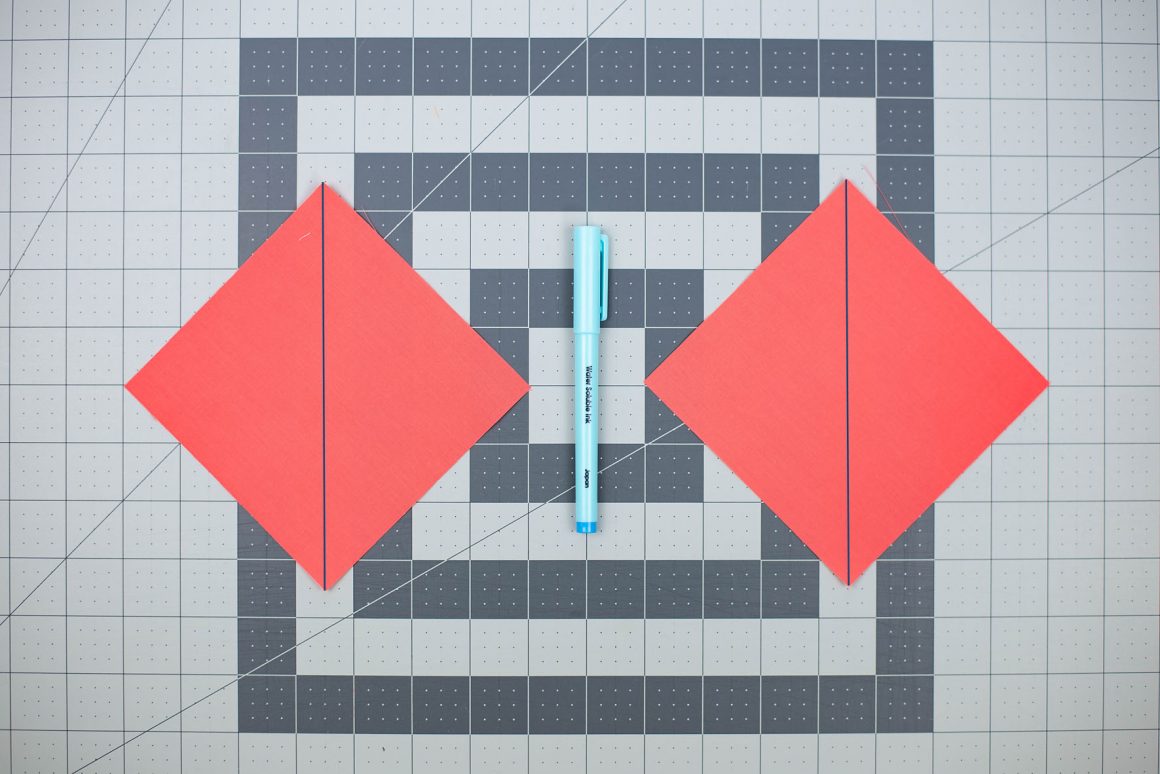
Take those Coral Reef blocks and lay them RST directly on top of (1) 4 1/2″ x 4 1/2″ Mandarin and (1) Snow block, shown below:
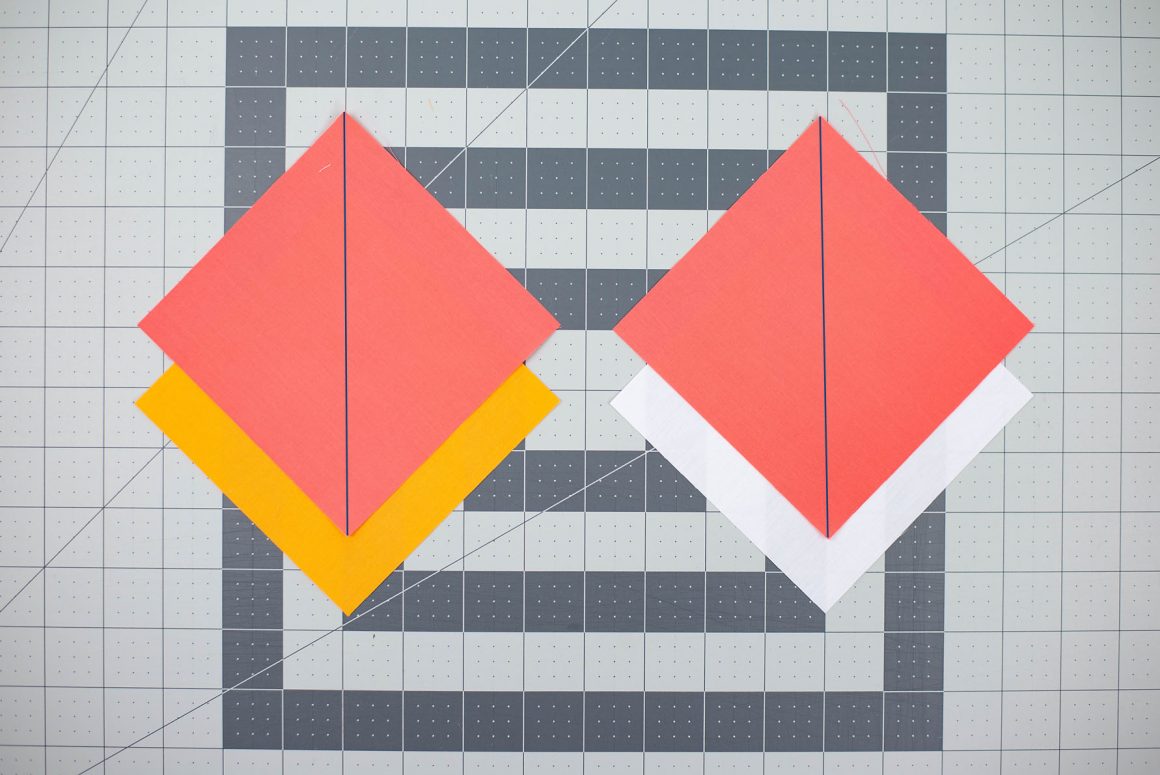
A closer look…right sides together! I know with solids there really is no ‘right side’ but it’s important if you end up working with a print. I then pin the squares together so that they don’t shift when sewing.
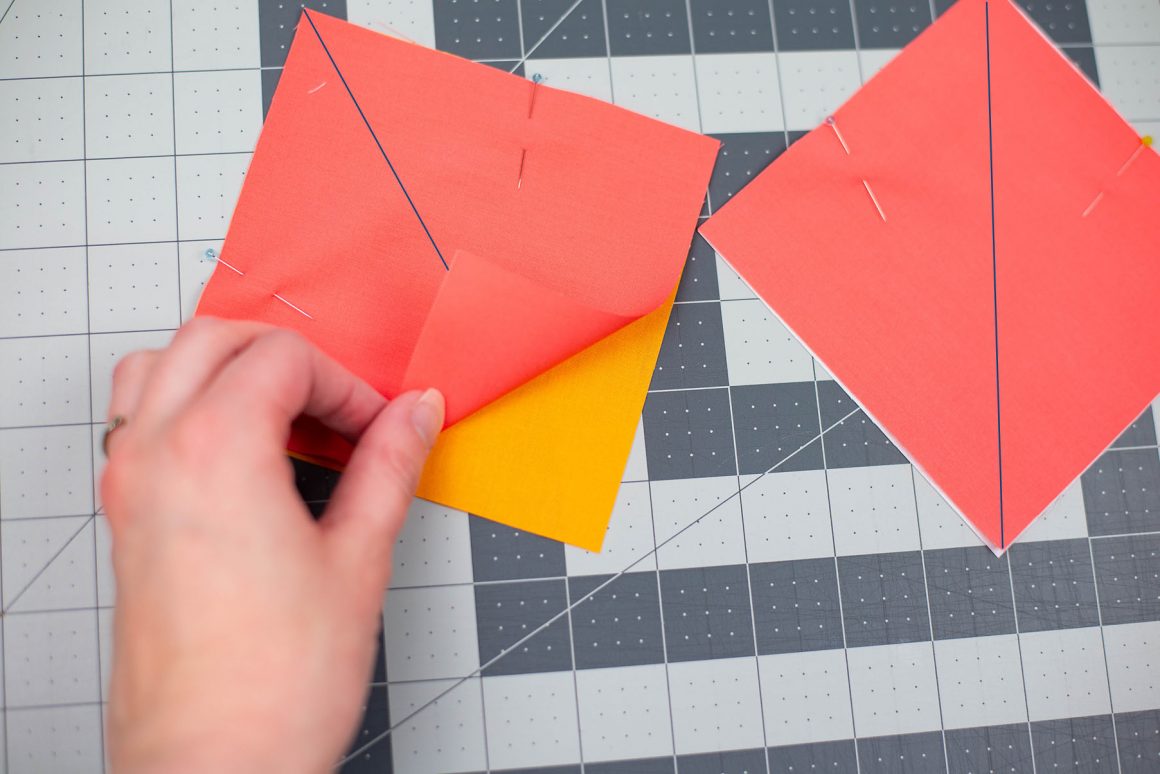
Use your quarter inch sewing foot and sew 1/4″ on each side of the line you drew. Your blocks will now look like mine do below:
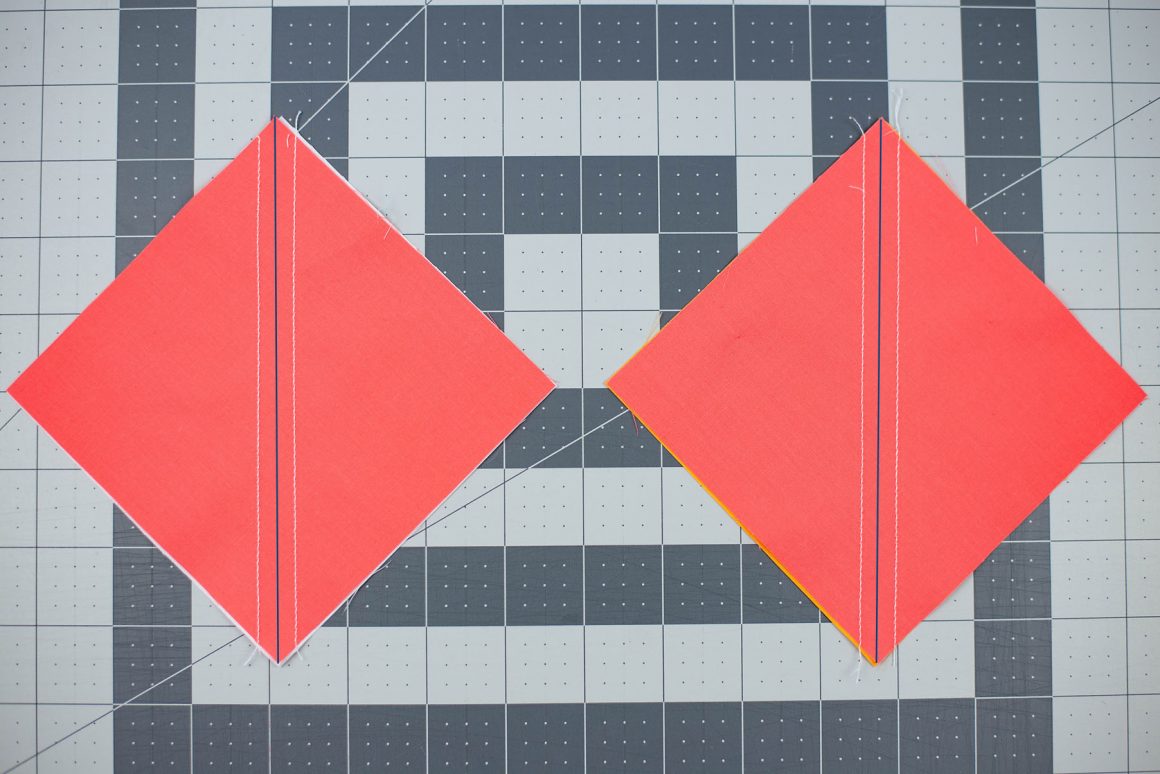
Take your rotary cutter and cut directly down the line:
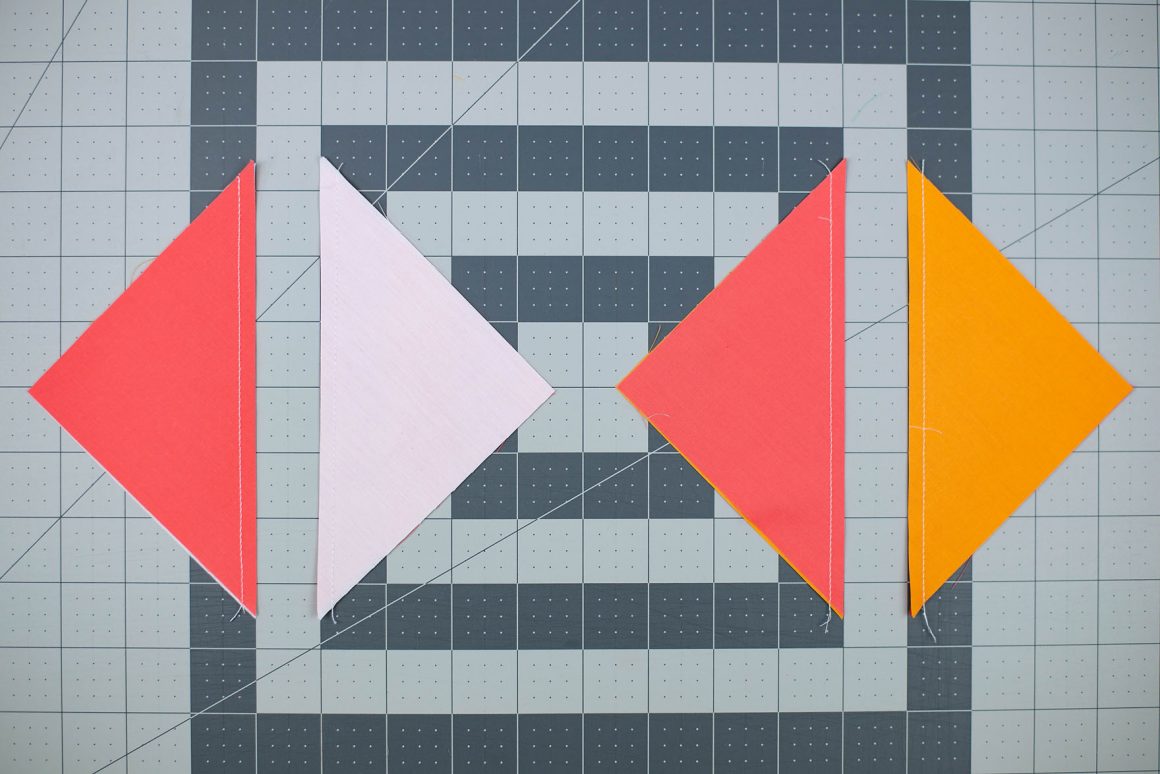
With your iron, press to set the seams and then press the seam towards the Coral Reef color on all blocks. This will give you (2) Coral Reef and Snow half-square triangles and (2) Coral Reef and Mandarin half-square blocks.
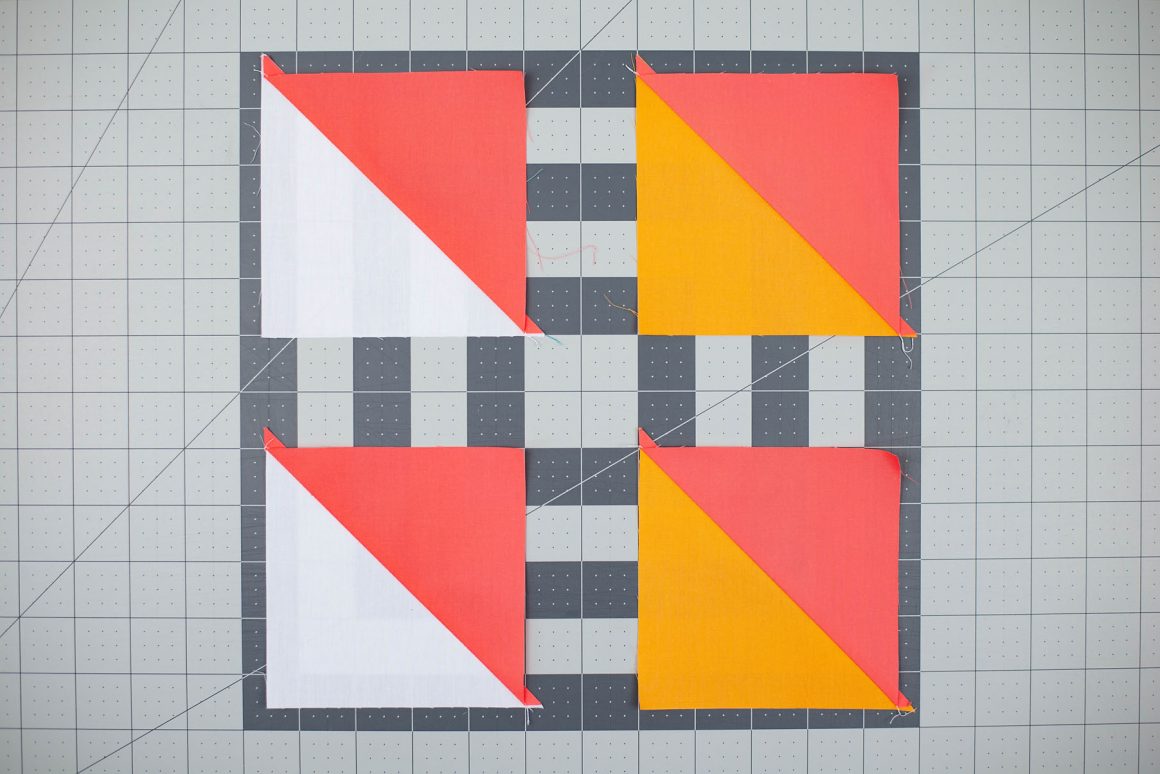
Take your (2) Coral Reef and Snow half-square triangles and with your water soluble pen, draw a line down their centers (point to point) as shown below.
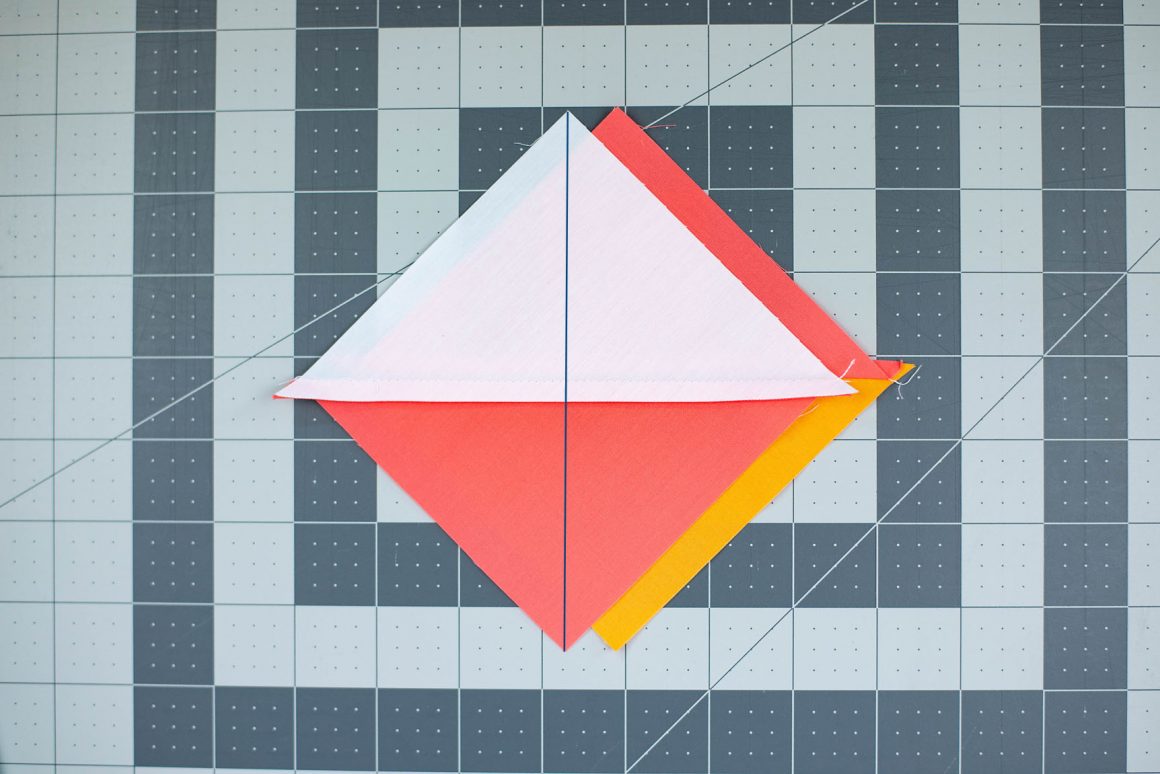
Take the half-square triangles that you just drew a line down and pair them with a Coral Reef and Mandarin half-square triangle. You will want to make sure that the Coral Reef halves are opposite of one another as shown below. Also, because you pressed the seams towards the Coral Reef fabric, you should be able to feel the center seams of the blocks ‘nest’ together. This will ensure that you fabrics line up in the block. Pin blocks to prevent shifting.
Once again, sew 1/4″ to each side of your blocks. I know it’s hard to see on my blocks below but trust me, that’s what I did. Lol!
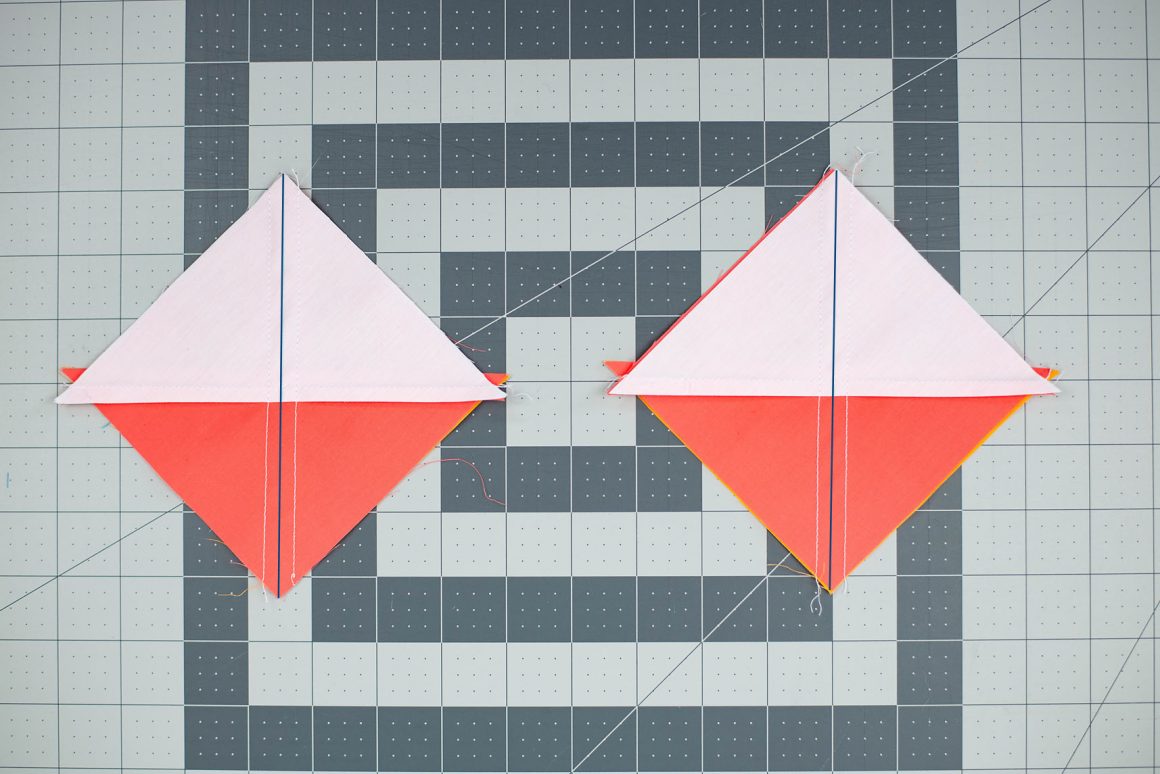
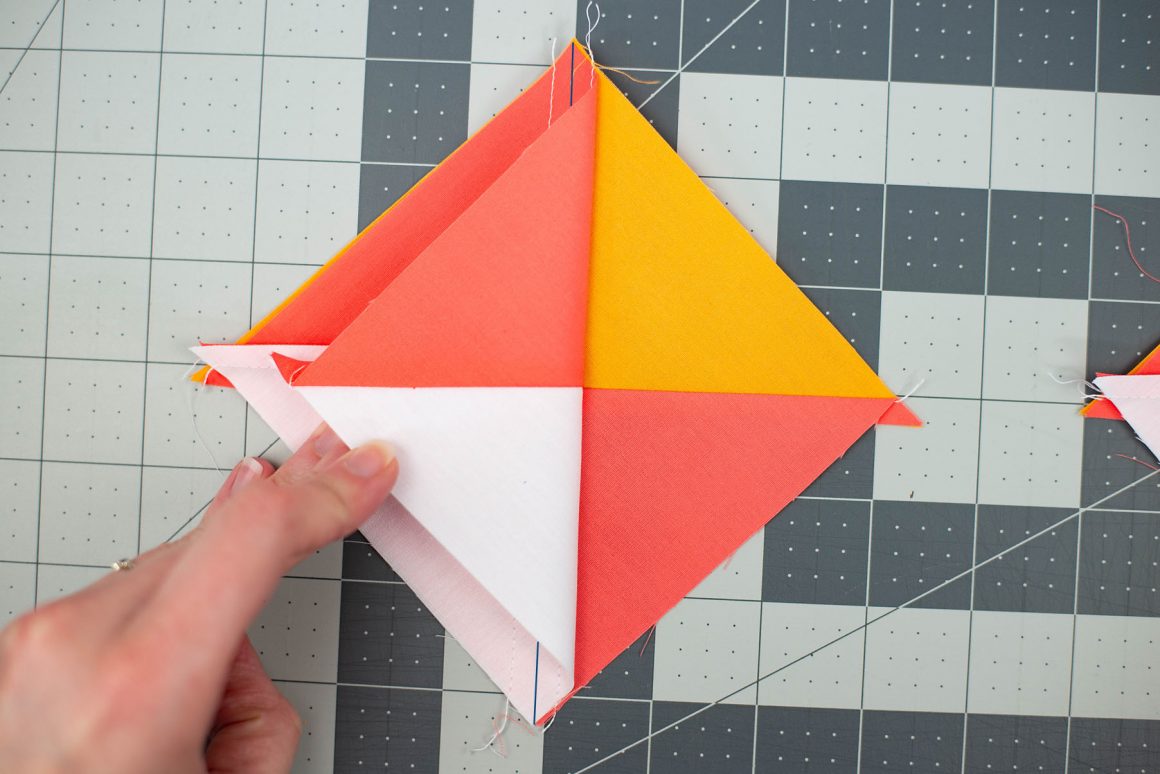
Before cutting down the line with your rotary cutter, check to make sure your blocks look like mine. Take a peek by opening one side of the seam…your Coral Reef sides should be opposite and look like an hourglass.
Go ahead and cut down the center lines. Press to set seams and then press them open. You will now have (4) quarter square triangles:
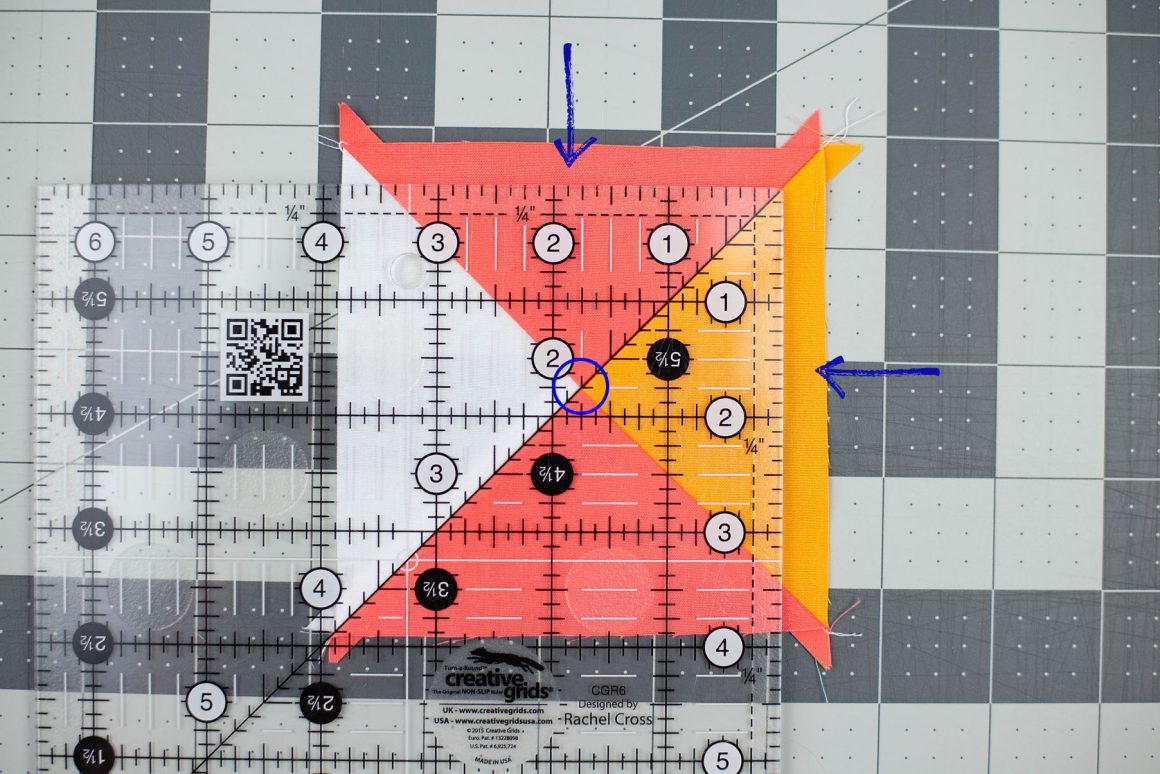
Time to square them up! A good square ruler is key to getting sharp points so I highly recommend investing in a good ruler (I waited so long to buy a good ruler and I’m kicking myself now!).
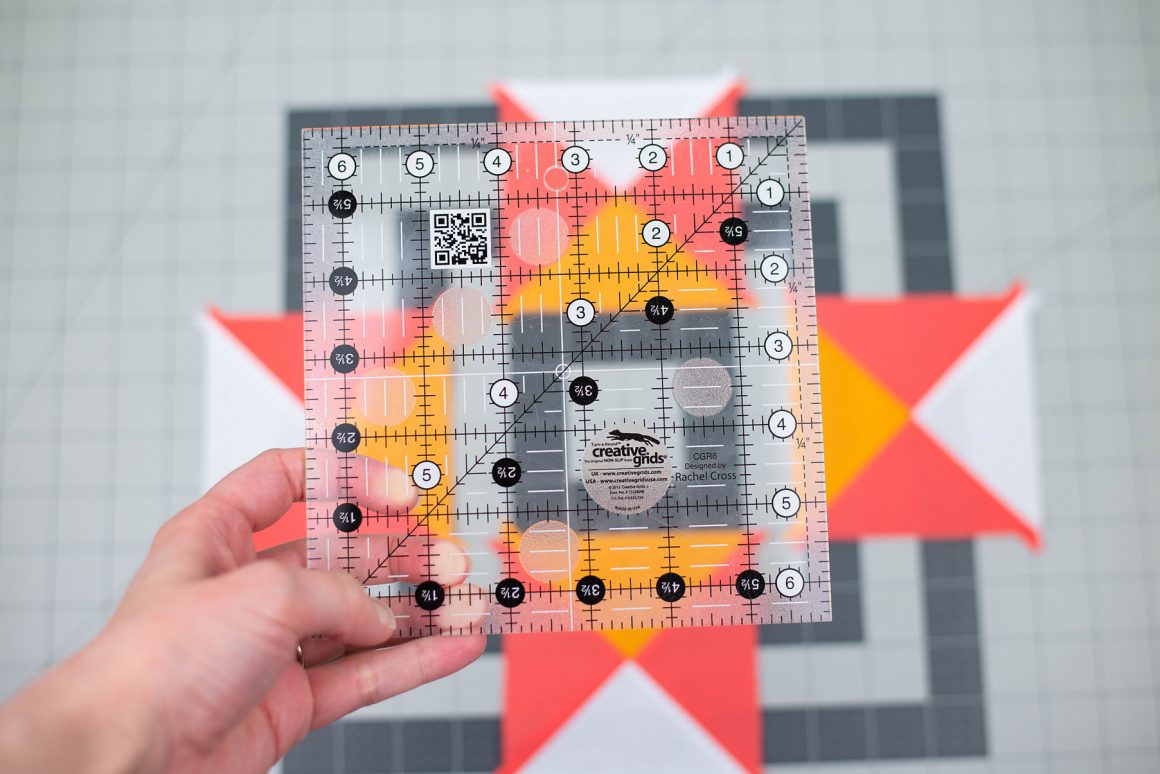
You’re going to trim your square to 3 1/2″ x 3 1/2″. But the catch is you want where all of your triangles meet to be in the exact center of the block! So take your square ruler and first make sure the diagonal line lines up with the diagonal line on your block. Then MAKE SURE the 1 3/4″ mark is lined up exactly on top of where all your points meet (see the blue circle I’ve added in the middle of this picture). Then trim off the top and right sides (you will have less to trim off than I show in my photos because I made my demo blocks in this photo a tad bigger than they needed to be).
Your block will now look like this:
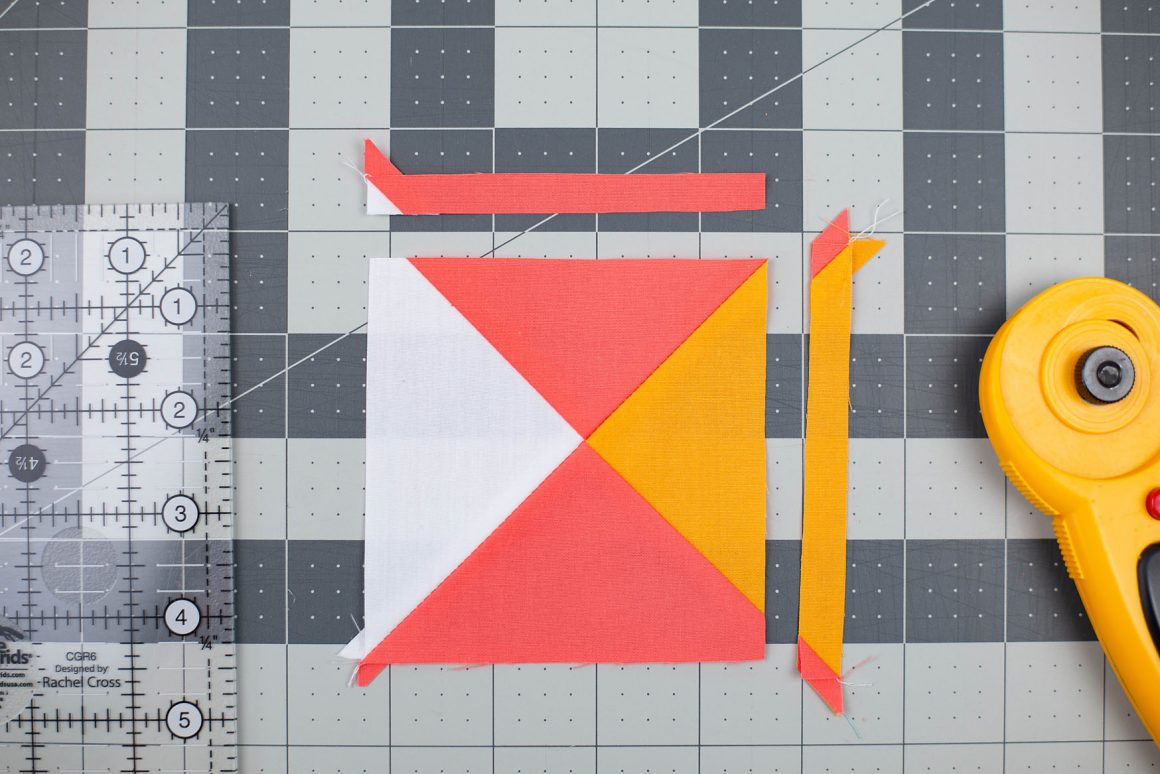
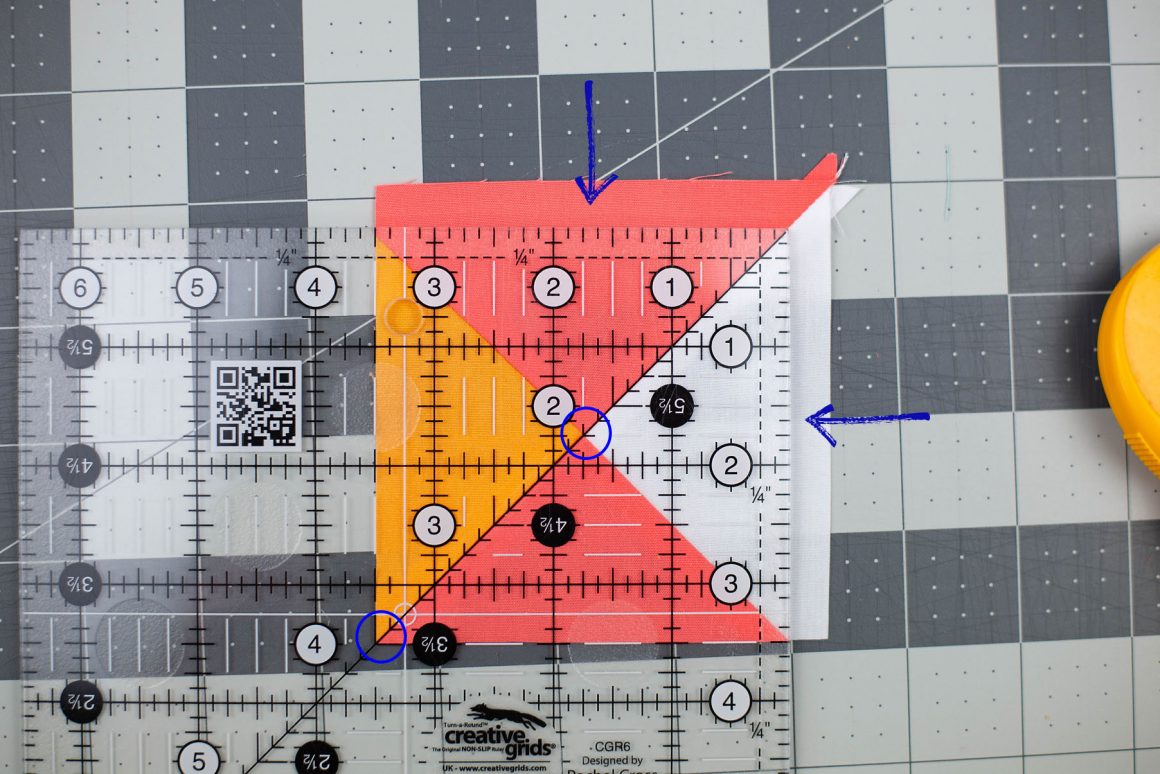
Now turn your block so that the untrimmed sides are exposed. Once again, line up the center of your block with the 1 3/4″ mark on the diagonal of your ruler (shown in the center blue circle below). Once that is lined up, the bottom left edge of your square should be directly on the 3 1/2″ line (shown in the second blue circle in the bottom left of the photo below). Trim off the remaining two sides.
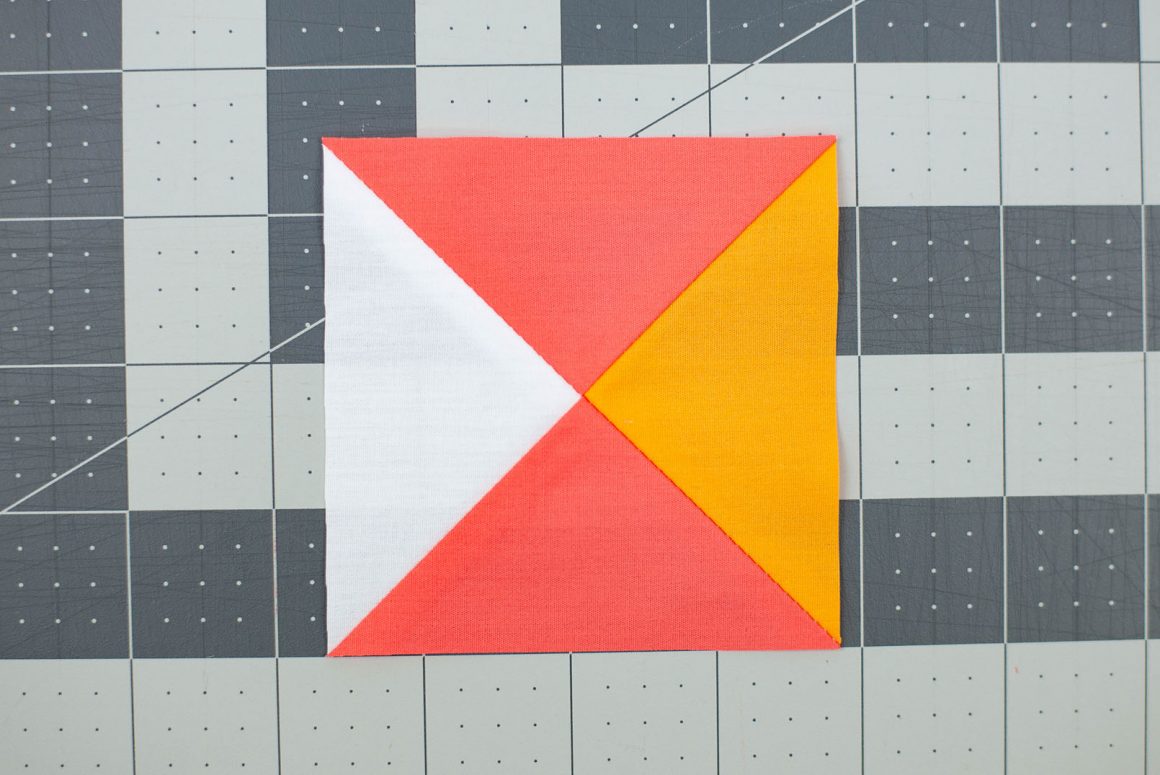
Look at those pointy corners! Your block should now measure a perfect 3 1/2″ x 3 1/2″! Repeat this squaring up process for the remaining blocks.
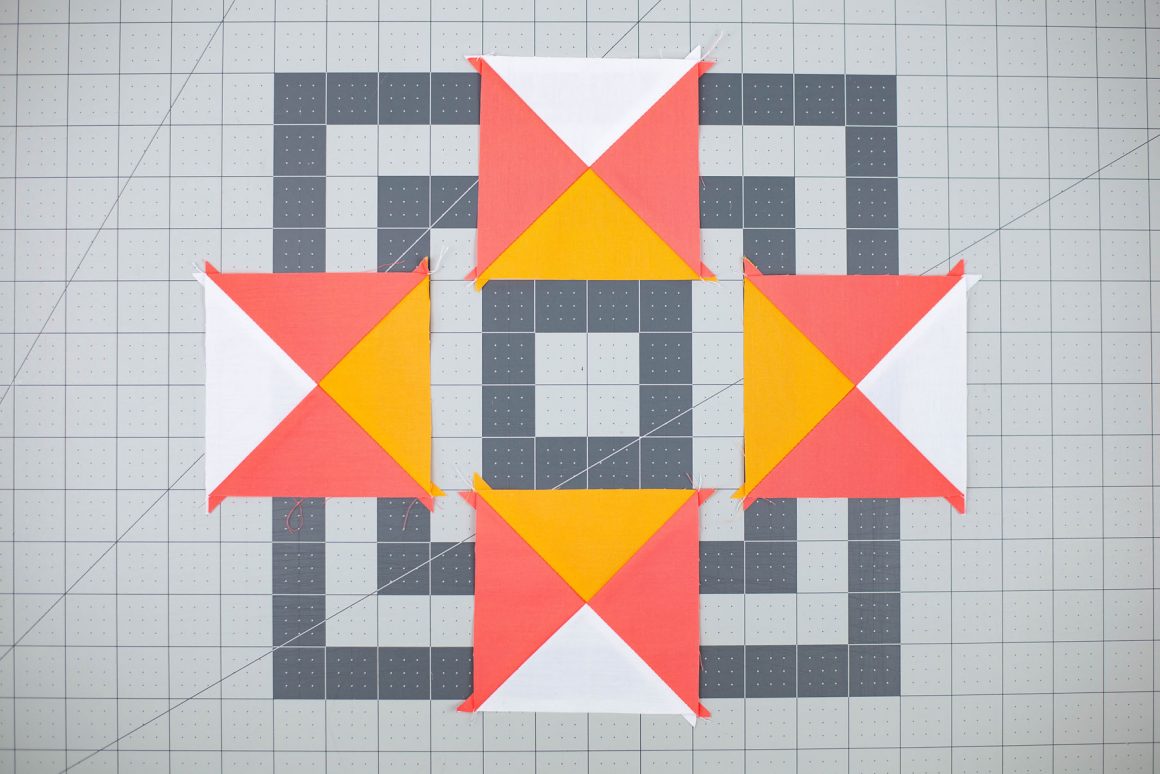
Take your (4) quarter square triangles and lay them out with (4) 3 1/2″ x 3 1/2″ Snow squares and (1) 3 1/2″ x 3 1/2″ Canary square as illustrated below.
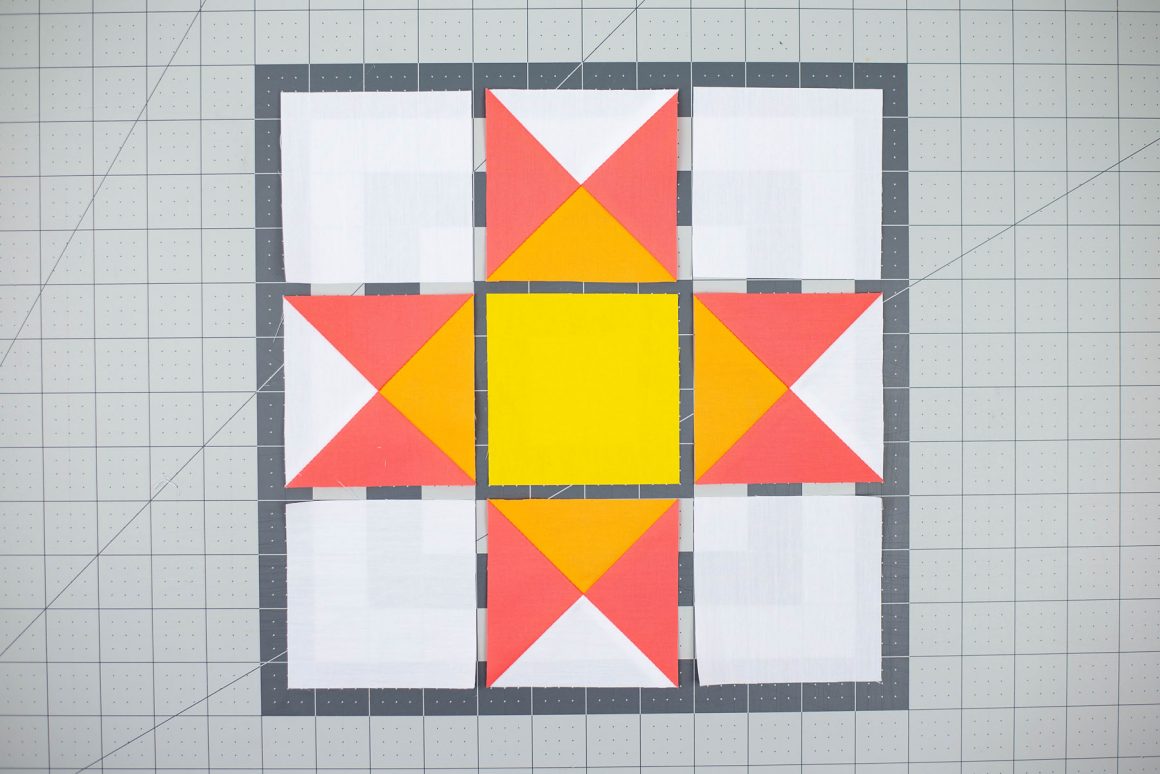
Sew blocks together in rows. Press seams open.
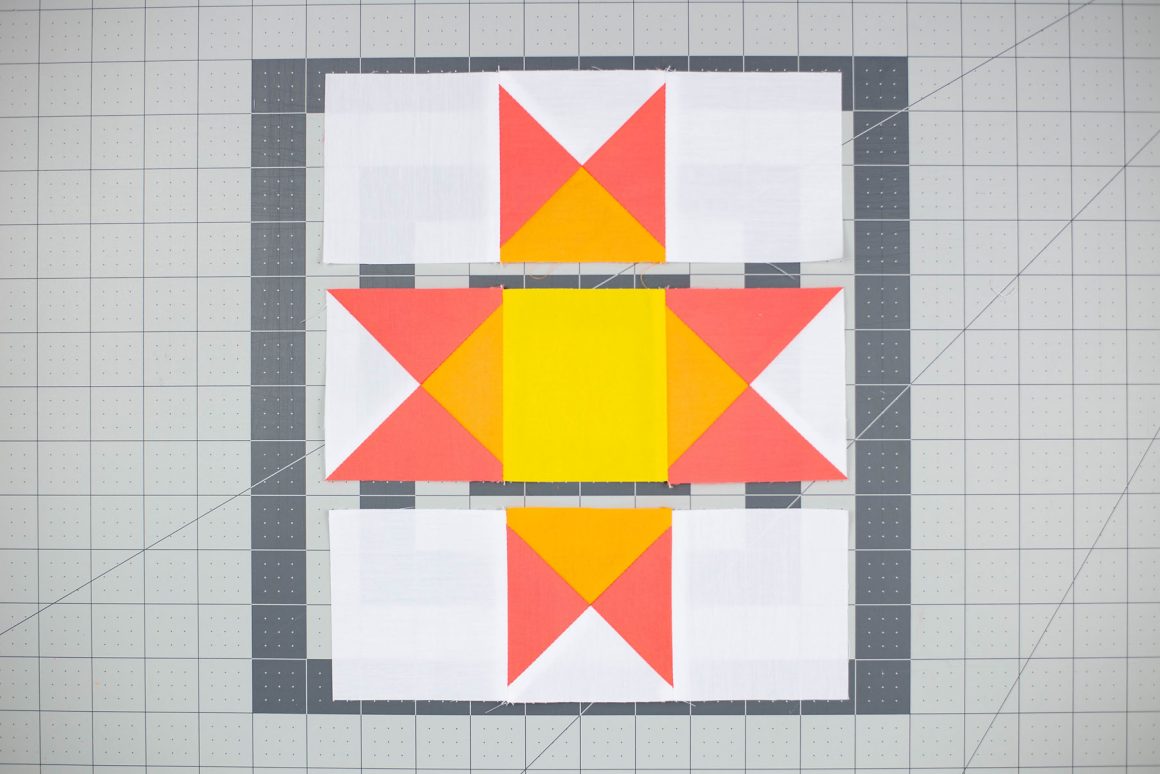
Sew rows together to make your Ohio Star block. Press seams open.
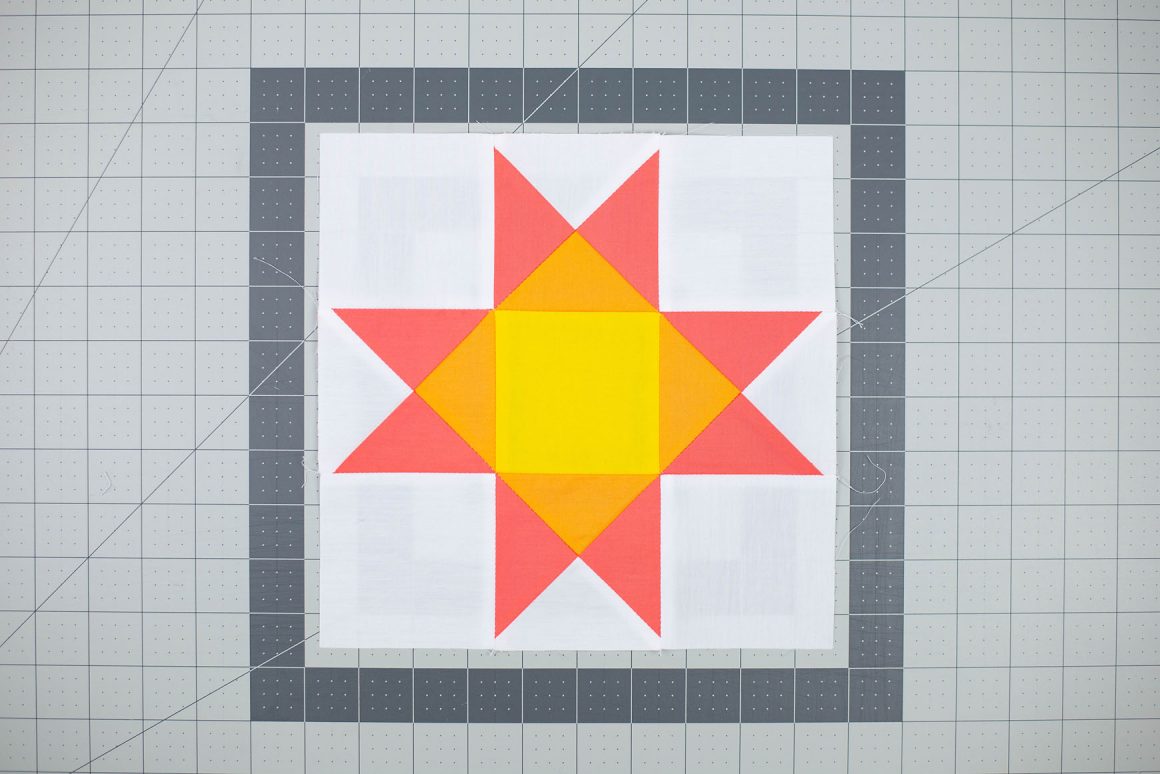
Block will measure 9 1/2″ x 9 1/2″ (before being sewn into your quilt). Repeat steps to make a total of 25 Ohio Star blocks.
Quilt Construction:
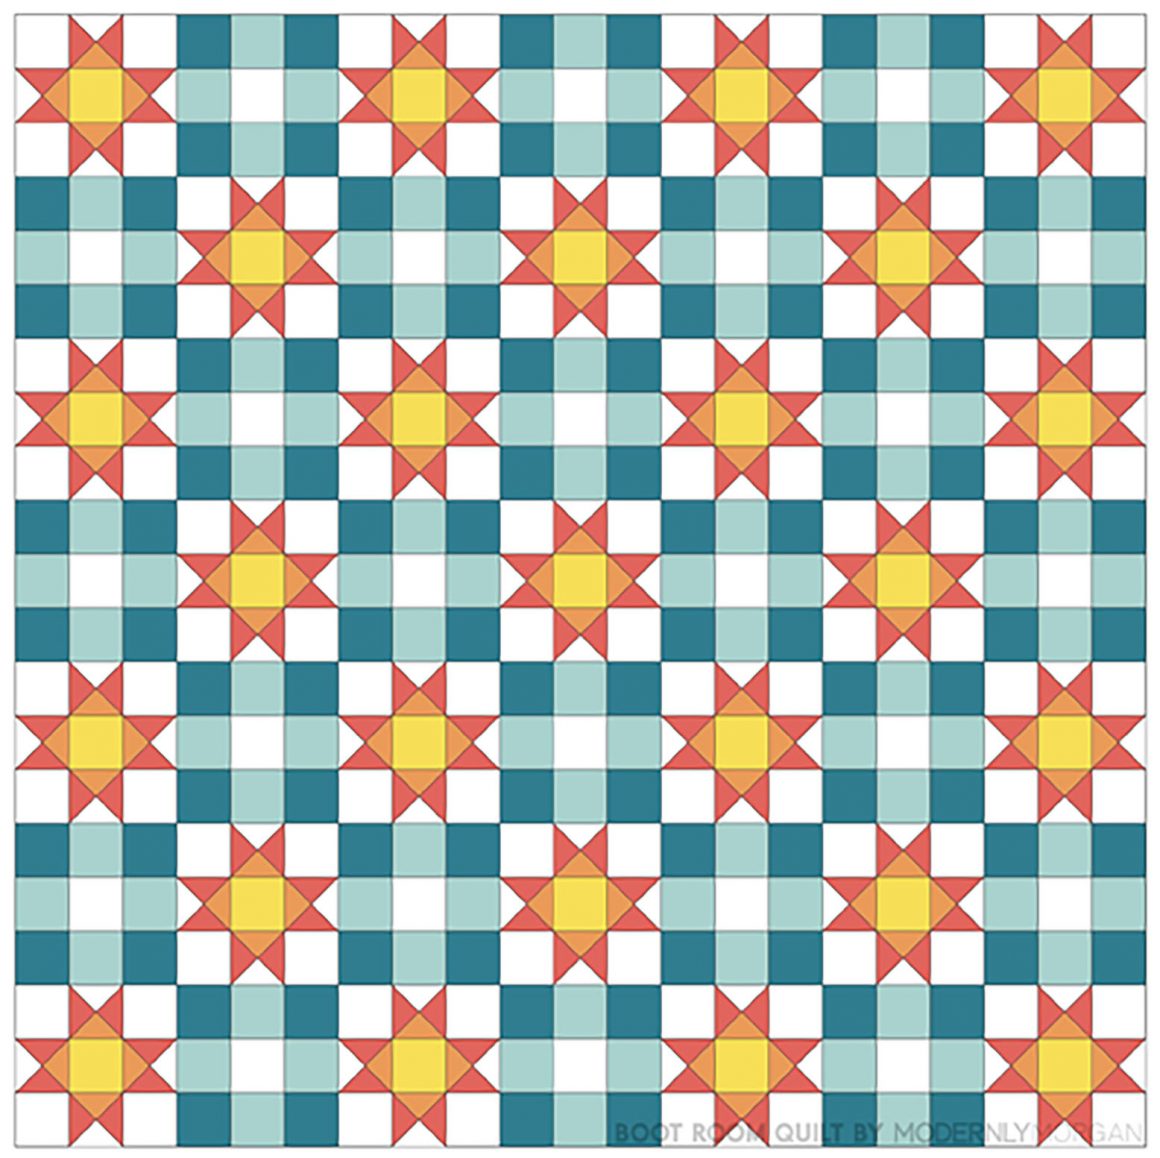
Lay your blocks out so that they look exactly like my quilt:
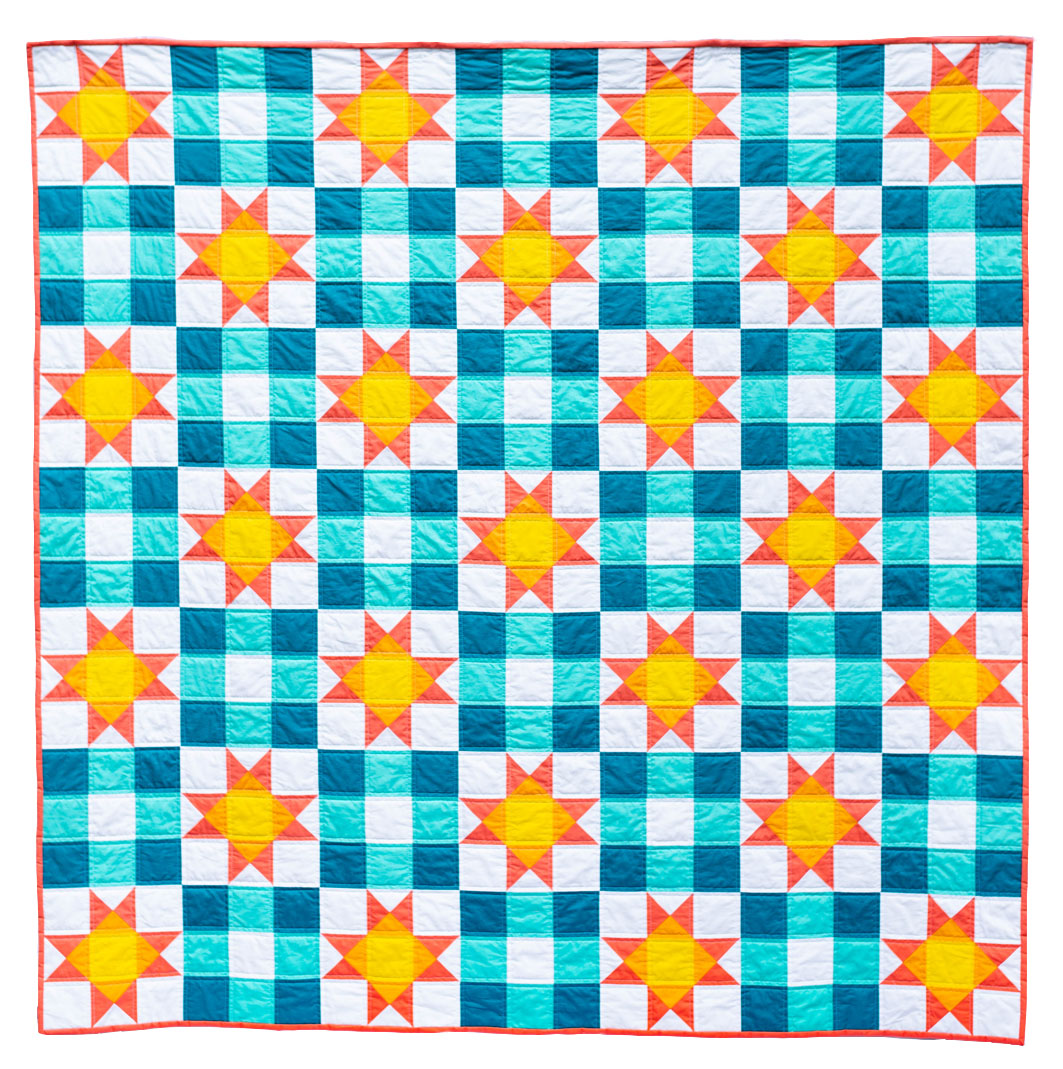
Start by sewing your blocks into horizontal rows. Press seams open. Then sew the rows together to create your quilt top. Press seams open. I recommend pinning where every seam meets. This will guarantee that everything lines up.
Piece together your backing fabric by cutting it in half and sewing with a 1/2″ seam allowance. Press open. Create your ‘quilt sandwich’ by laying your backing fabric right side towards the floor, batting in the middle and quilt top facing up, centered on top. Baste and quilt as desired, then bind using your Coral Reef WOF strips you cut earlier.
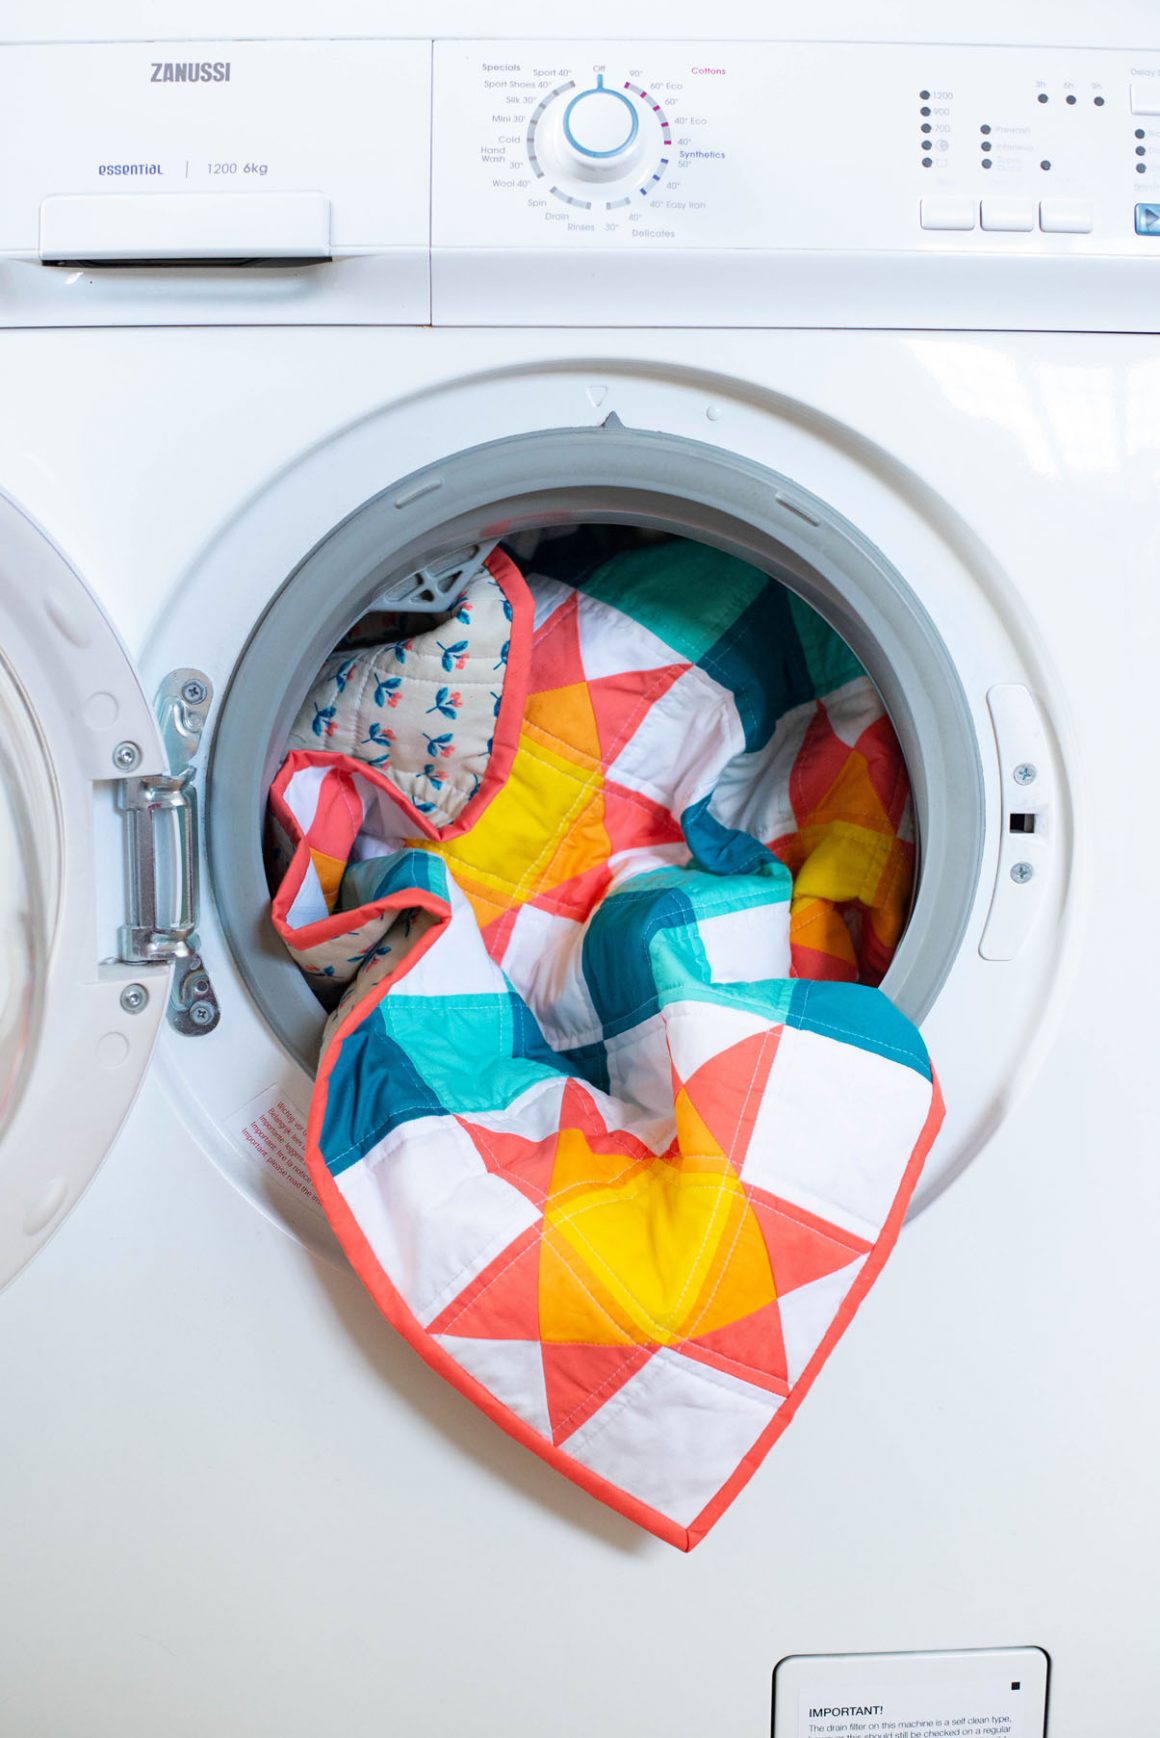
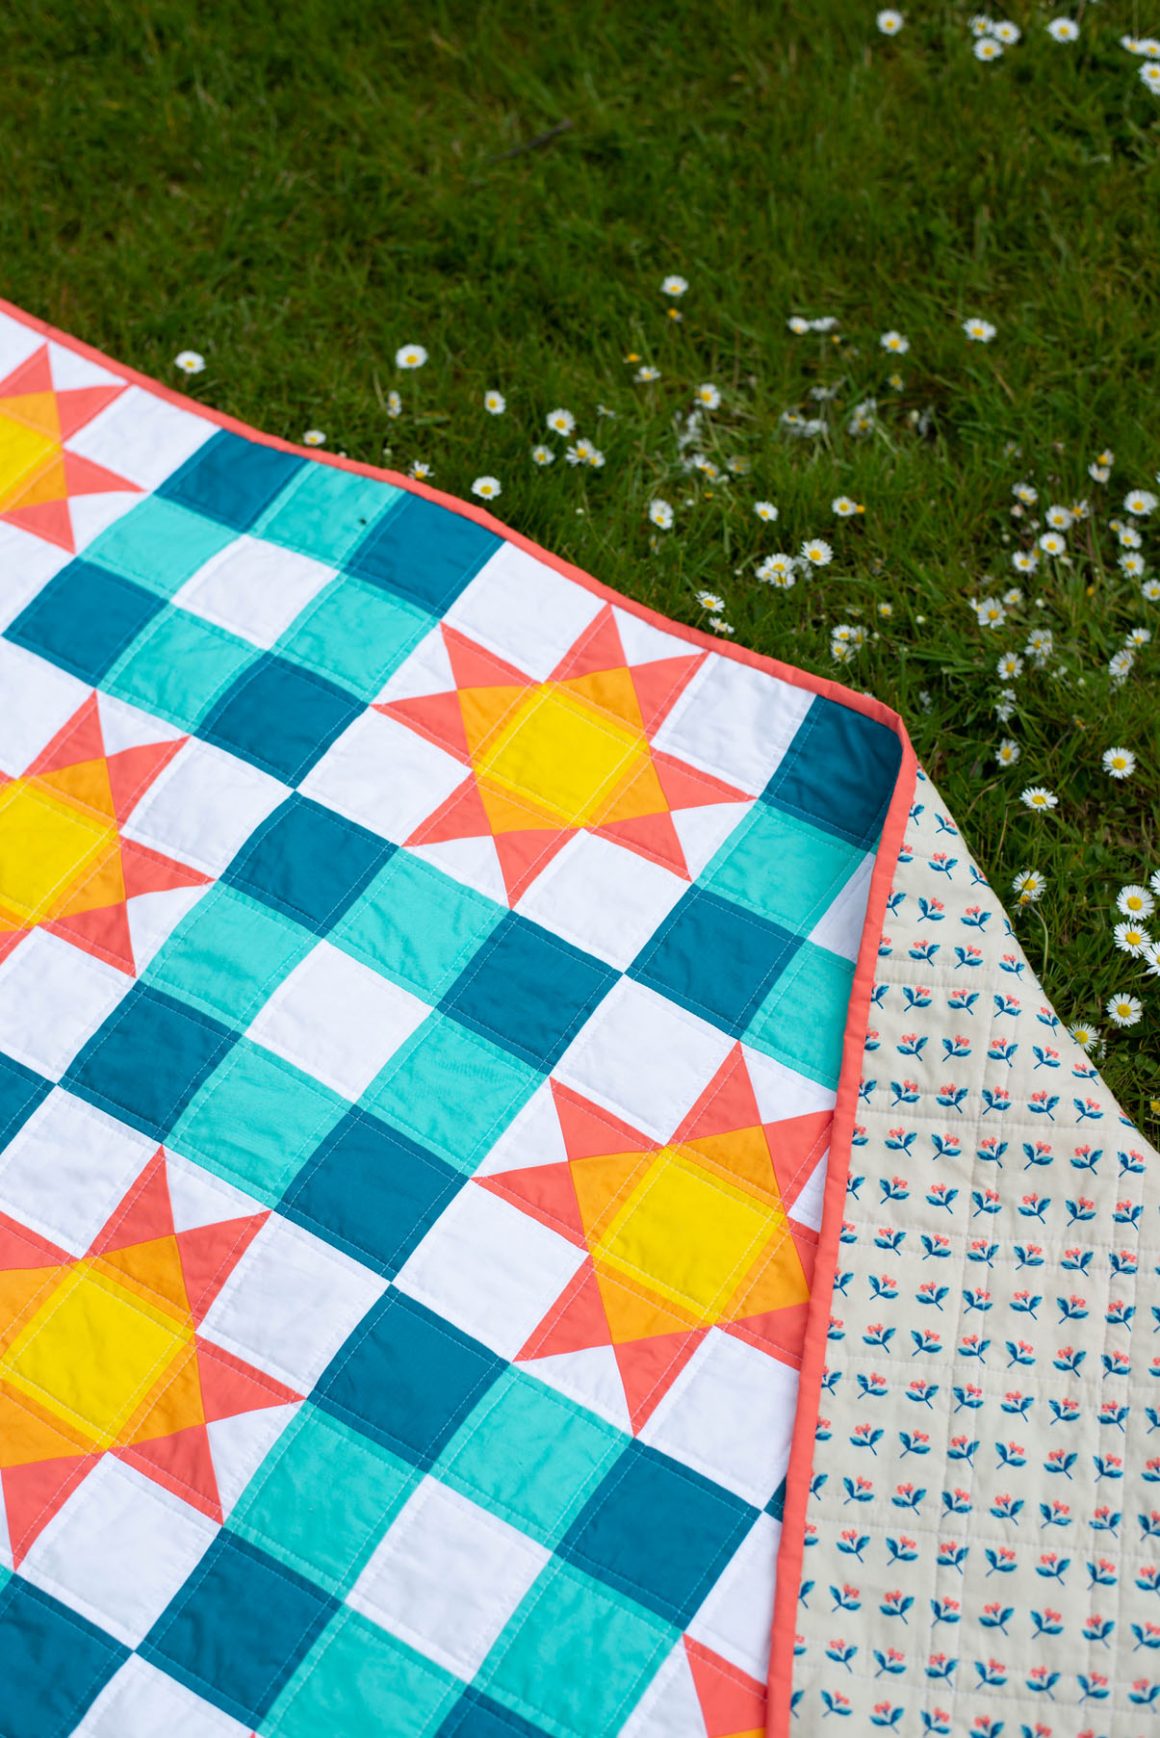
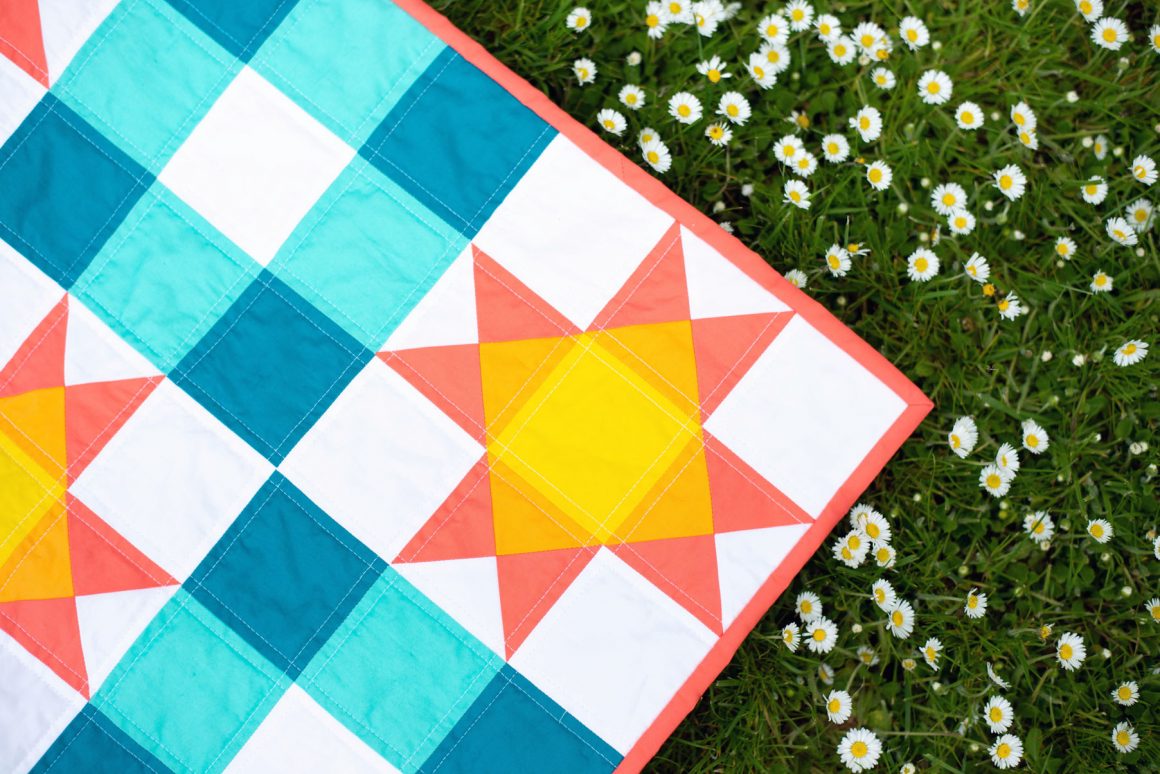
Now cozy up to your Boot Room quilt and be sure to share it on instagram with me! #BootRoomQuilt
**This pattern is for personal use only and you are not permitted to repackage/sell this pattern.**

Hi Morgan! I found your blog when googling PCS-Lakenheath because we -may- be getting orders this week! Its a government job, not military, but similar. And then I see youre a quilter! I love quilting- well, I love piecing, and I love looking at quilts, but I never finished a whole quilt. Hopefully someday! Just between working and school and knitting (which i can do while watching TV) quilting has fallen by the wayside.
Anyways im really glad to have found your blog, ive already learned a little about dual voltage machines from your Bernina post, and hope you keep blogging! Wish us luck on getting Lakenheath, I’ll tell you when we get orders in hand 😀
Thanks so much for this fabulous free pattern, Morgan! When I track down a quilt shop that carries these AGF Pure solids, I’ll be substituting Plum Preserve, Verve Violet and Festival Fuschia for your Coral Reef, Mandarin and Canary… It should look smashing!
~Diana from Toronto (Canada)
I saw this quilt on your Instagram and fell in love, one of the most beautiful quilts I’ve ever seen. I’m a beginner now but can’t wait to make it one day