
Quilt, Quilt Blocks, Tutorials
Four At A Time Flying Geese Tutorial
In the world of quilting, there are tons of quilts that have Flying Geese blocks. Actually, my quilt pattern, the Framed Folk quilt has a bunch of them so I figured I’d put this flying geese tutorial out there to help those of you learn this simple and fast method.

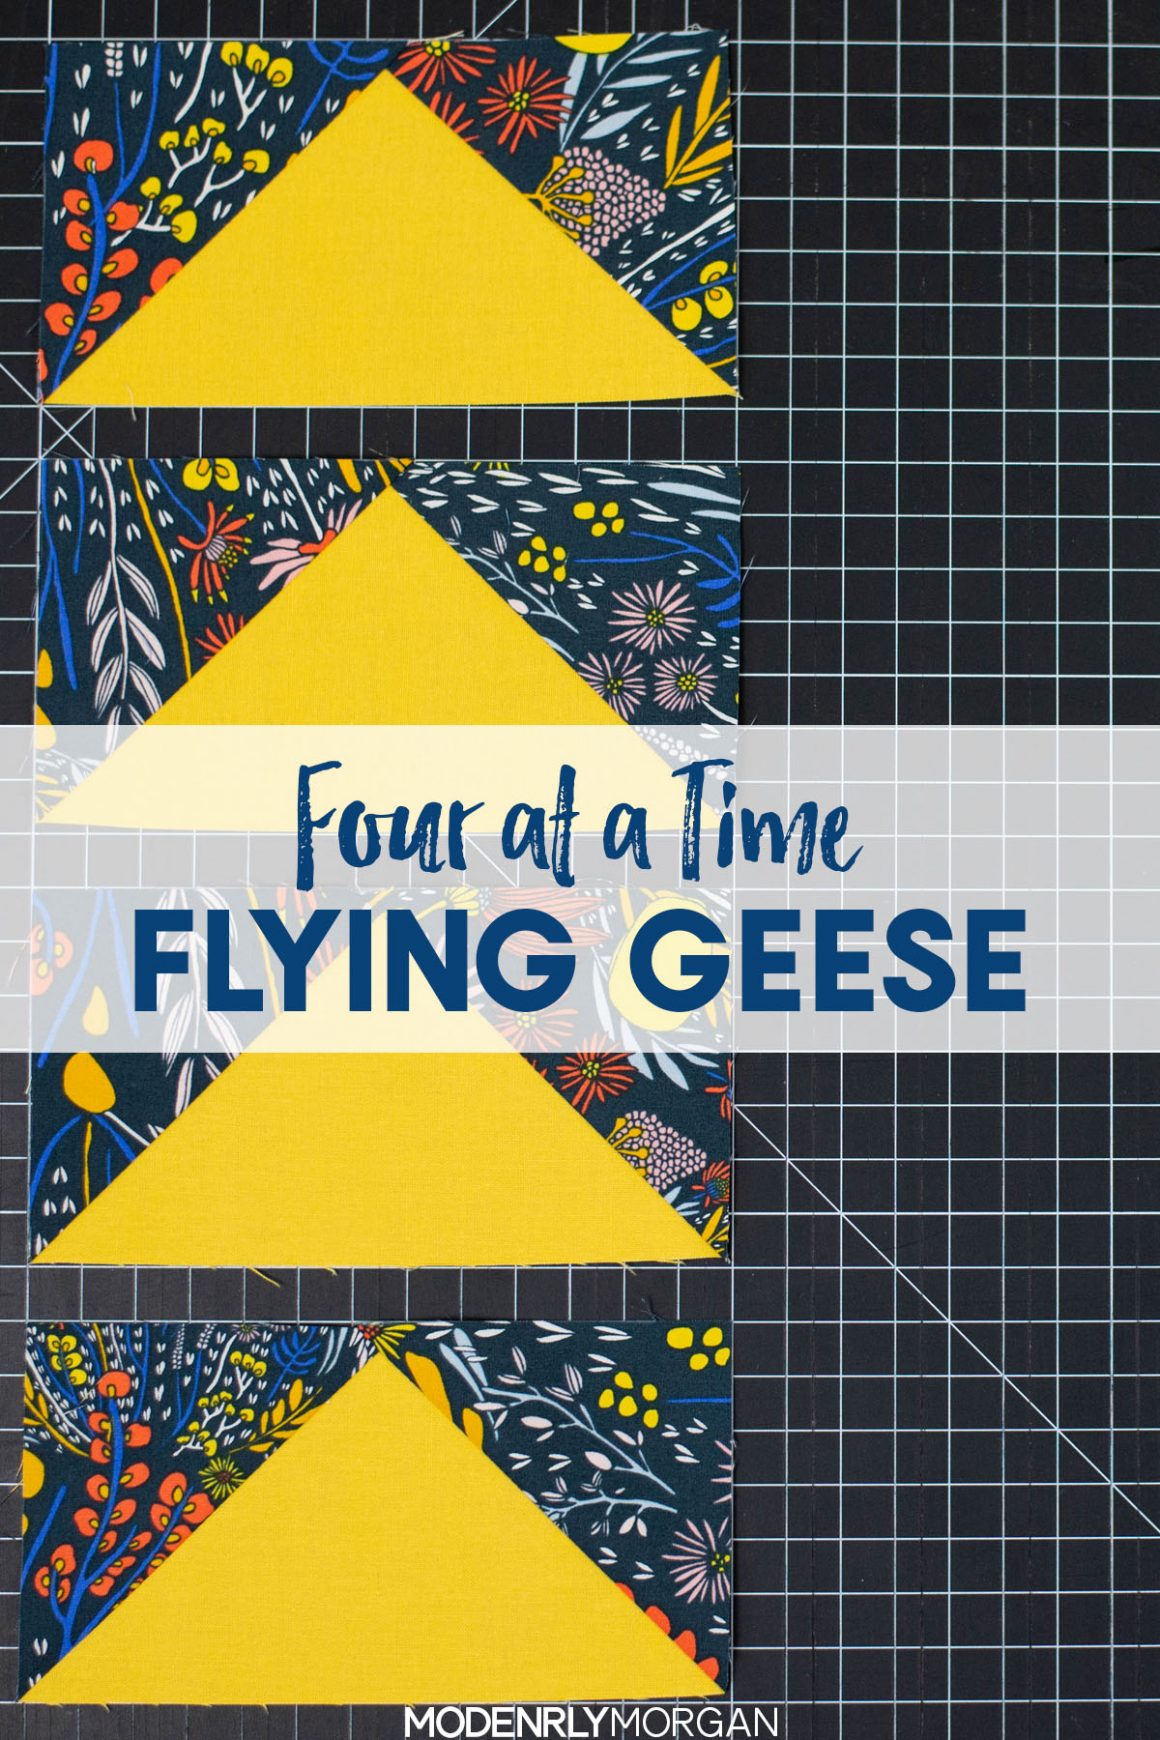
Oh, and I’ve taken a million photos detailing each step so if you’re a visual learner, you’re in luck!
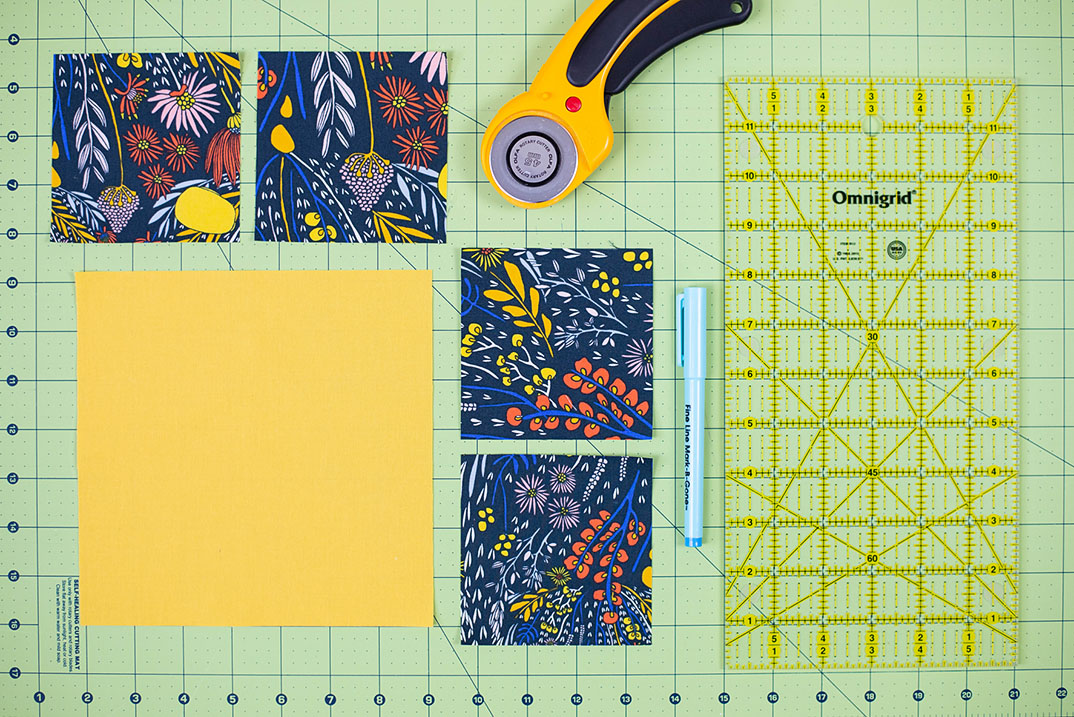
Here’s what you’ll need:
•fabric
•rotary cutter
•water-soluble pen
•cutting mat
•ruler
•pins (these are my favorite!)
Now let’s get down to business!
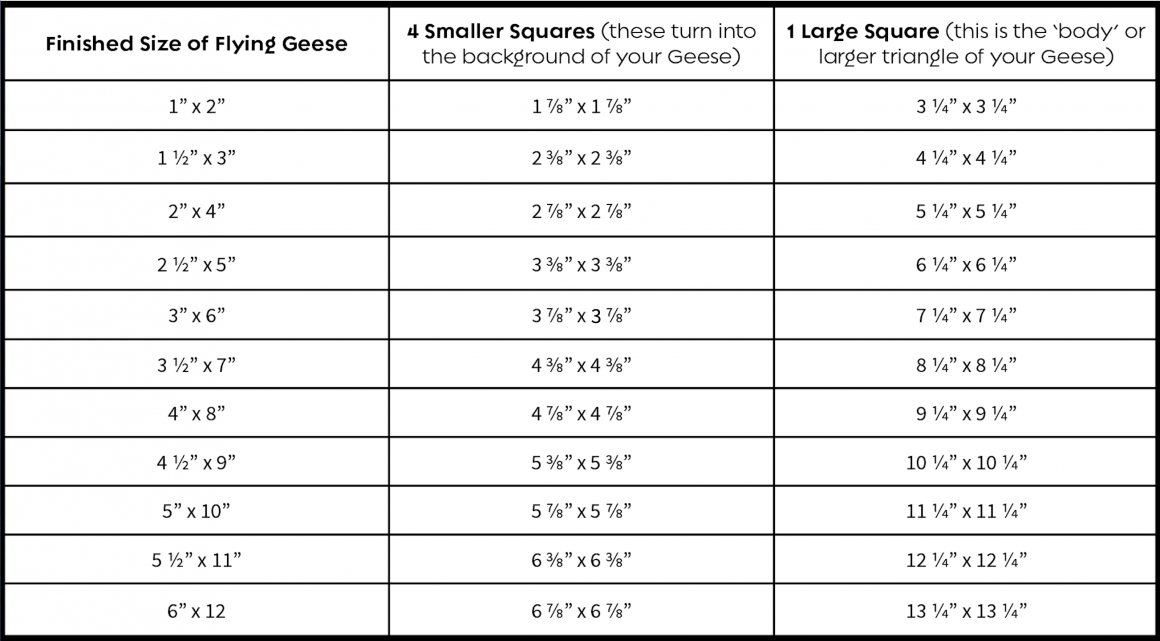
This chart breaks down Flying Geese sizes. Find the size you need on the left and cut your coordinating blocks accordingly.
Take your 4 smaller blocks and with your water-soluble pen, draw a line right down the center with your ruler as shown below.

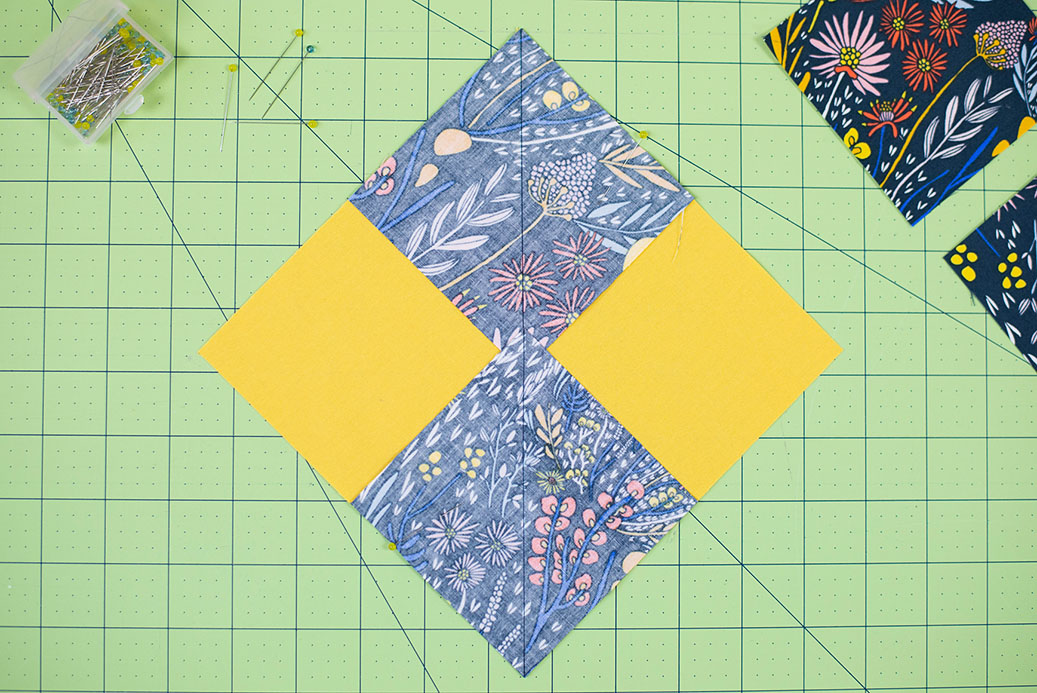
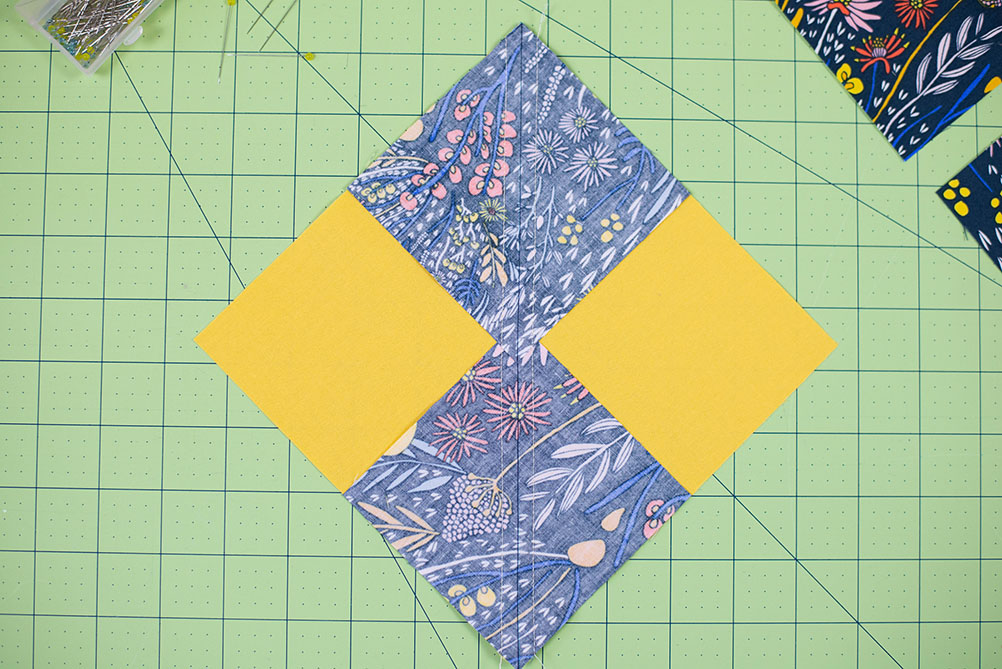
Now, take two of those smaller squares and place them RST (right sides together) with your larger square. They will overlap a tiny bit in the middle and I want you to make sure you have them perfectly lined up on the corners. I use one pin on each square to hold them in place.
Sew 1/4″ lines on each side of the line you have drawn. The edge of the foot on my machine is 1/4″ so it’s easy and fast to do. Just use your quarter inch foot and you’re good to go!
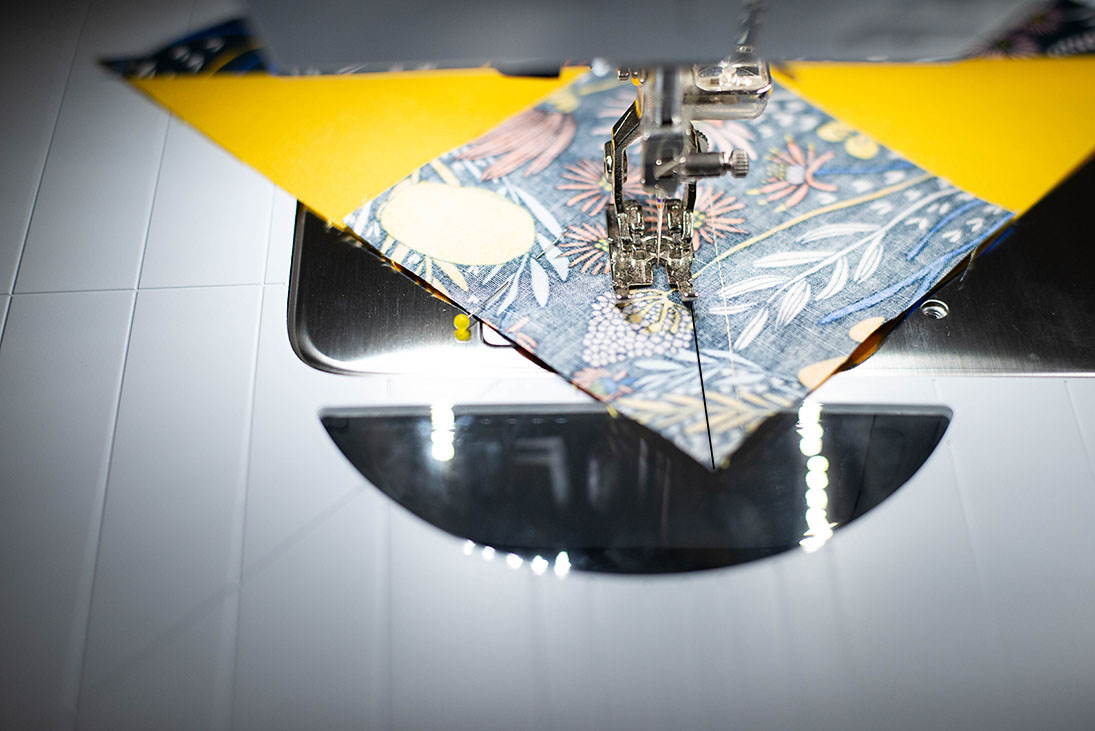
Your block should now look like this: stitching, drawn line, stitching. 😉 I know, it’s a tad hard to see…I’ll do better in the future!
With your rotary cutter and ruler, cut directly down the center on top of the line you drew with your water-soluble marker. Some will say you can use scissors…and I guess you can but it’s way easier if you have rotary cutter. So do yourself a favor and buy one if you haven’t already!
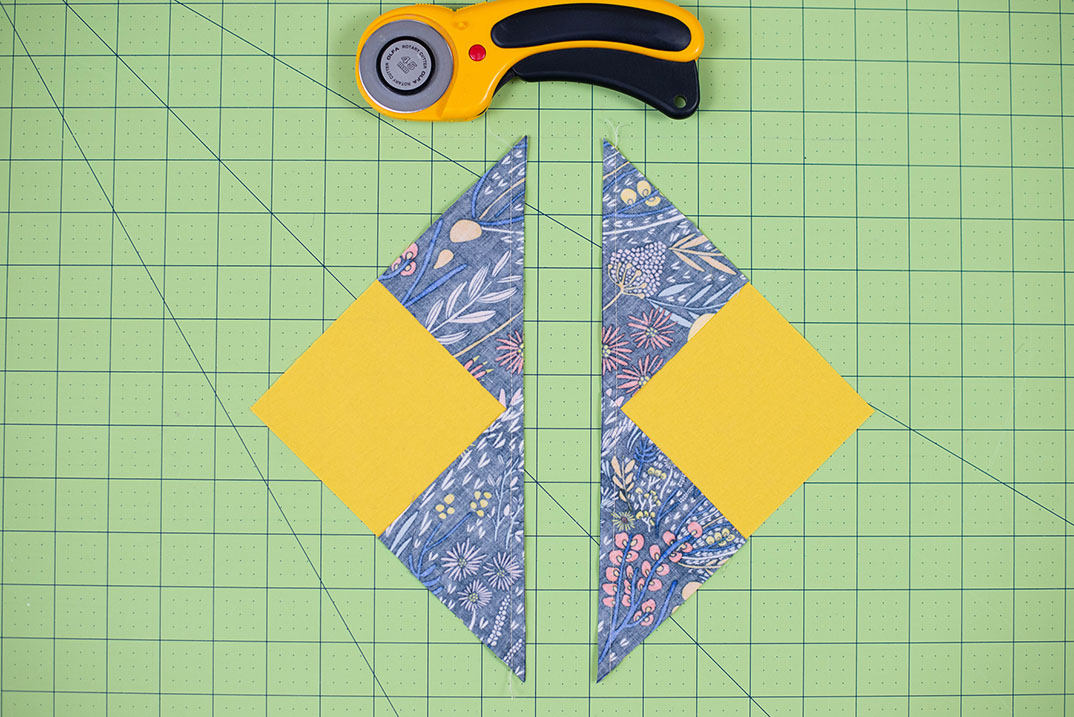
Take your two pieces and press the seams to set them. Then, press the seam towards the two smaller triangles. I’ve shown you below what the front and back should look like (note how the seam is pressing up towards the two smaller triangles…most other tutorials never show the backs and it would drive me nuts when I was learning to quilt, lol!).

It’s now time to grab those remaining two smaller squares that you drew lines on earlier. Take one and and lay it RST on the top corner of the larger triangle. Pin and then repeat with the other smaller square and triangle unit. See both photos below.
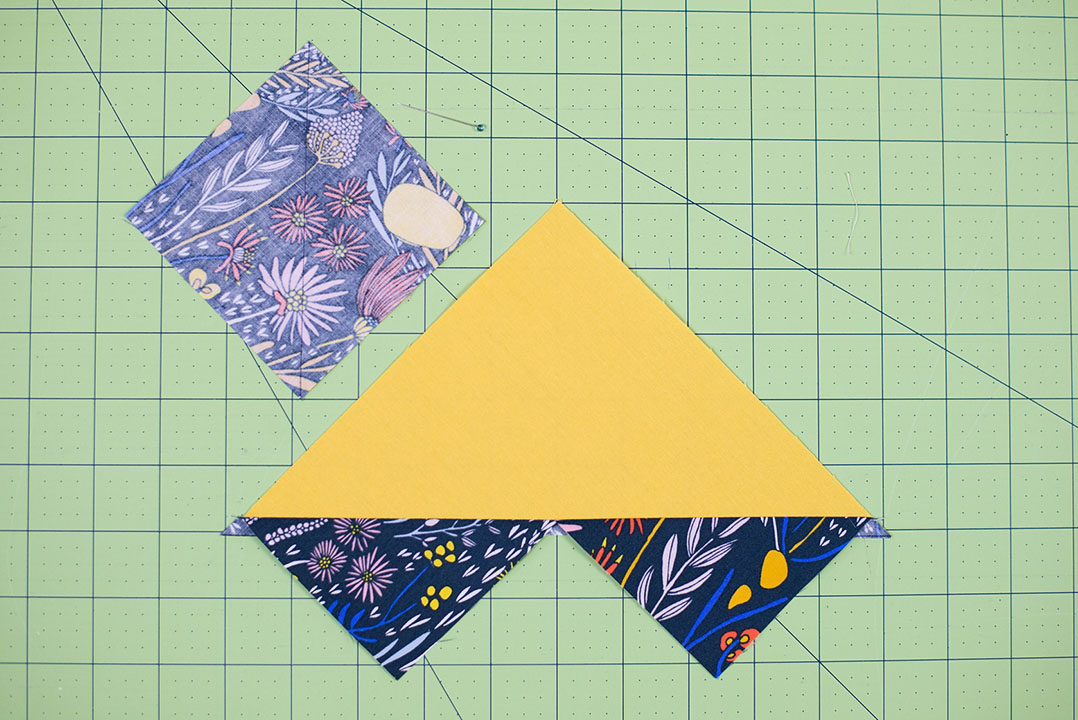
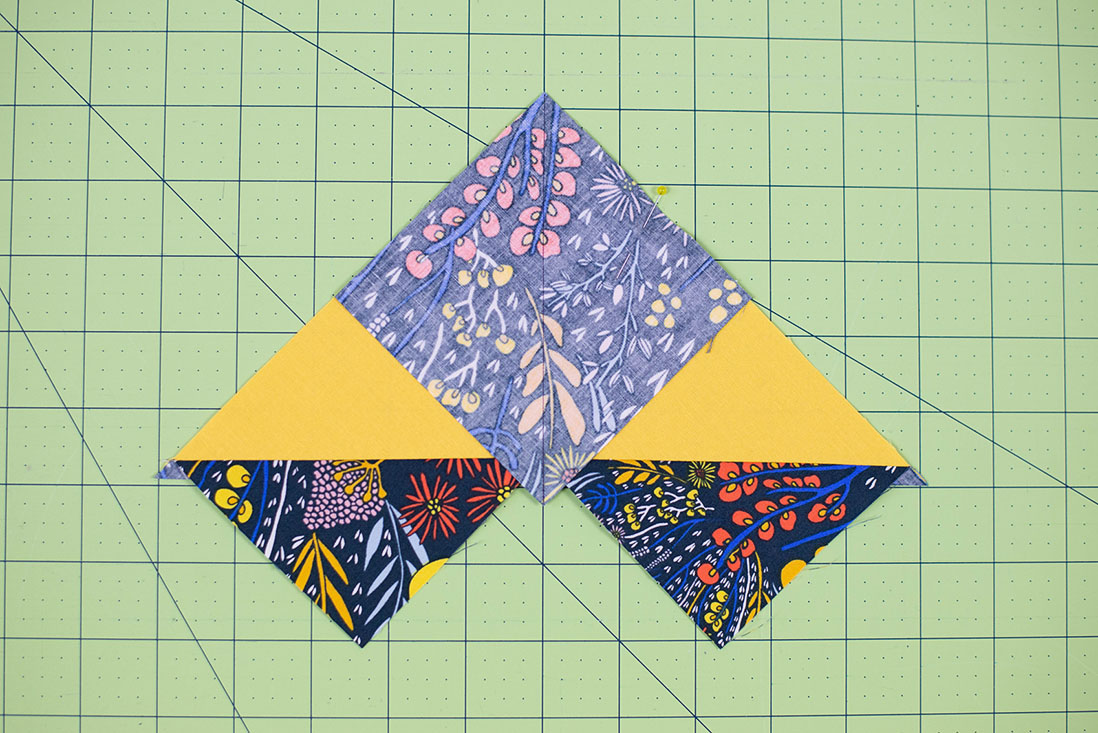
Just as before, sew 1/4″ on both sides of the drawn line. I like to start the first side by sewing from the top and then going down towards the smaller triangles. I just find that it’s less bulk that way, my machine handles it better and it’s flatter to sew the opposite direction for the second seam. Hopefully my rambling wasn’t too confusing.
Ta-da!
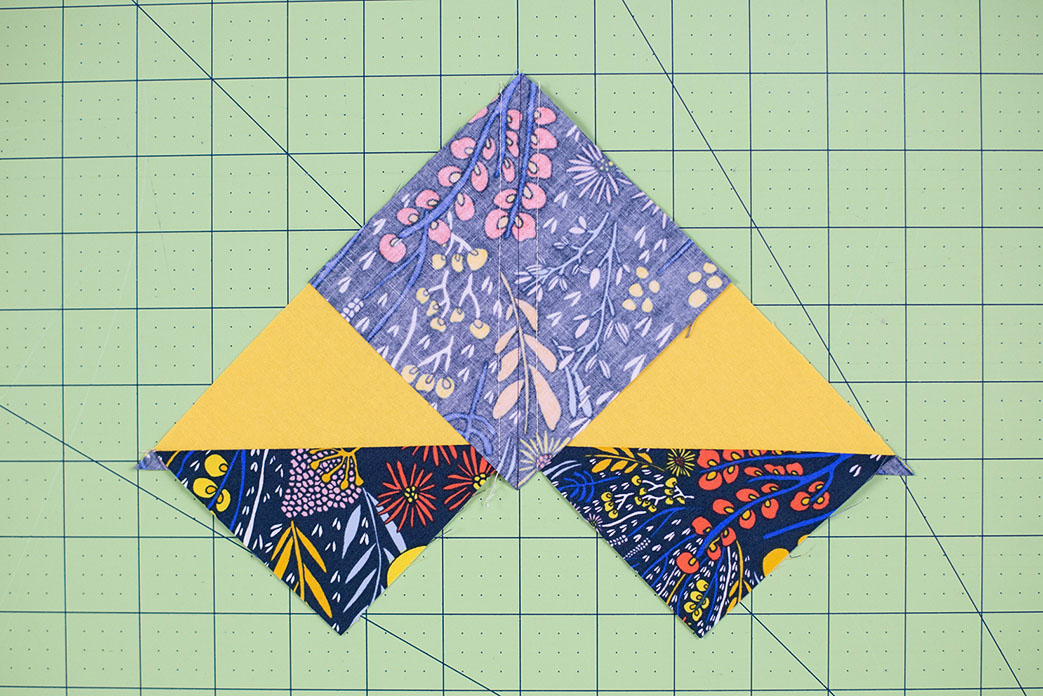
Take your rotary cutter and cut down the line between the seams on both units and you’ll end up with 4 smaller units (Flying Geese). Press the seams to set once again and then press the seam towards the smaller triangle. Front and back picture illustrates what your pieces should now look like.
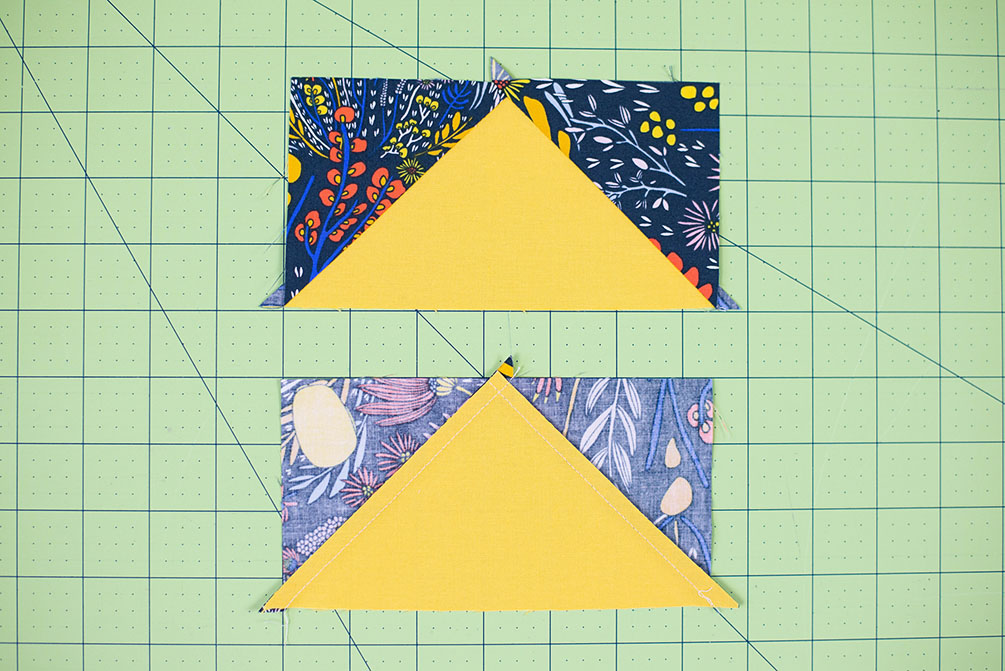
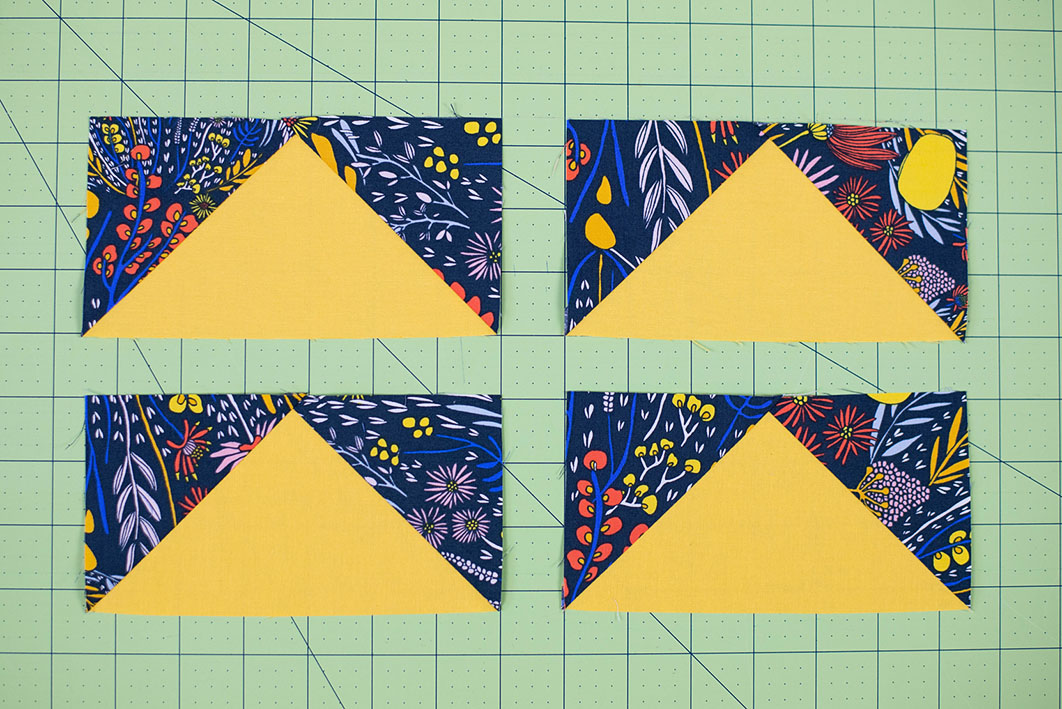
Trim off the ‘dog ears’, those little tabs hanging off the sides and you’ll be left with 4 perfect Flying Geese!
Where is this gorgeous fabric from???
Hi Melanie! It’s Leah Duncan’s Morning Walk collection. It’s older so it may be harder to track down but it’s gorgeous. These were all the prints: https://liveartgalleryfabrics.com/morning-walk/
That’s so awesome! Thanks for sharing the technique!
Awesome instructions! I made my first four trial geese and it was so easy to follow! Thanks so much.
WOW! Great instructions. I’m a retired teacher, and a visual learner, so I should know!
I’m in the process of trying this now! I watched video but your pictures and explanation is excellent and just what I needed! Thanks so much!
Thank you! Great tutorial.
You’re a great teacher. The explanation was very clear and I appreciate the pictures.
Best ever directions – I have seen this but it never made sense – duh – your directions made it all so clear! Thanks!
Great directions and photos! I made 32 last night and it went very quickly!
Working on my firs quilt block with flying geese. Used this tutorial all along the way!! Thanks