
paper piecing, Quilt, Tutorials
How to Foundation Paper Piece – A Tutorial
Have you wanted to learn how to foundation paper piece (FPP) but weren’t sure where to start? Well, I’ve got the tutorial for you and it’s paired with my FREE Lucky Spin quilt pattern so that you can try out your new skills!
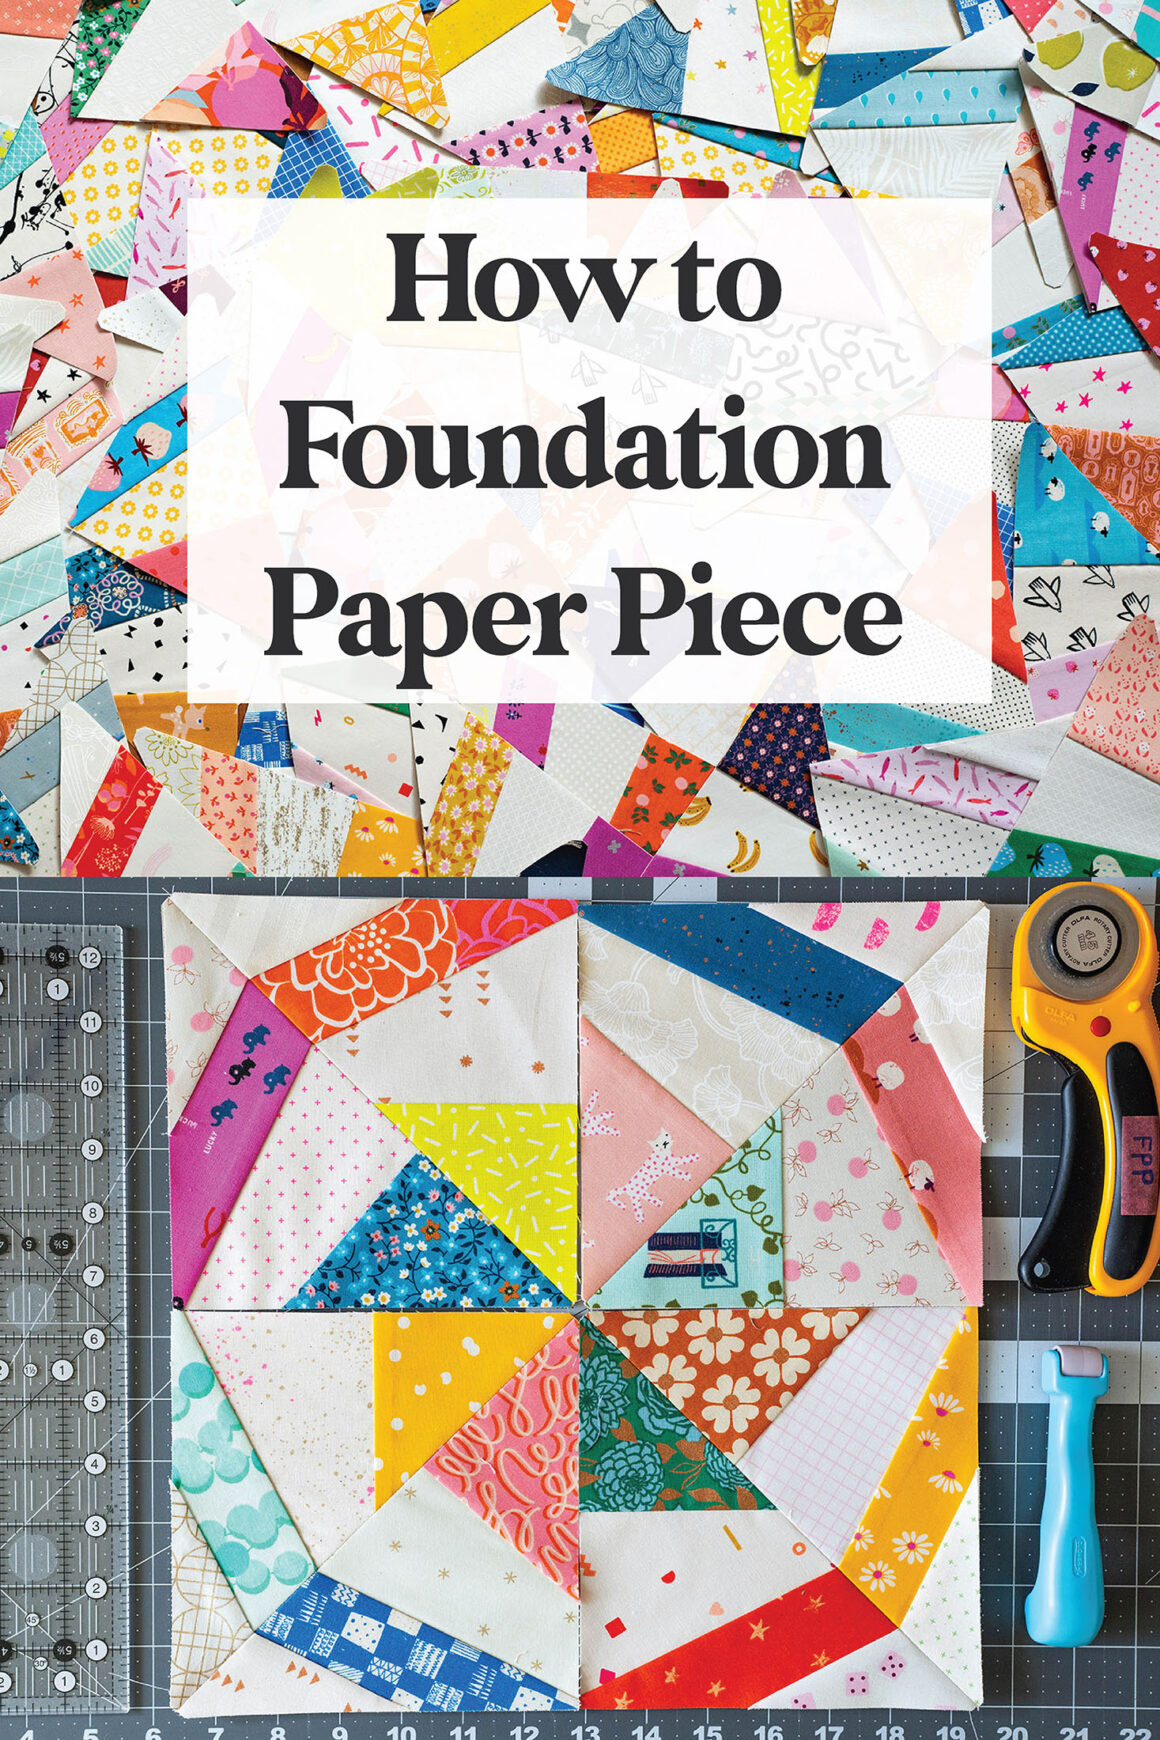
Foundation Paper Piecing, also known as FPP, can look pretty intimidating! But let me assure you that it’s not! I remember early in my quilting days when I discovered some gorgeous FPP blocks on Instagram and I was amazed. I wanted to learn but was so overwhelmed that I put it on the back burner. I eventually tackled it and kicked myself for not trying it sooner. It really is quite easy once you master the basic steps that I’m going to teach you today. And I promise, before you know it, you’ll be sewing alllll the fun FPP blocks out there!
Let’s start with the basics that you’ll need:
- Sewing Machine – I love my trusty old Juki…it’s a workhorse!
- Needles – 80/12’s work perfectly.
- Cutting Mat
- Pins – these are my favorite since they won’t melt!
- Thread – basic 50wt quilting thread is perfect.
- Rotary Cutter – I have two, one for fabric and one just for paper.
- Ruler – Creative Grids are the best and they won’t slide!
- Iron – Chi…hands down!
- Ironing Board
- Paper – you can get away with printer paper but I HIGHLY recommend FPP paper.
- Seam Ripper – because, you know…we all make mistakes.
- Tweezers – fine point tweezers, you’ll thank me later!
Optional items:
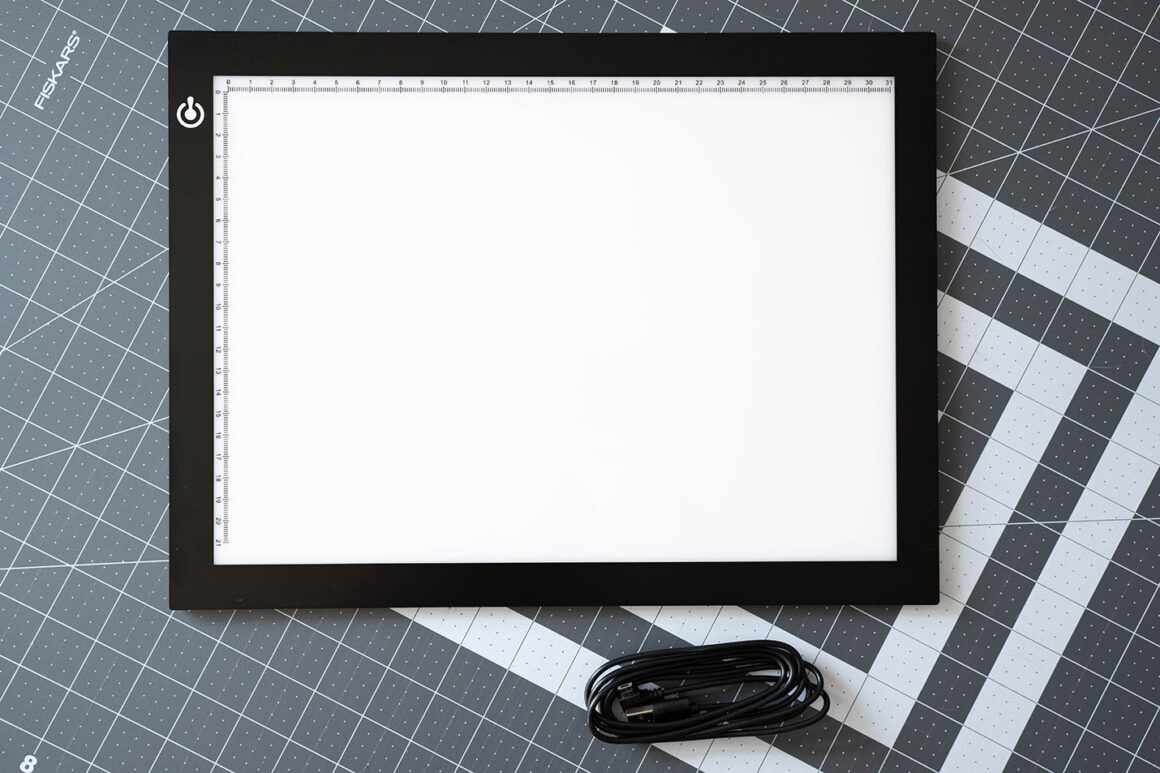
- Lightbox – I use a super cheap one…those $100+ ones are not necessary!
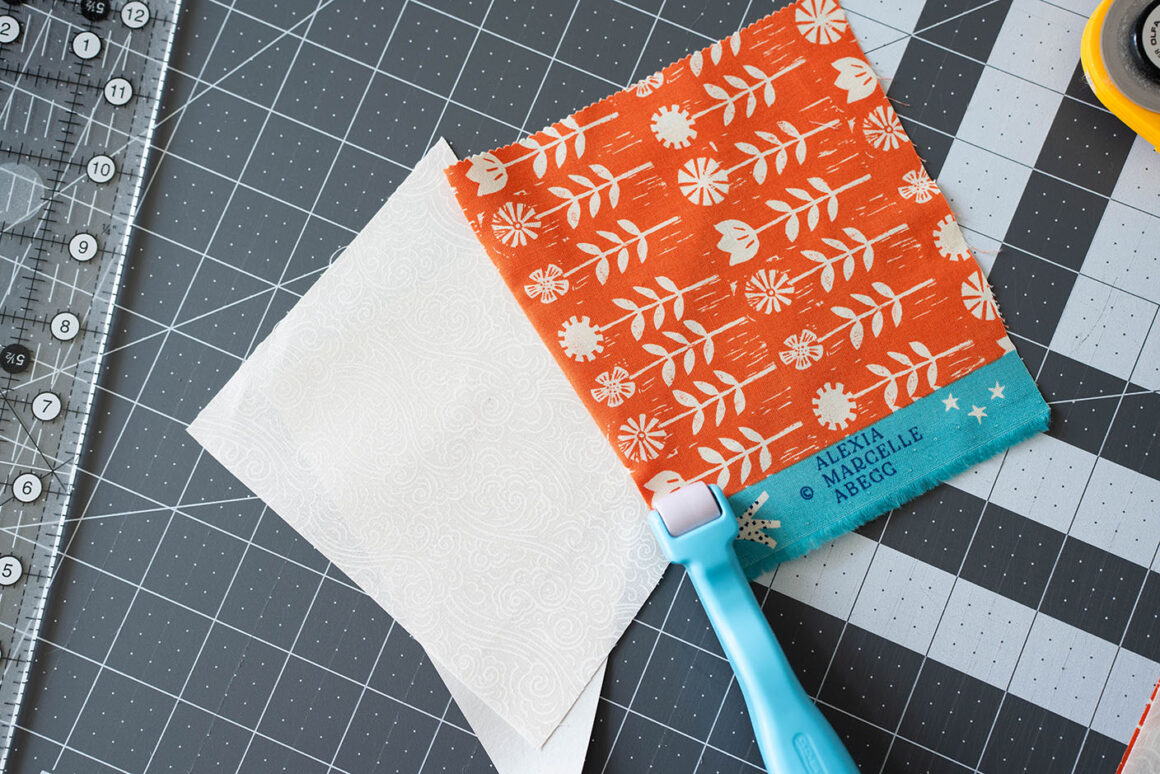
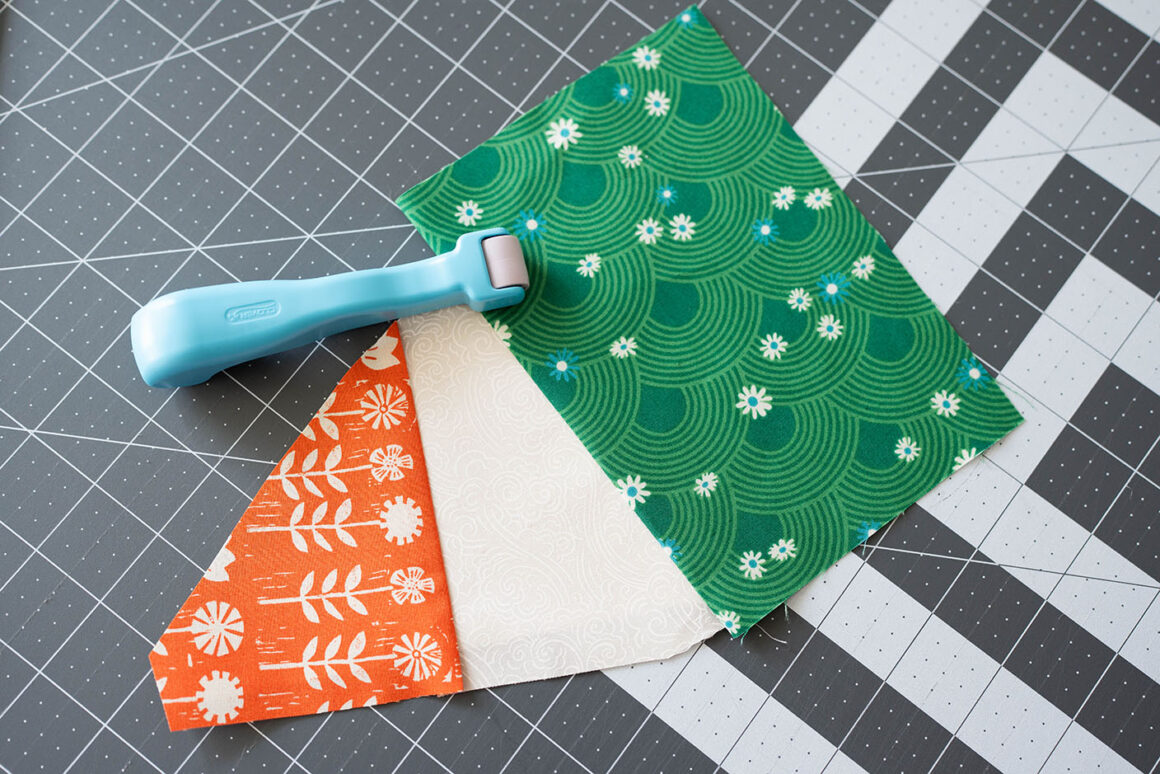
- Seam Roller – I use this Clover roller.
Okay, it’s time to get started!
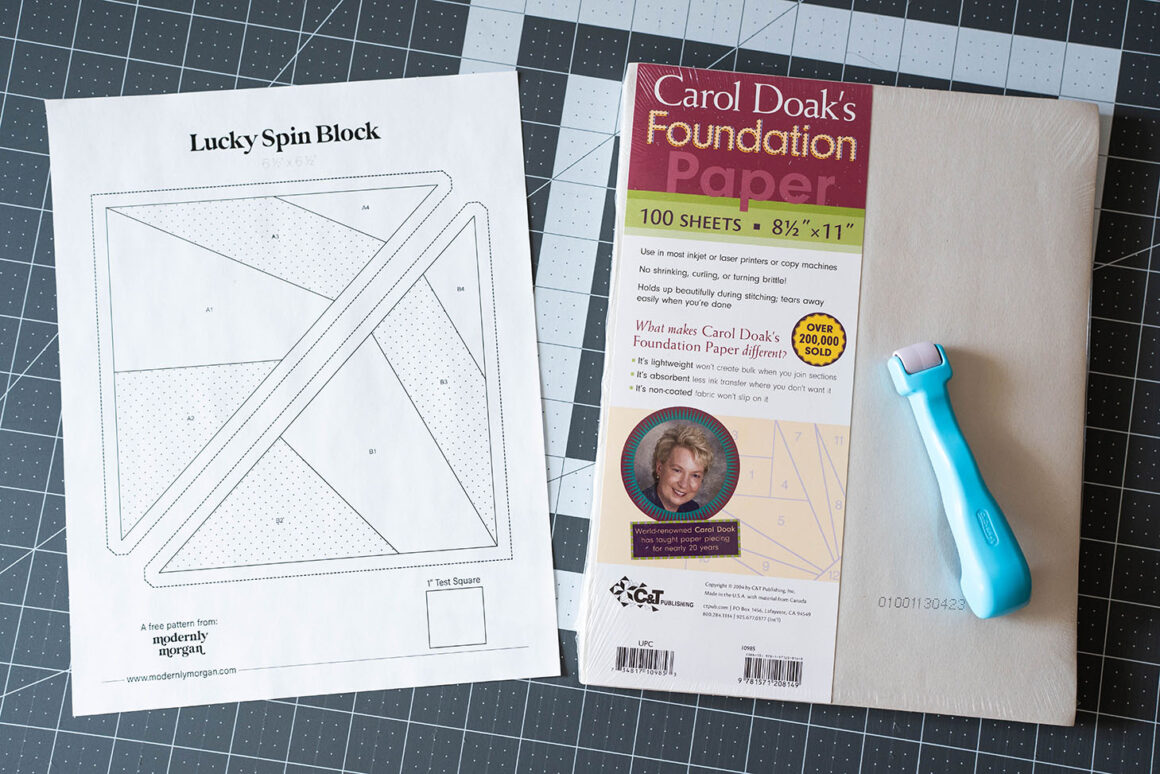
Prepping Your FPP Template
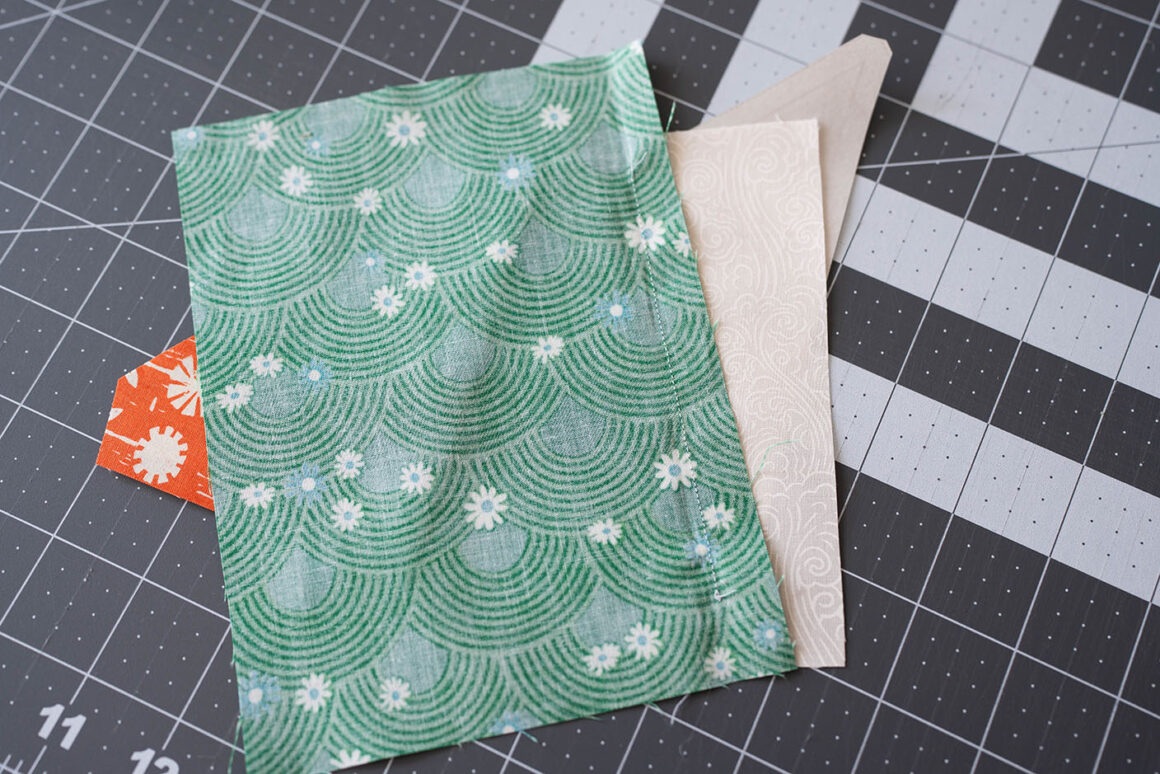
Get your FREE Lucky Spin Block template here to sew right along with this tutorial. You’ll see in the photo above the actual block template along with FPP paper and a seam roller. We’ll get to the template in a minute but let me spend some time talking about the paper that you print your FPP templates out on. If you’re just giving FPP a go, feel free to try it out on standard printer paper (the lighter the weight the better), it’s what you’ve got in the house so I’m 100% here for it! If you fall in love with FPP and want to make an entire quilt, I highly recommend this Foundation Paper. It’s easier to remove when you’re done with your blocks and it’s not as thick for your sewing machine to sew through, especially when you have multiple layers. It is slightly more expensive, but if you’re able to add it into your budget…it’s well worth it when you have 100+ blocks to remove paper from!
When printing out your block template, make sure your printer settings are set to print at 100% scale. Whether it’s my Lucky Spin template or any other FPP block, there should be a 1″ test square and I always recommend printing 1 sheet out first and measuring your printed template to make sure it’s the correct size before printing out a bunch of sheets.
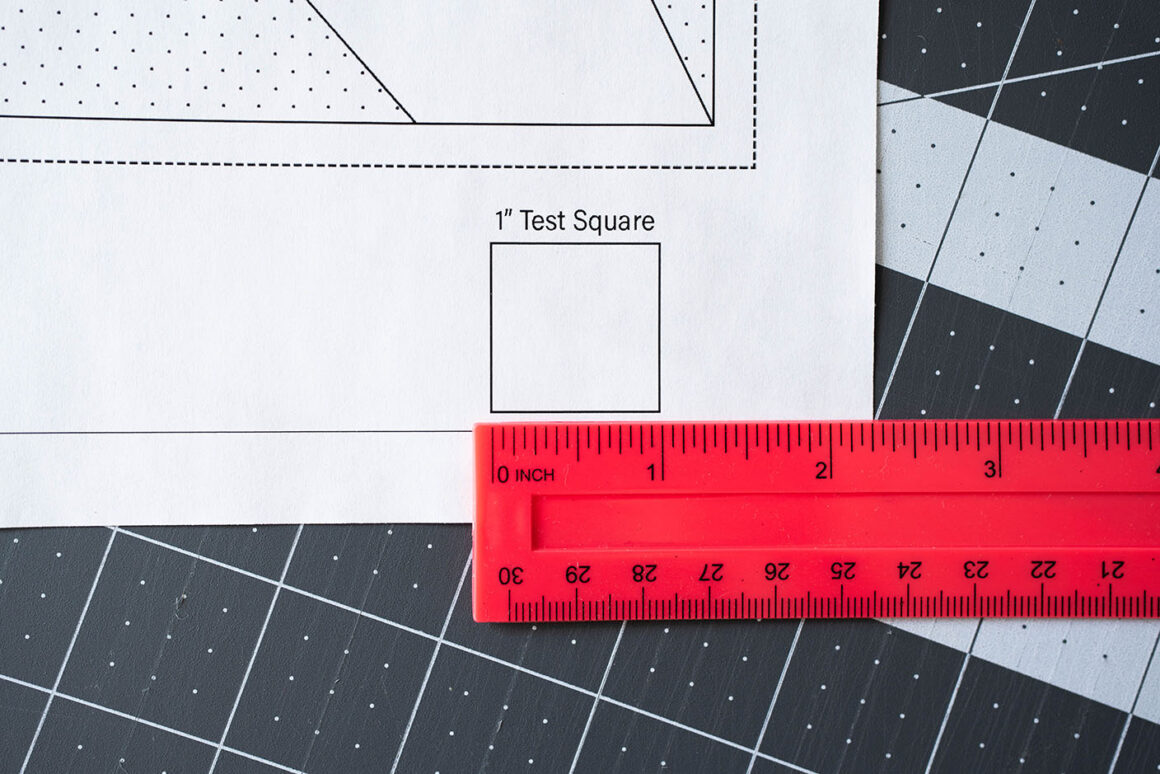
It’s perfectly to scale. Woohoo!
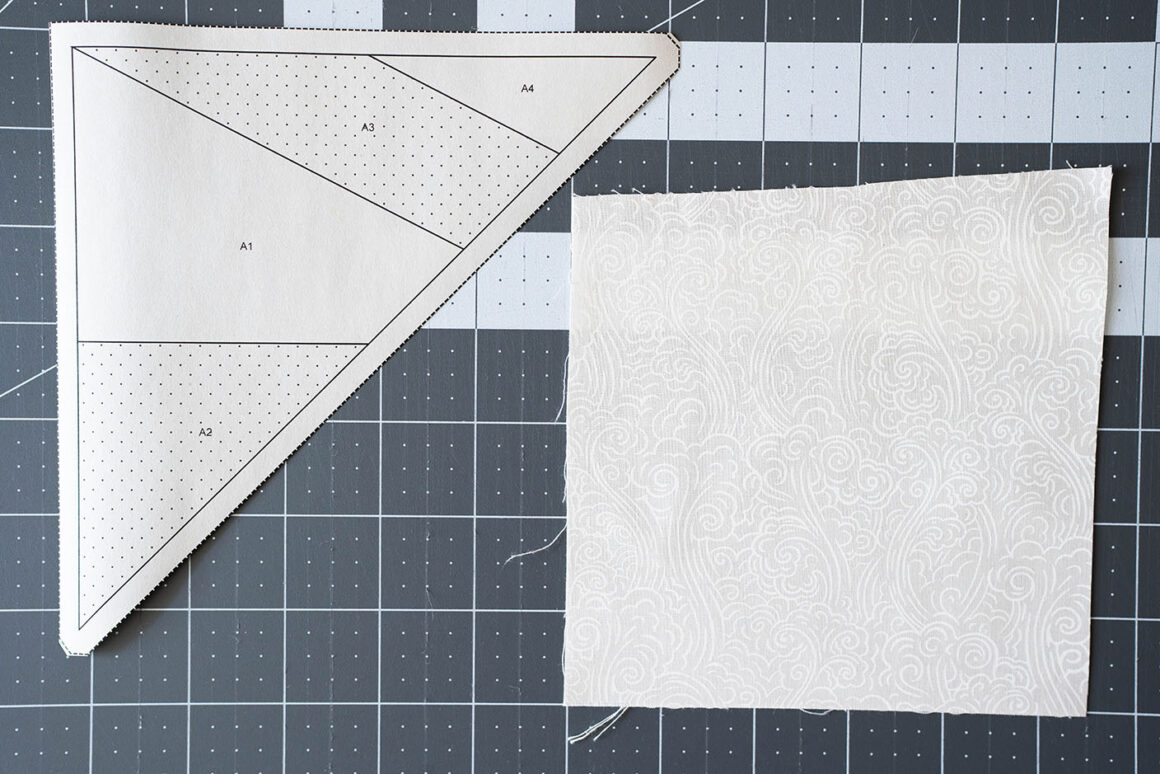
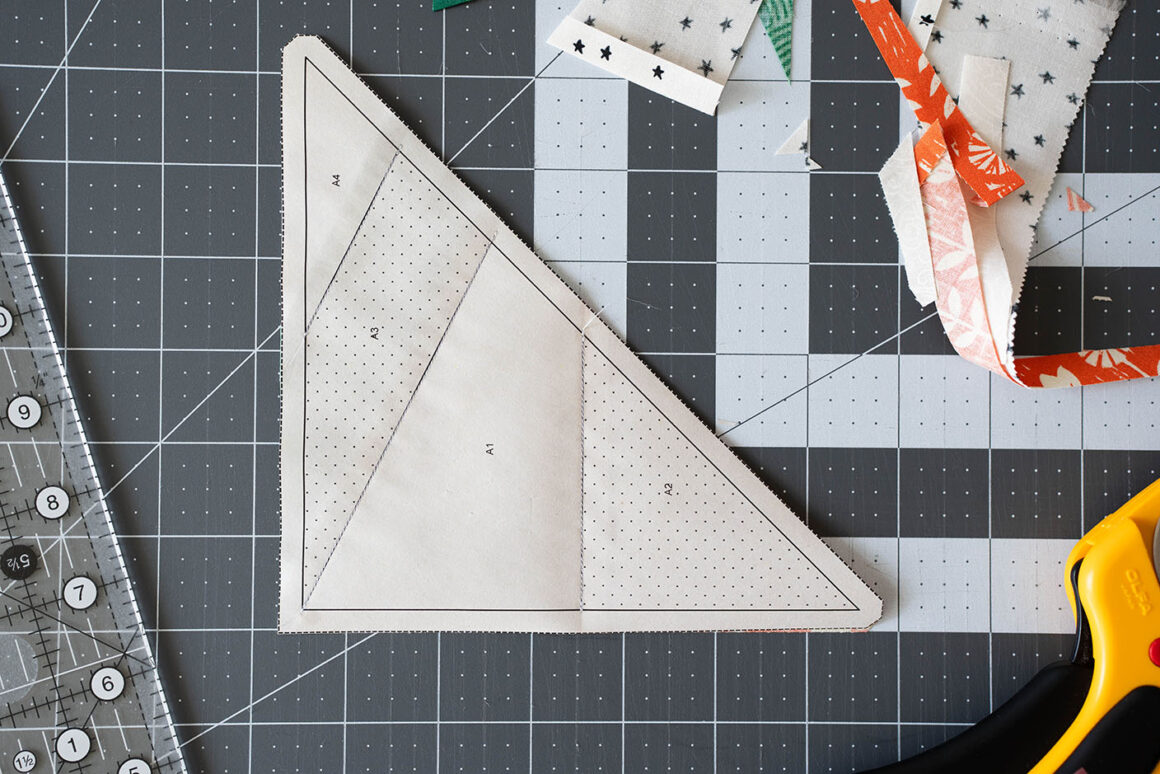
Now go ahead and cut the excess paper off so you have the actual templates as shown below:
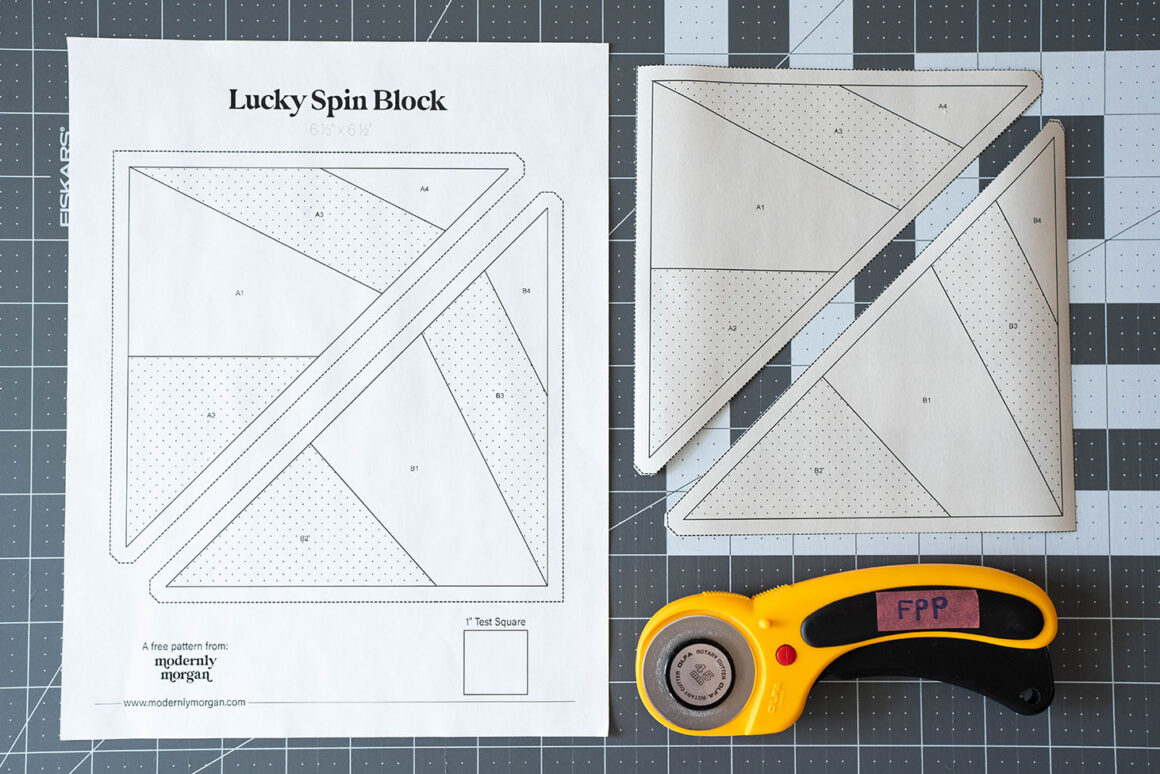
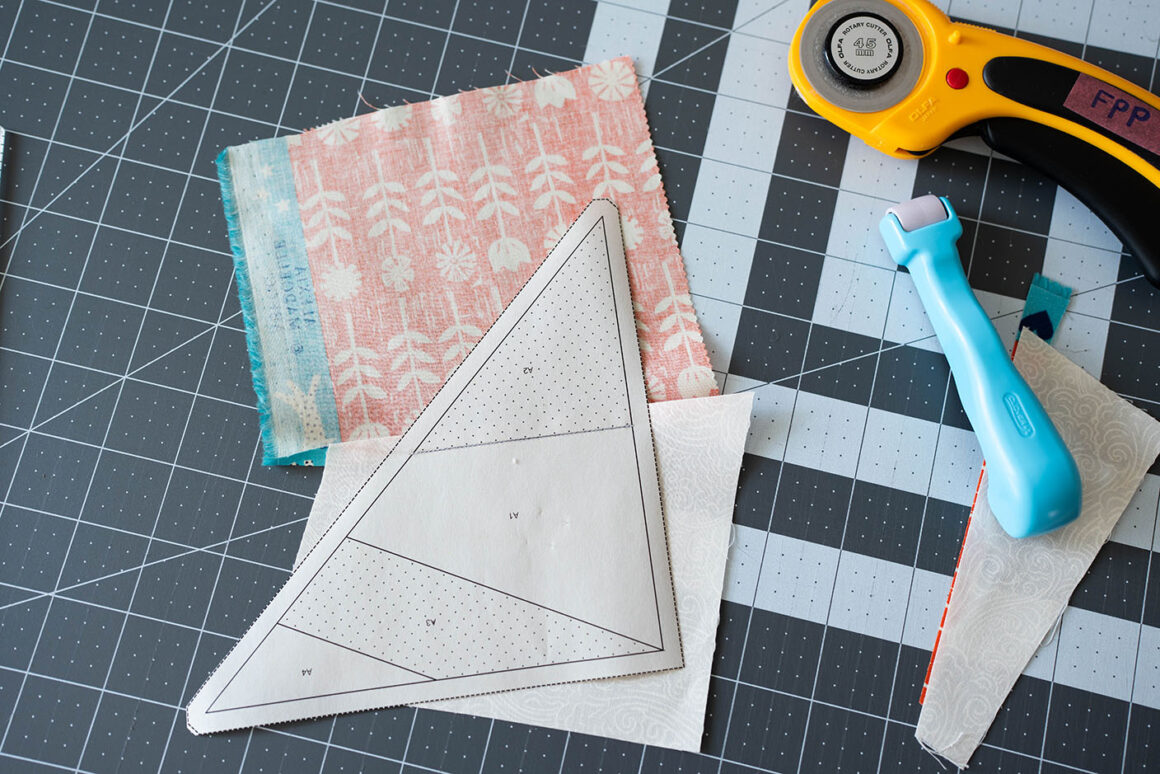
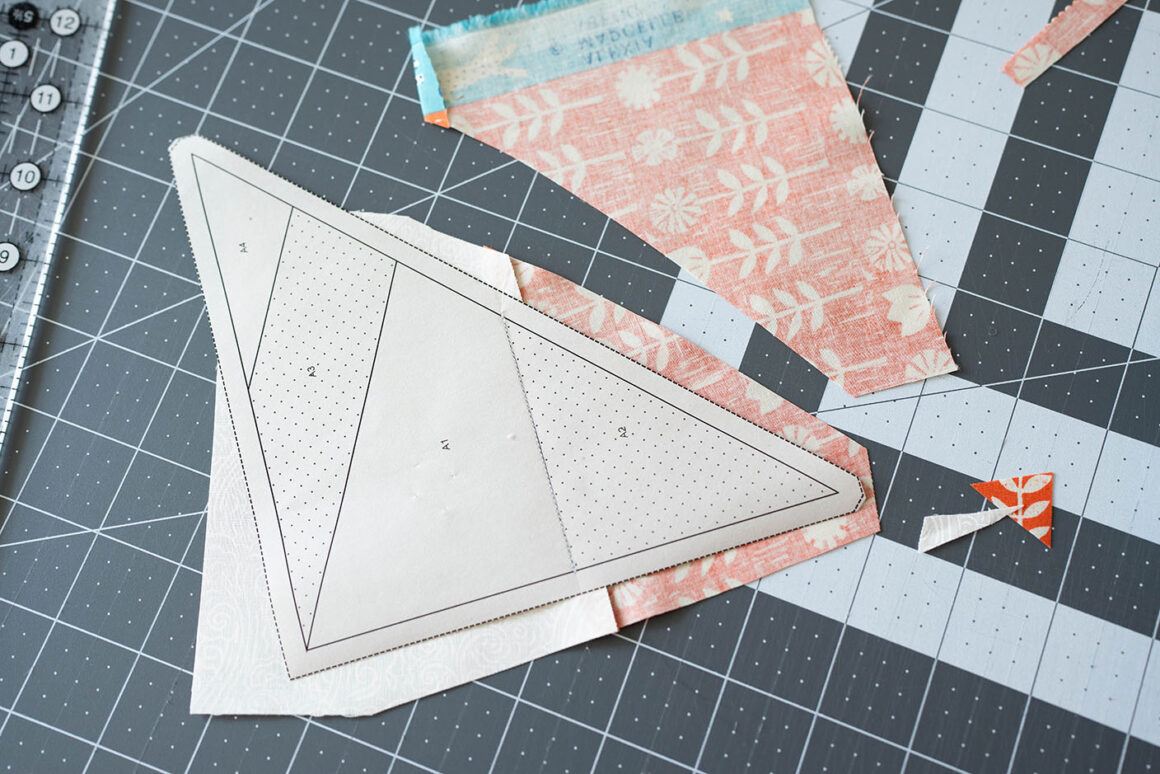
You’ll notice that one triangle template has the letter A in front of the numbers and the other template has the letter B in front of the numbers. This is to help keep things sorted and FPP blocks you may encounter in the future can have even more letters depending on how many sections the FPP pattern might have. If it’s a super simple block, there may only be numbers.
*One thing to note is that my template includes a 1/4″ seam allowance on the outside edge. Most FPP designers I’ve seen include this on their blocks, but just be mindful and check your FPP template/pattern to make sure it’s there or you’ll have to remember to leave an extra 1/4″ when trimming your template.
Also, you’ll see that my rotary cutter is labeled with ‘FPP.’ This rotary cutter is the one I use specifically for cutting bits of paper…since paper dulls the blade faster, I don’t want to get it mixed up with my regular rotary cutter that’s just for fabric.
A lightbox is 100% optional so don’t feel like you need to get one. You may see a lot of quilters online recommending expensive lightboxes specific for FPP and I’m going to tell you that you don’t need to spend that kind of money! Simple drawing/tracing lightboxes will work just as well for less than $20! This is the one I picked up on Amazon and it’s still going strong a year and a half later. Mine is an A4 size but there are multiple sizes if you need one that’s slightly bigger.
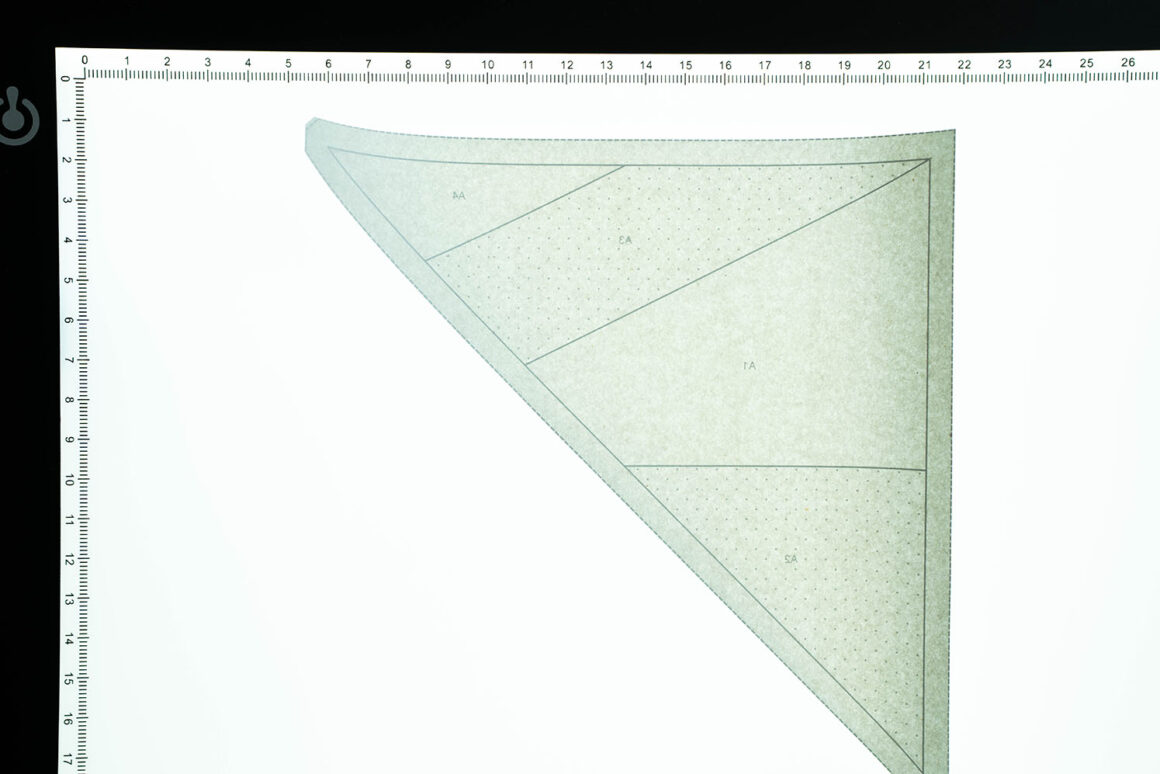
I’ll be using my lightbox throughout the tutorial since it’s easy to show for the tutorial’s sake but you can hold your FPP pieces up to a bright light or even a sunny window just as easily!
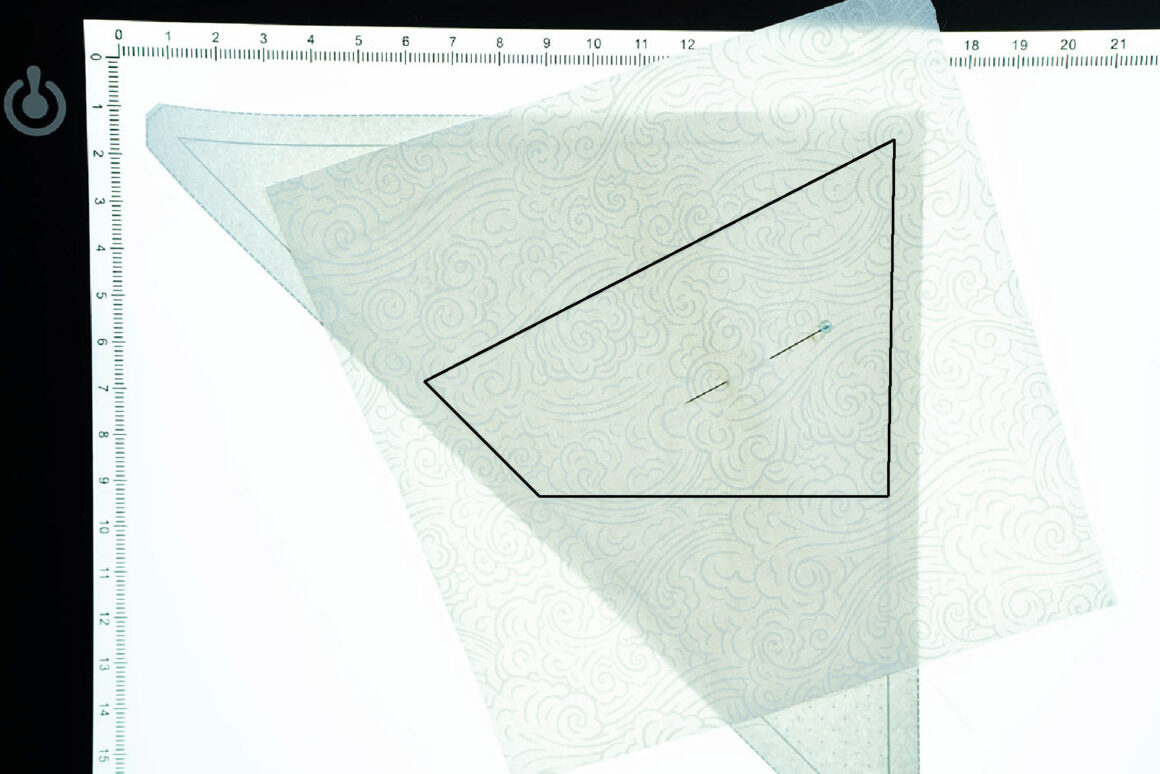
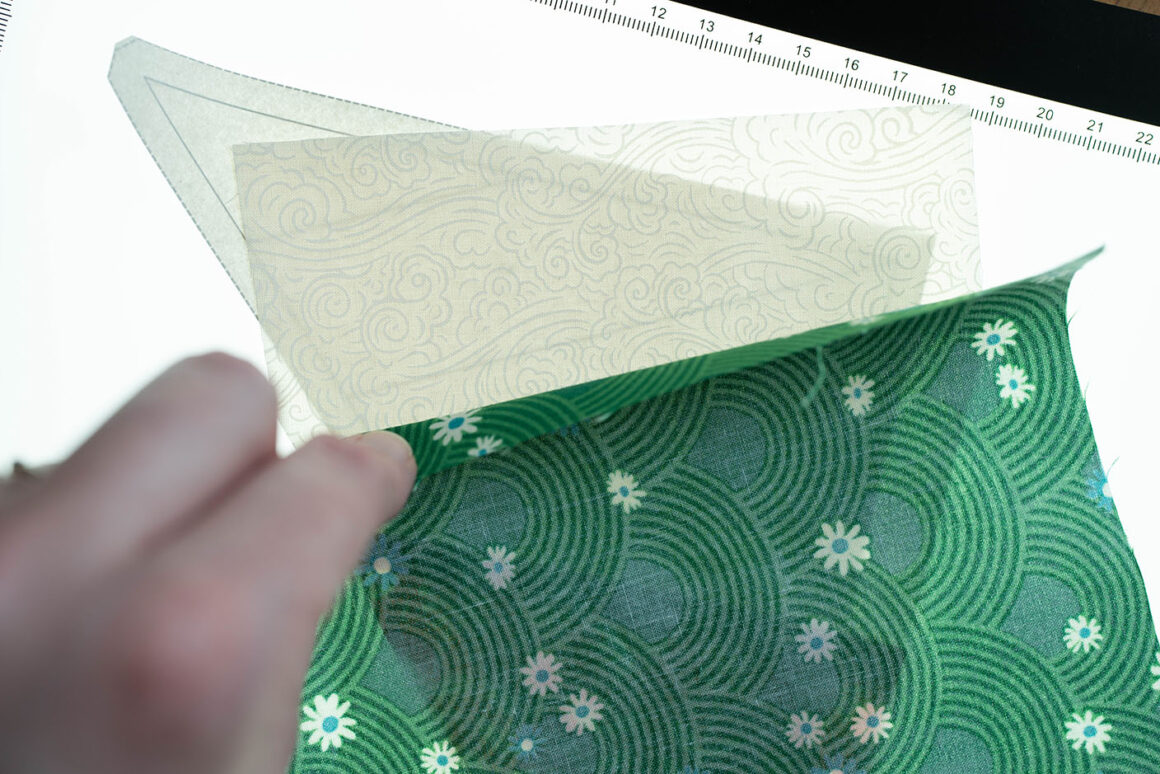
Grab your Lucky Spin template A or any template you’re working with and I want you to look at the piece that has a 1 on it…that’s where you’re going to start. This is also the time to note which fabrics/colors go where on your template. If using the Lucky Spin template, the areas/numbers with a white background are for Background or Low Volume Prints. The areas/numbers with printed dots on them are for Colors/Prints. I did this specifically to save you ink when printing. 😉 Some FPP designers will color code their pieces for you.
Take the template and flip it over so that you’re looking at it backwards:
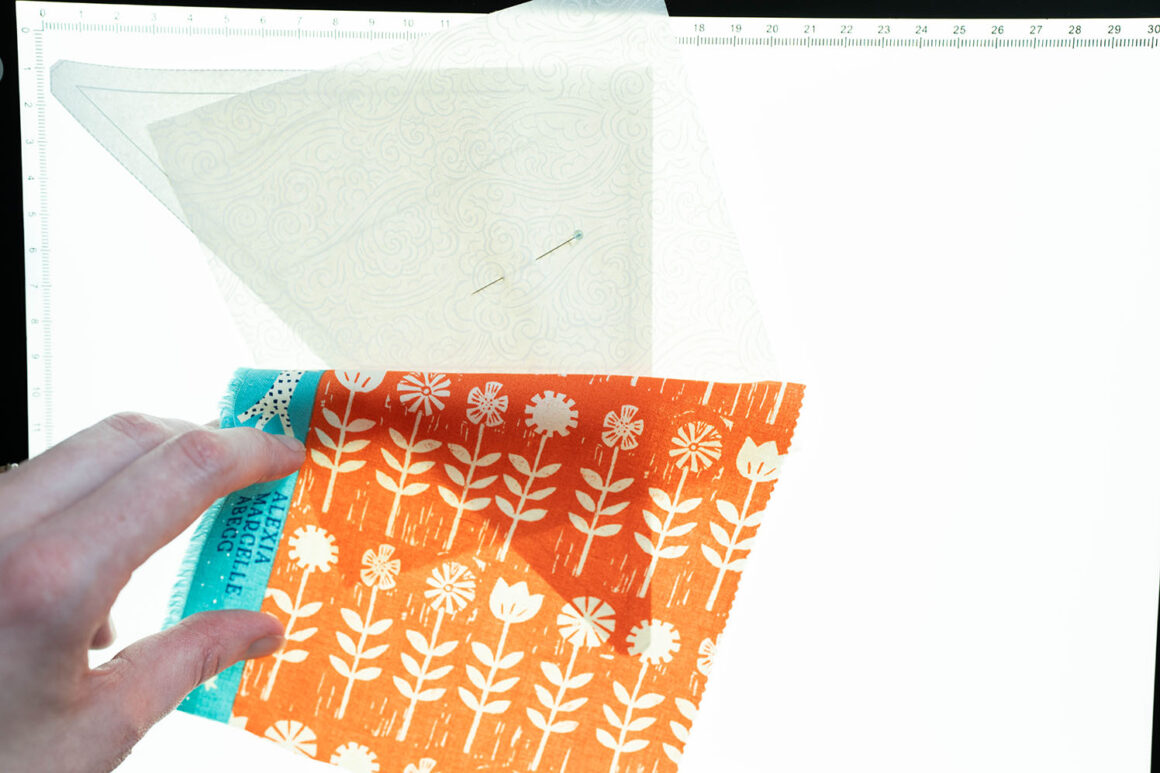
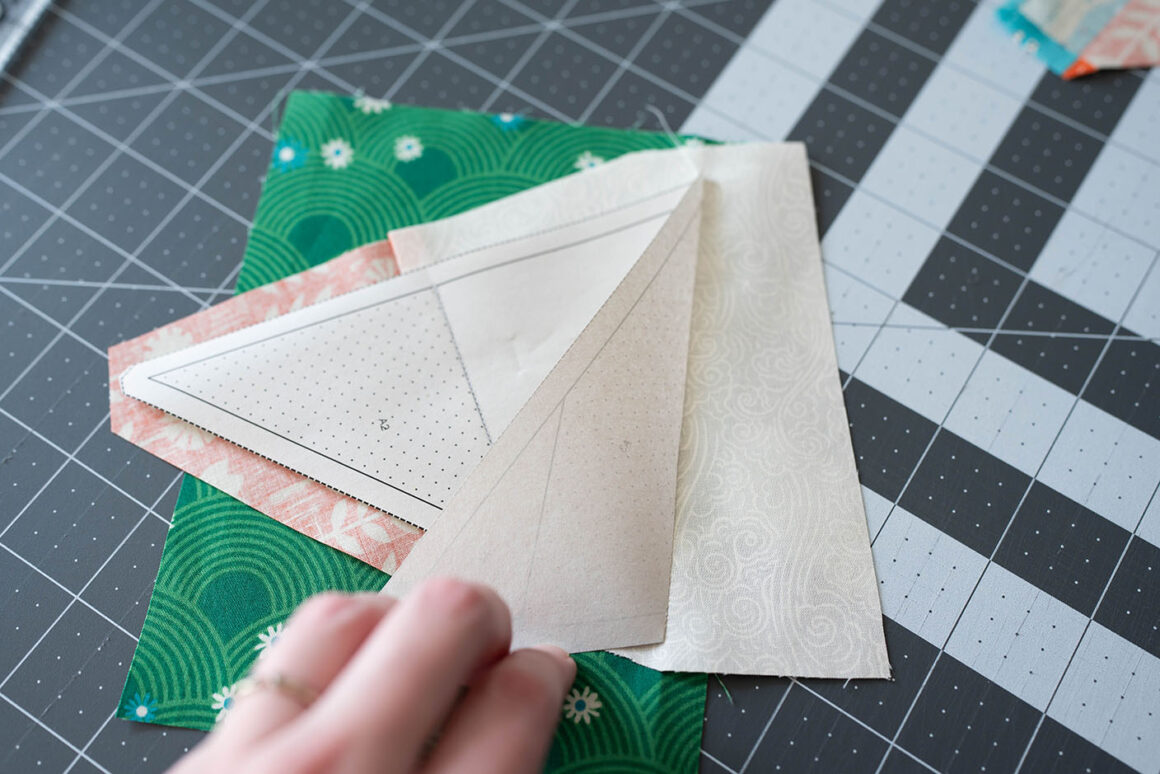
Cut a piece of fabric that will cover the A1 section (this will be a Background or Low Volume Print for the Lucky Spin template) and you must make sure that it goes at least 1/4″ past ALL edges of A1 (the overage will become your seam allowance). I’ve outlined the perimeter of A1 digitally to make it easier to see.
Your fabric should be right side up for this piece (you should be looking at the pretty side) and your template should still be flipped over so you see the wrong side. Once you’re sure that your fabric goes past the A1 edges at least 1/4″ on every side, pin it into place. Make sure to place the needle away from the edges so it doesn’t get in the way when sewing.
Sidenote about pins…just like rotary blades with paper, sticking pins in paper will dull them too. I have a box of pins that I only use with paper. It helps extend the life of the pins I use for my regular quilting. Also, when paper piecing, fine glass head pins are great since they can withstand being ironed.
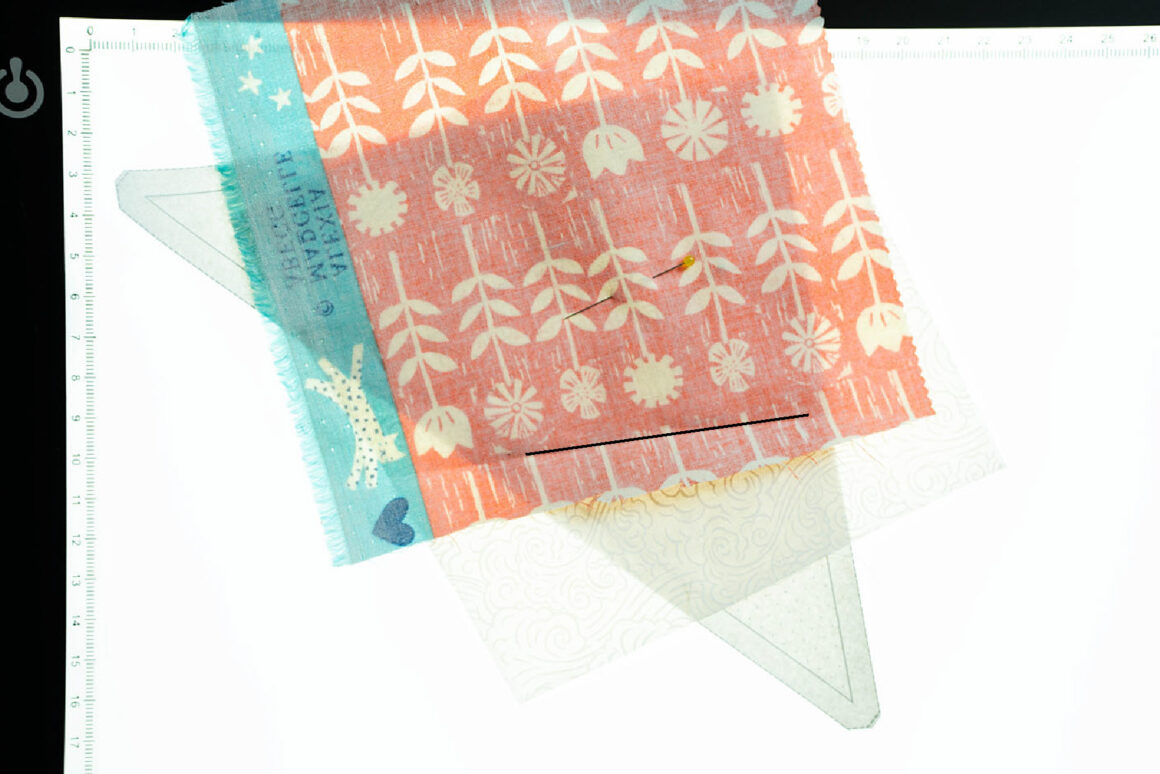
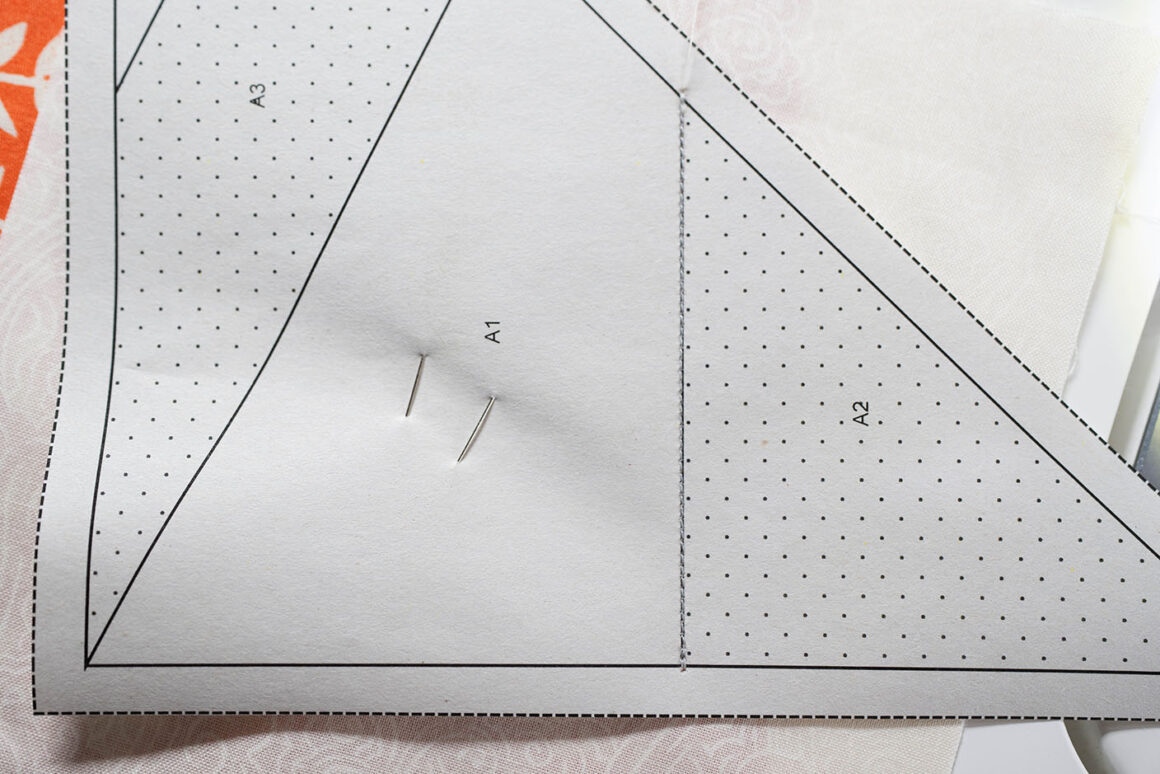
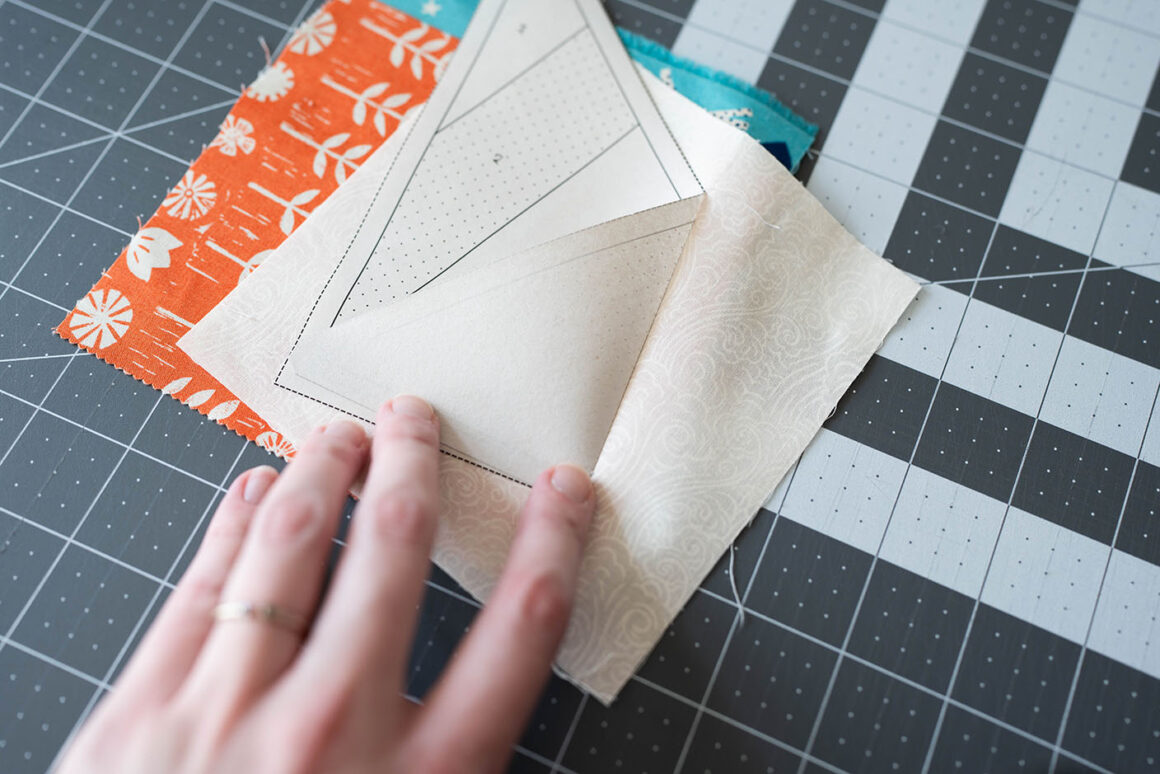
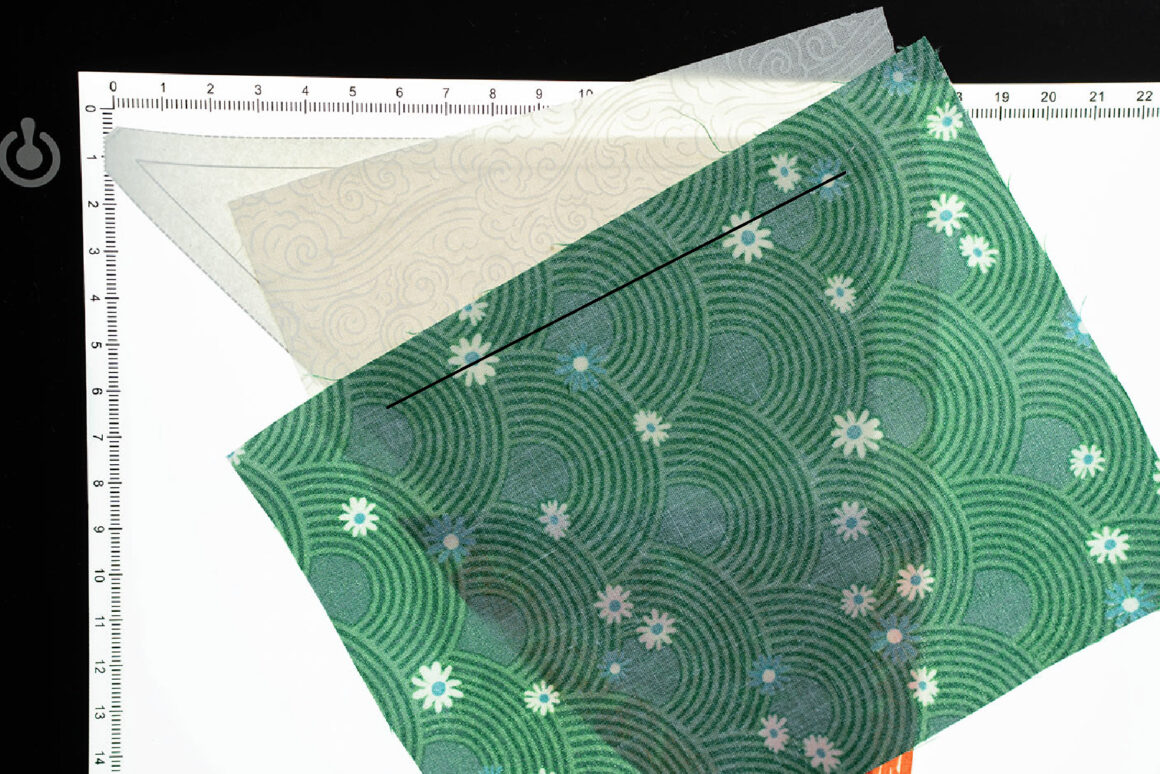
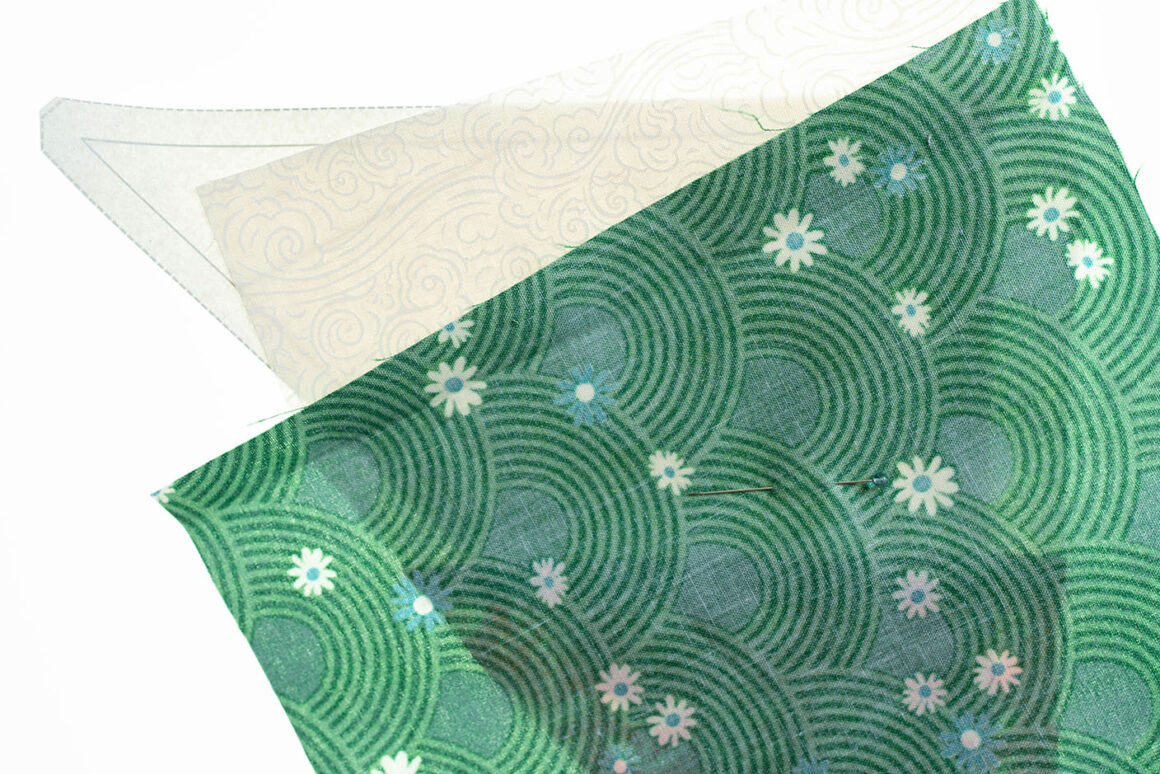
With the A1 section now pinned into place, it’s time to move onto the next section: A2 (FPP templates will go in numerical order; guiding you to which seam will be sewn next). Cut a large enough piece of fabric to cover A2 (you’re still looking at the template from the back side) and place the fabric with its wrong side facing you (right side should be facing the A1 fabric). Make sure the A2 fabric overlaps the line where A1 and A2 meet at least 1/4″. I’ve digitally darkened it in the photo below so you can see the line easily:
The overlapping 1/4″ will become the seam allowance. Also, you’ll notice that I like to cut all of my fabric pieces pretty big. I prefer to leave a lot of room rather than cutting it too close and then having to cut even more fabric (been there, done that, lol!). As a beginner, I recommend that you do this as well. As you get more practice, you’ll have a better feel for the size fabric you can get away with for each section.
After placing the A2 fabric, it’s important to check and make sure that all edges of the section will have a 1/4″ overlap. I like to fold and lightly finger press the fabric over along the A1/A2 line to make sure the placement will work. If you look at the photo below, you’ll be able to see that all edges of the A2 section are more than covered by the fabric:
Once you’ve checked and made sure the A2 fabric overlaps 1/4″ on all of the A2 template edges, pin it into place (you’ll have two pins now). I’ve added the A1/A2 line below to make it easier to see:
Sewing The FPP Template
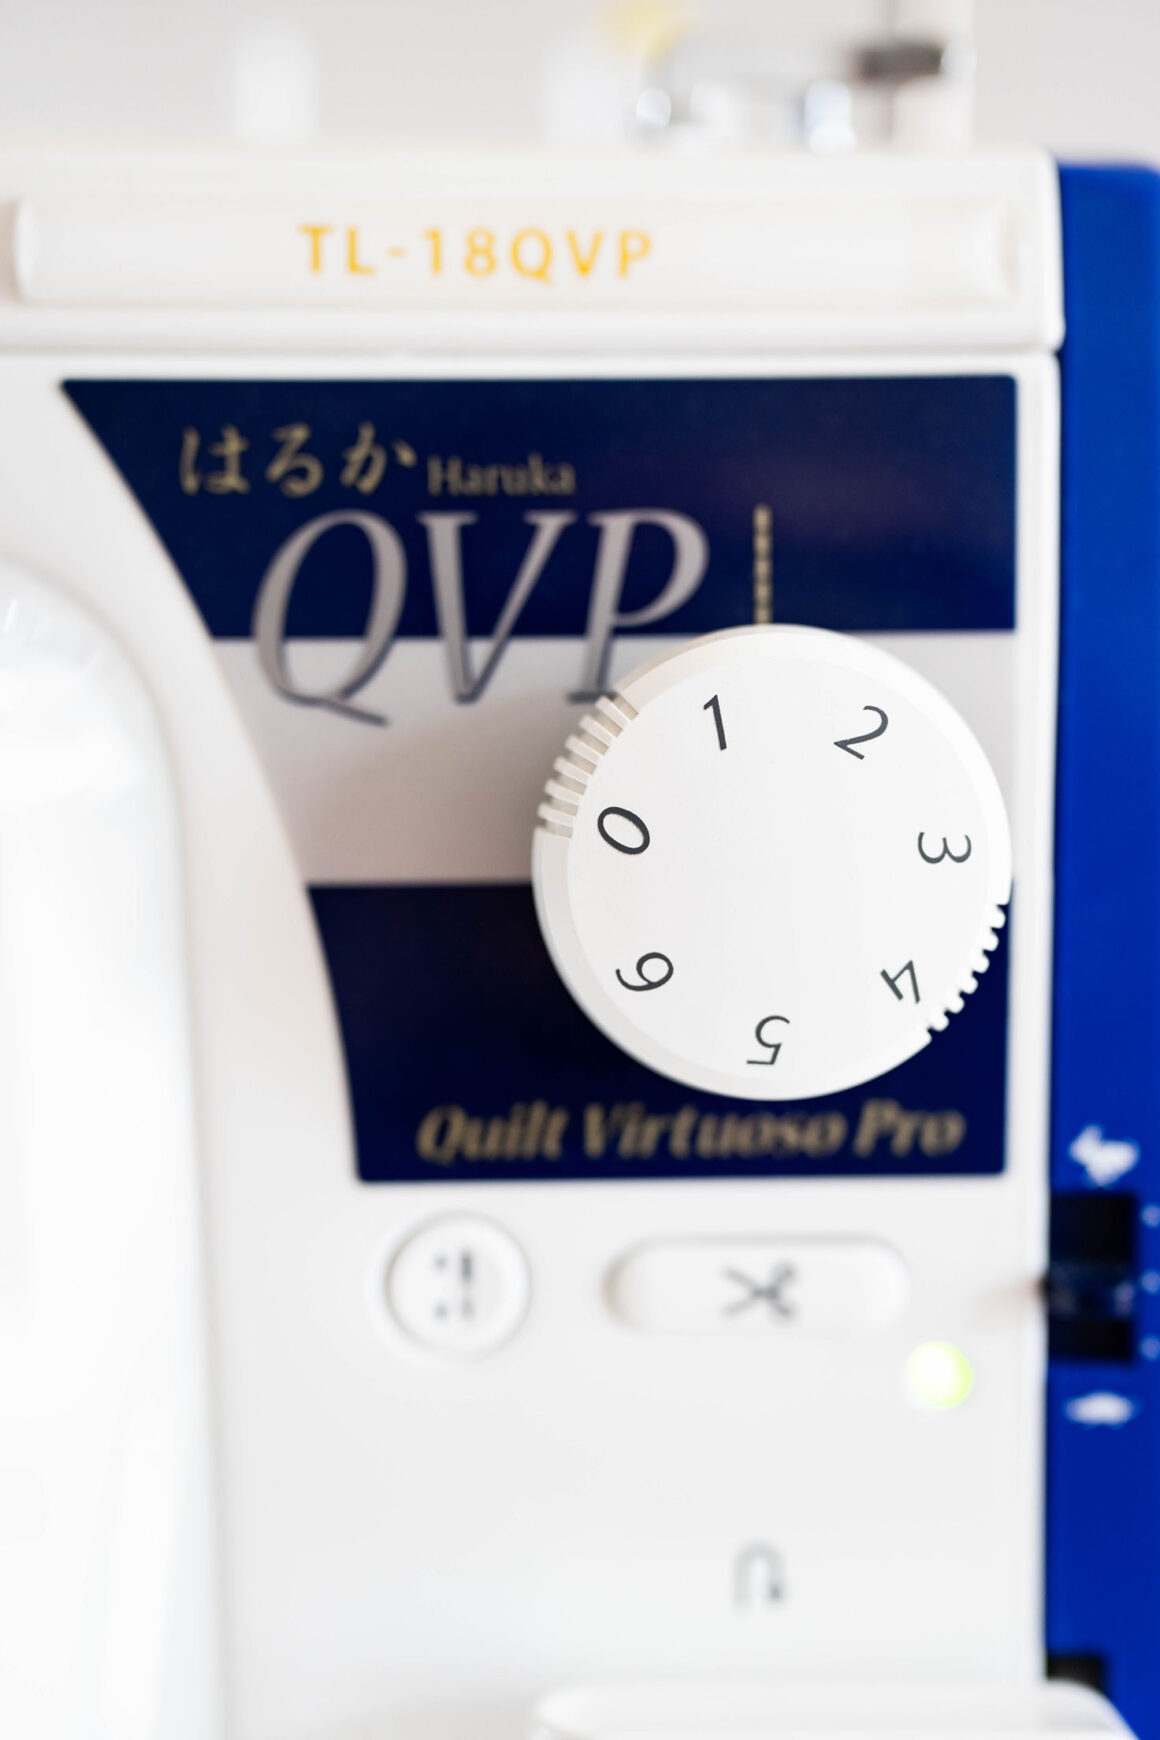
Before sewing your first two pieces of fabric together, you need to change the stitch length on your sewing machine. I always use a 1.4 length as I feel like it’s small enough for pulling papers out at the end (a larger stitch length will make this difficult) yet still big enough to seam rip if something goes wrong.
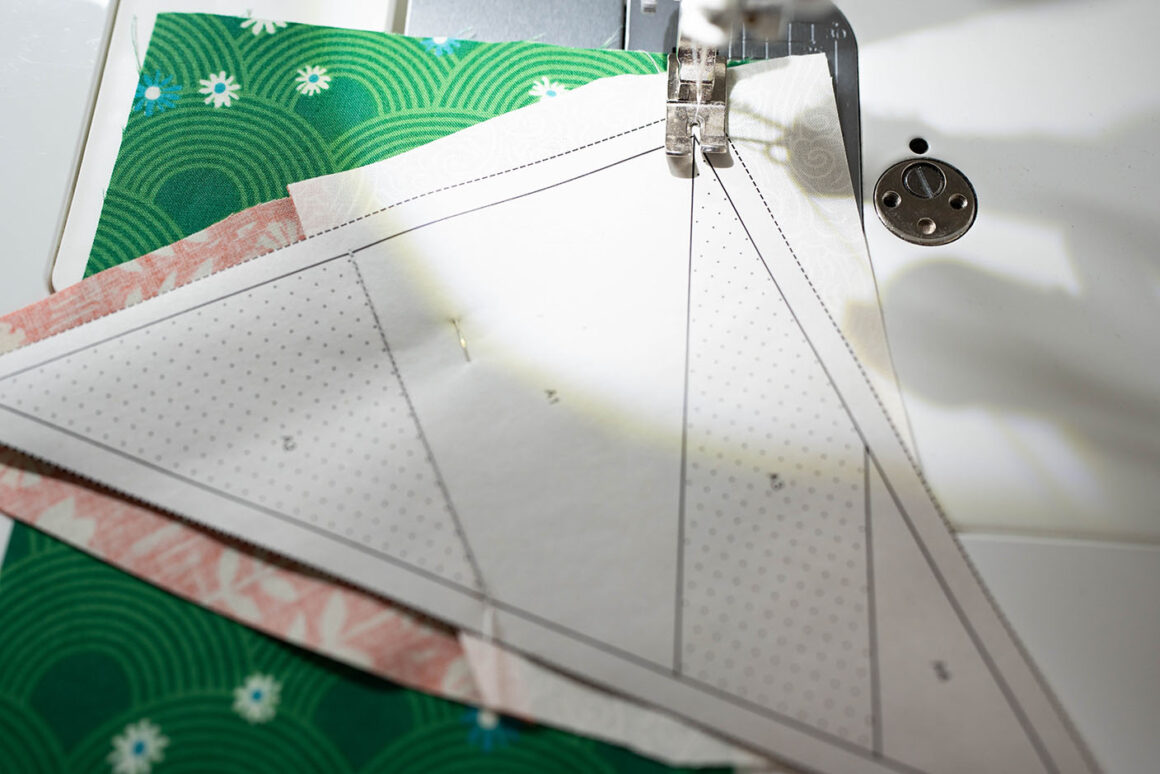
Now it’s time to sew! Take your template and flip it over so that you’re looking at the printed side (where it can be read) and the fabrics you pinned are on the underside. Start sewing slightly before where the A1/A2 line starts and make sure you lock your stitches in by backstitching the first 2-3 stitches. Sew to slightly past the end of the A1/A2 line and once again backstitch a few stitches to lock your seam in:
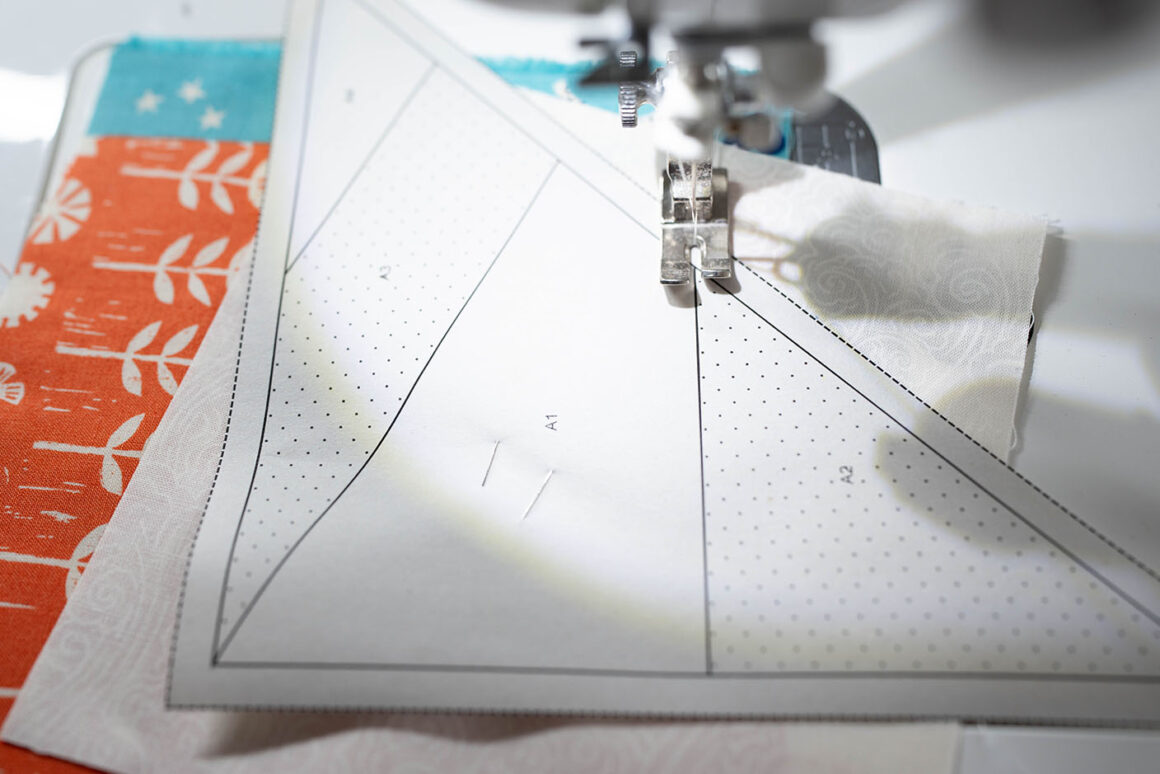
You can remove the pins holding your fabric in place now.
This is how your template will look at this point…things don’t look pretty at this stage but no worries, you’re on the right track!
It’s time to trim the excess fabric and create your perfect 1/4″ seam allowance. Flip your template over so you’re facing the printed side:
Gently fold back the A2 section on the line/seam you just sewed. And I stress gently because you don’t want the stitches to pull through the paper at this point.
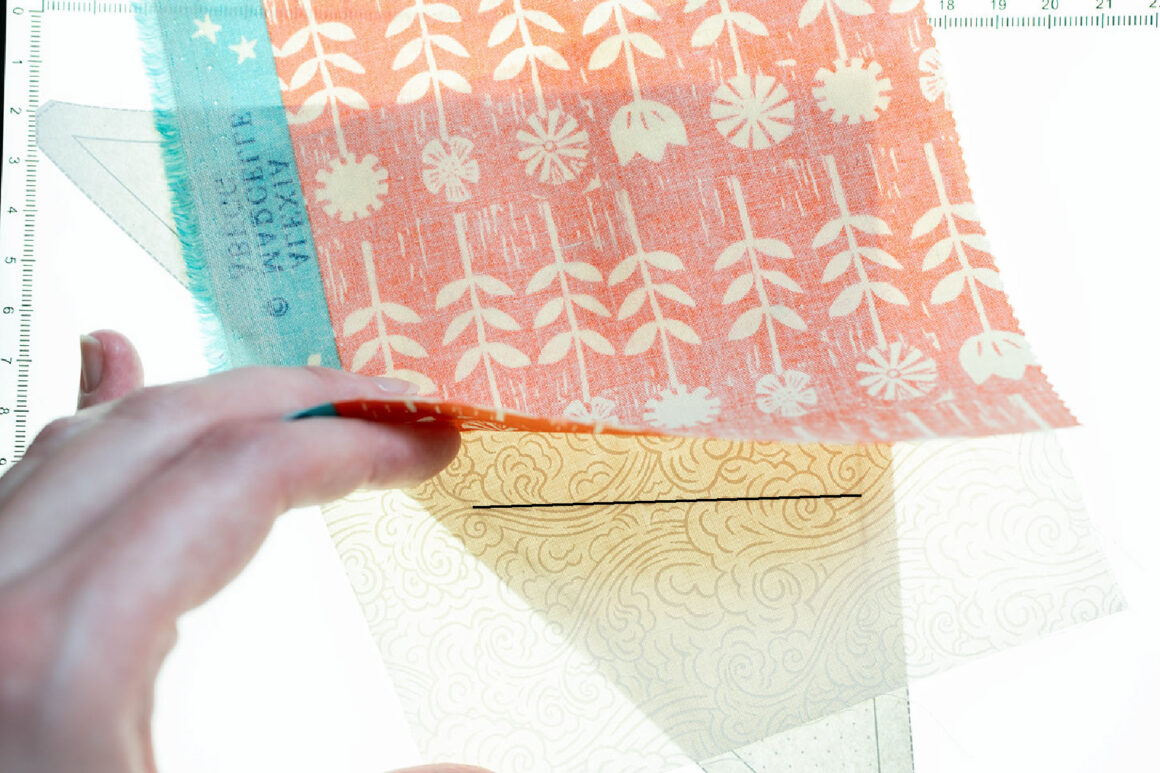
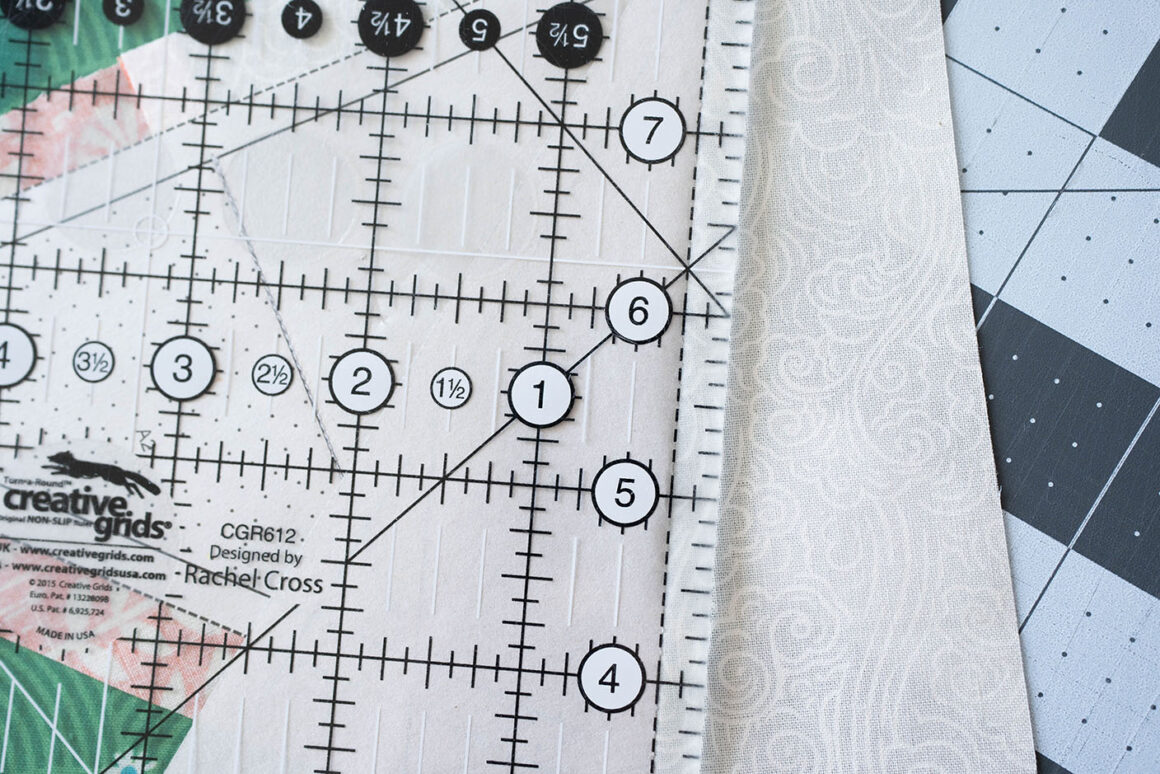
Now you’re going to take your ruler and line it up with the 1/4″ mark directly over the fold/line you created as shown in the photo below:
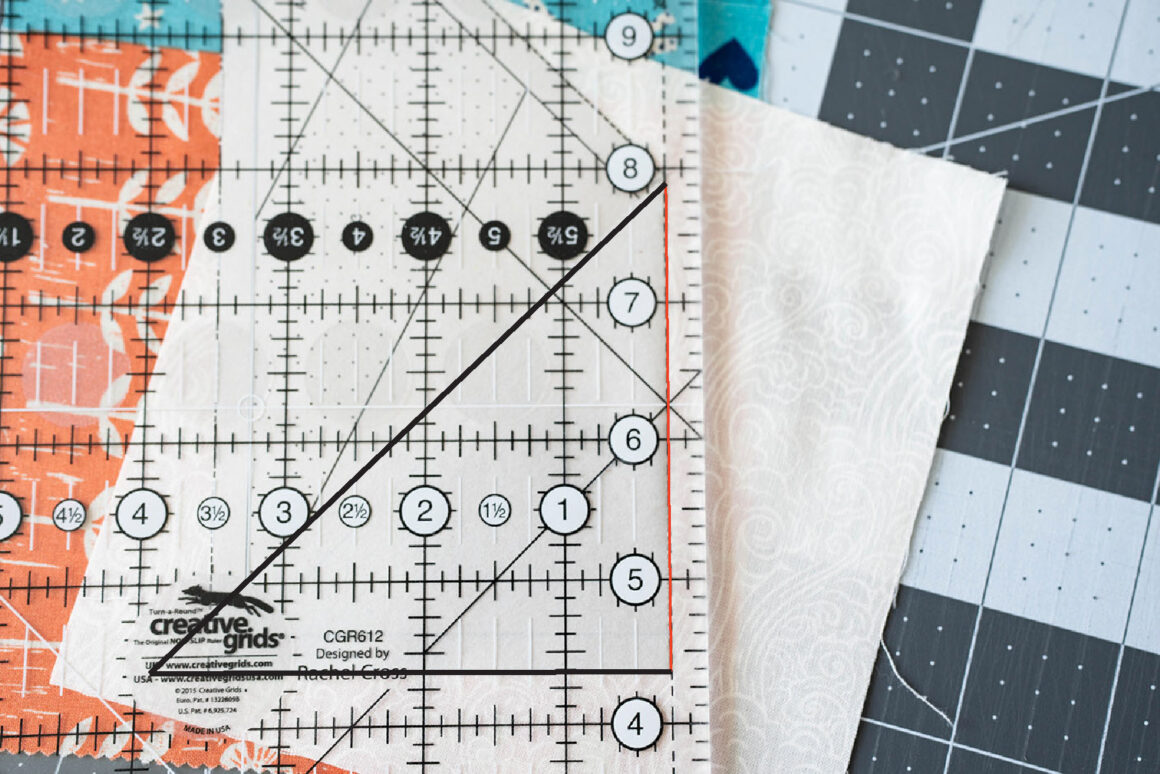
I added the black lines to show you the folded back part of the template and the red line shows you where the paper seam/fold is. NOTE how my ruler goes past the seam 1/4″! You MUST cut 1/4″ past the actual fold/seam so that you’ve got a good seam allowance.
Trim 1/4″ past the seam:
You can go ahead and unfold the corner:
Flip the template over and press the seam towards your A2 piece. I like to roll the seam with a seam roller so I don’t have go over to my ironing board each time but it’s perfectly fine to iron this seam as well. Just remember: DON’T USE STEAM on your iron. This will cause ink transfer to your fabrics and will cause the paper to buckle. Ask me how I know…oops.
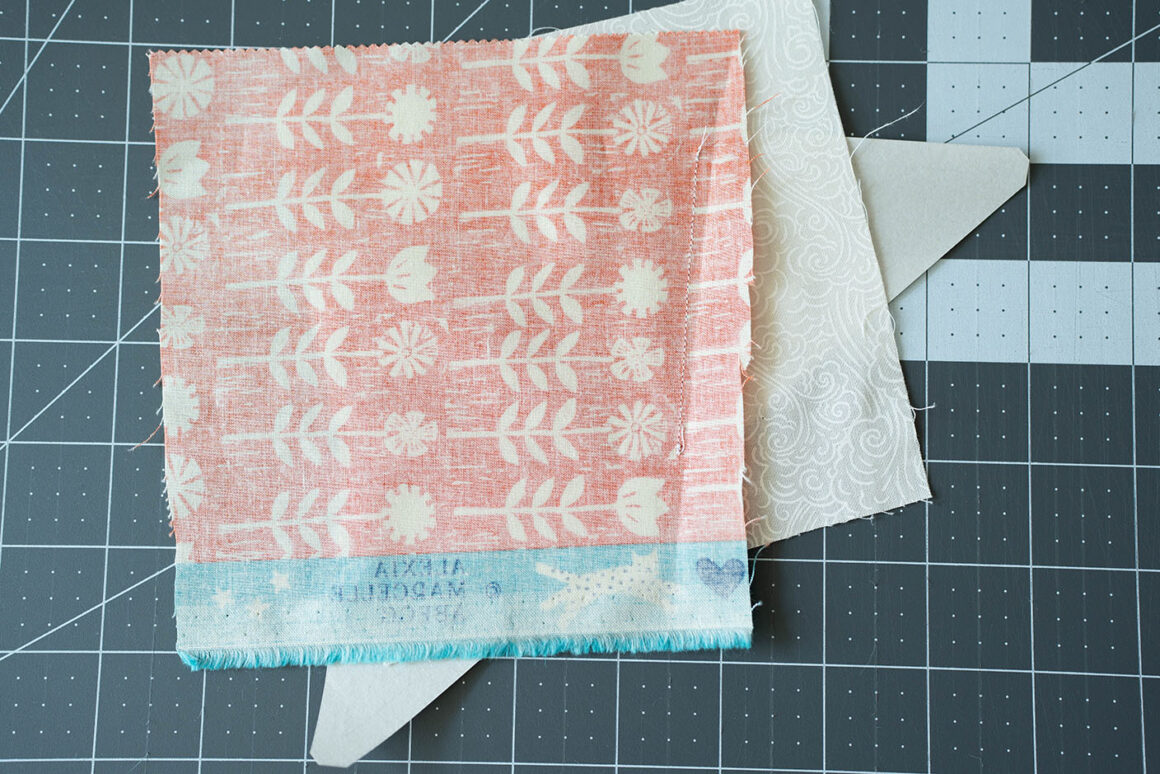
At this point, you may have a lot of excess fabric on outsides of your block:
This can get in the way and make it slightly more a pain to finish the block so I like to loosely trim off excess. This doesn’t need to be precise and ONLY cut excess on the outside of the template:
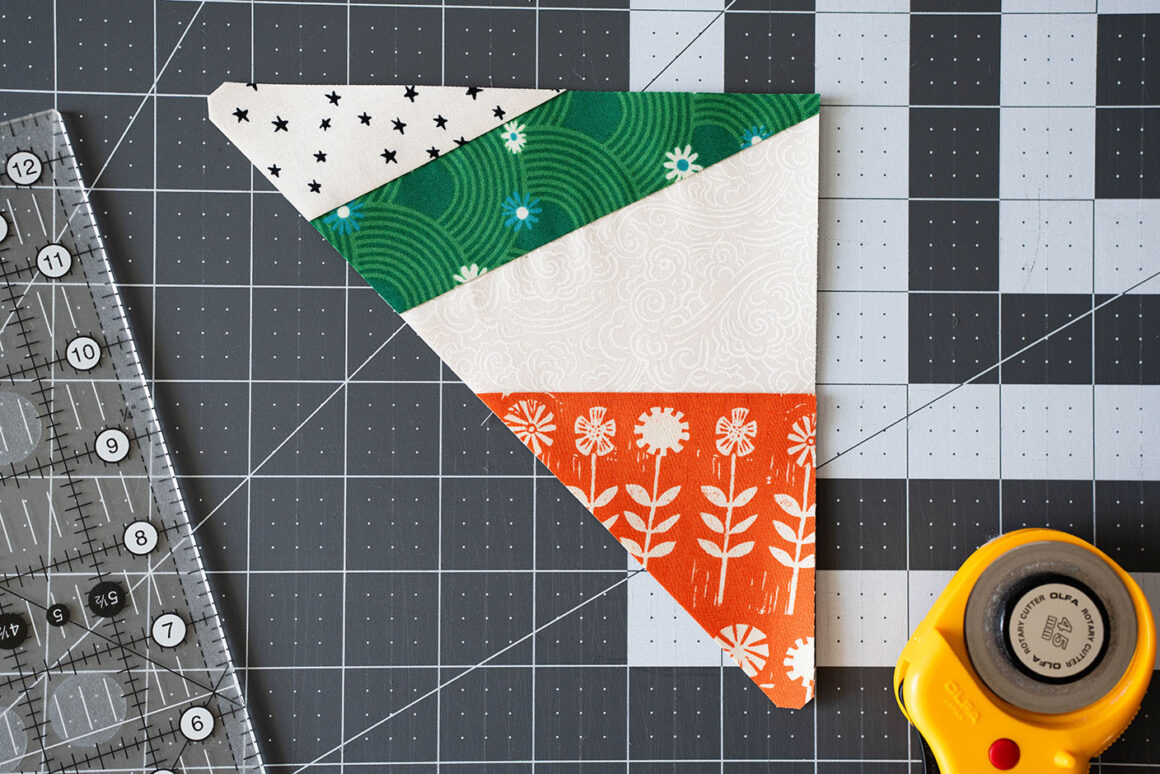
What your block should be looking like right around now:

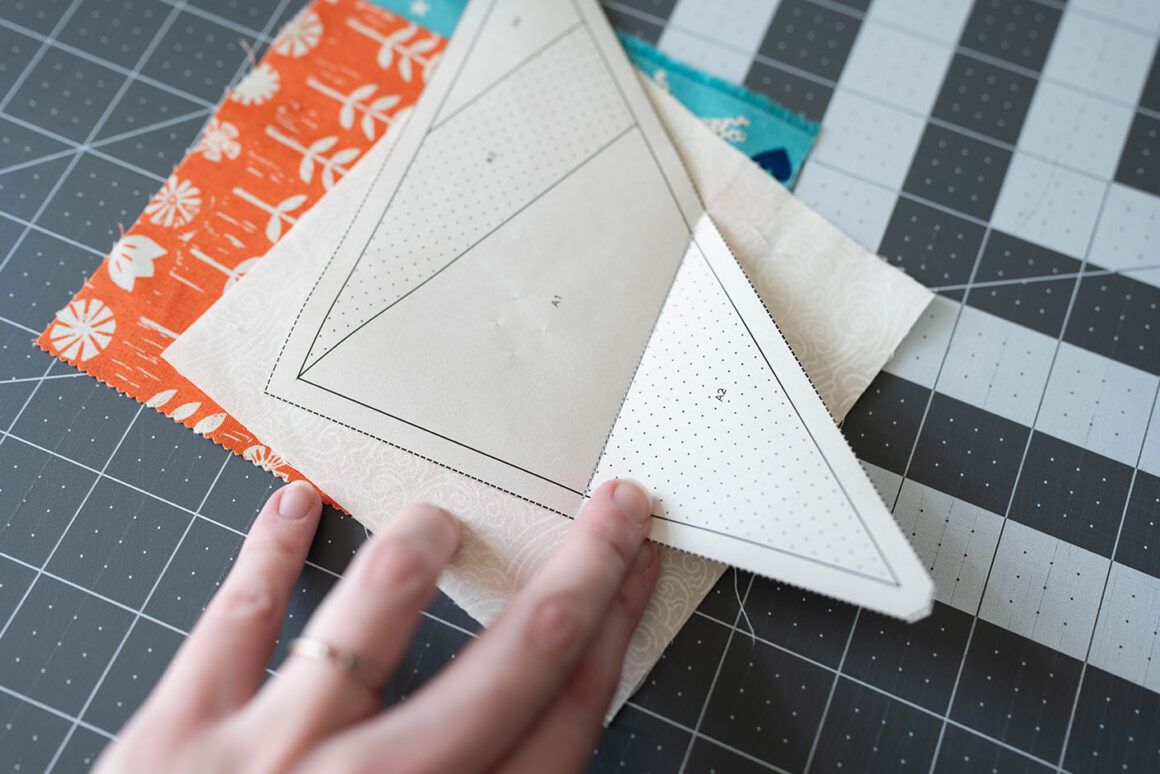
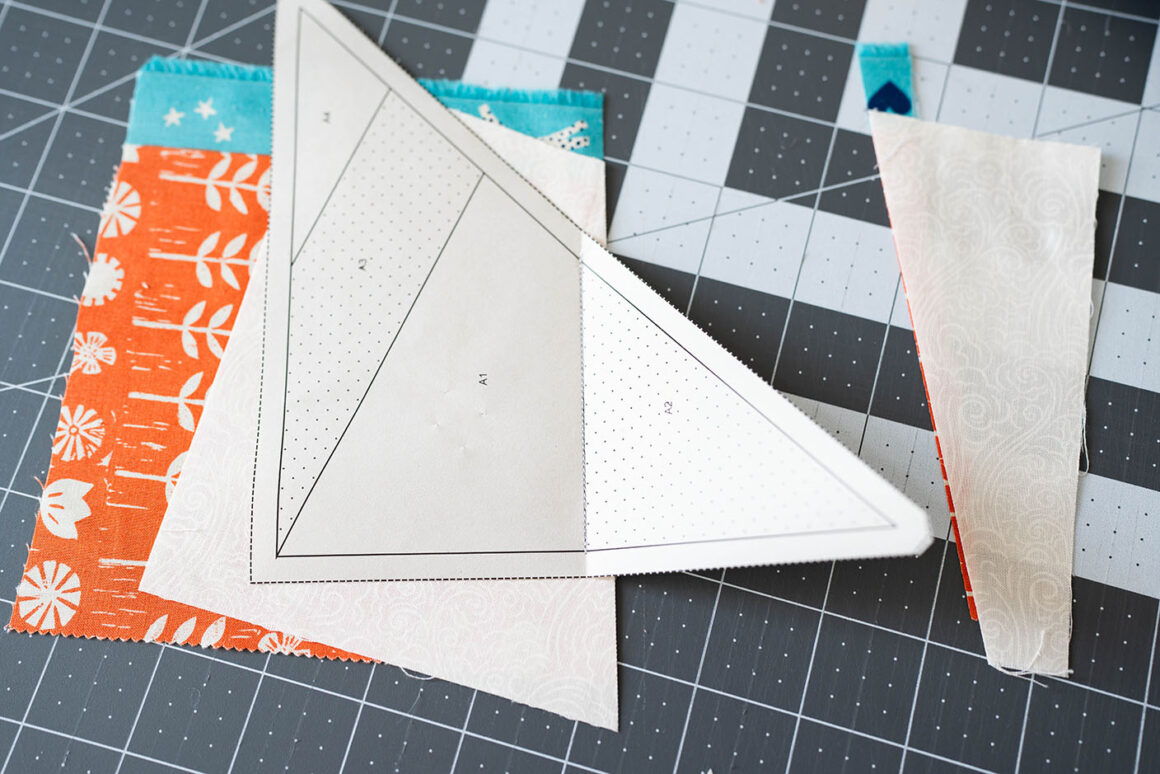
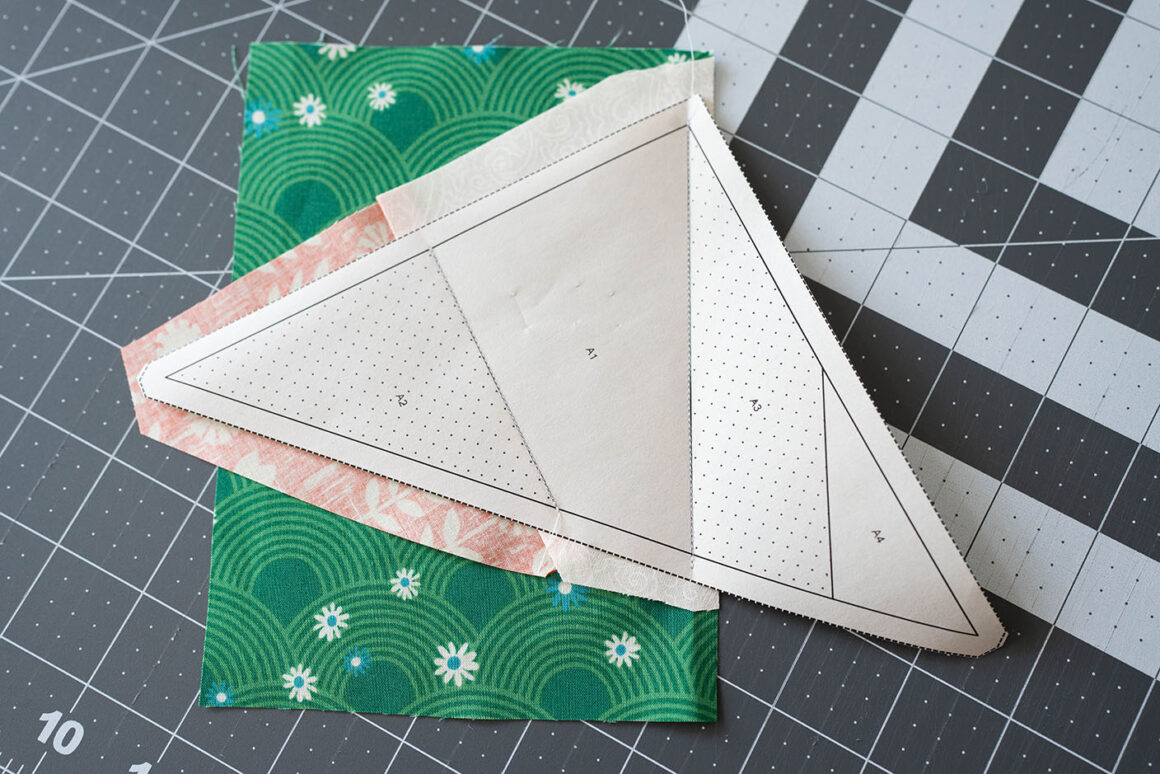
We’ve now completed the A1/A2 sections…so A3 is next! If you’re making the Lucky Spin block, you’ll see that A3 is on the other side of A1…so the line they are connected on is the next seam we’ll be sewing. If you’re making a different template, the process is the same, just move on to the next number.
Cut a large piece of Color/Print fabric that will cover the A3 section and place it upside down over the original A1 piece (pretty sides will be touching), all while making sure it overlaps the A1/A3 line by 1/4″. I’ve added the line digitally so that it’s easier to be seen in the photo:
Finger press, fold and flip the fabric over just like the previous section to make sure that the fabric covers the template on all sides. If that’s good to go, pin your A3 fabric into place, making sure to put your pin towards the middle of the fabric so you won’t sew over it.
Flip the block over and sew into place on the A1/A3 line, just as you did the last section. And don’t forget to backstitch at the start and end of your seam!
Time to trim that seam to exactly 1/4″!
Just like the last section…flip the block over to the right side and gently fold back the template’s edge:
Line up the ruler with the 1/4″ line directly over the seam/A1+A3 line and trim 1/4″ past that seam:
Unfold the template:
Flip the template over and press your new seam towards A3:
And go ahead and trim any excess fabric if desired. Just remember to only trim beyond the edges of the template at this point.
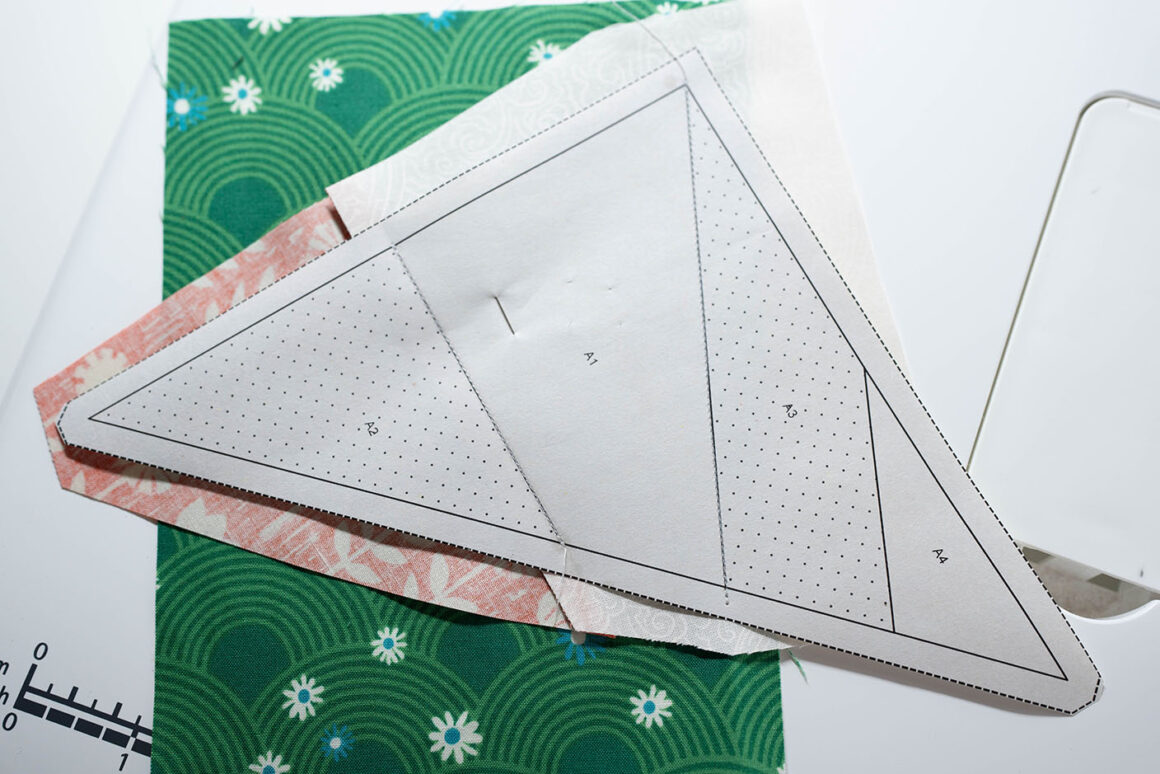
Moving on to the final section – YAY! There are only 4 pieces for the Lucky Spin template so A4 is the last piece. If you’re working on another pattern/template, just keep repeating steps until you’ve done all of the numbers in order.
Foundation Paper Piecing steps just continue repeating so I won’t drag you through all the steps yet again. But if you’re making the Lucky Spin template, your A4 piece will be a Background/Low Volume piece:
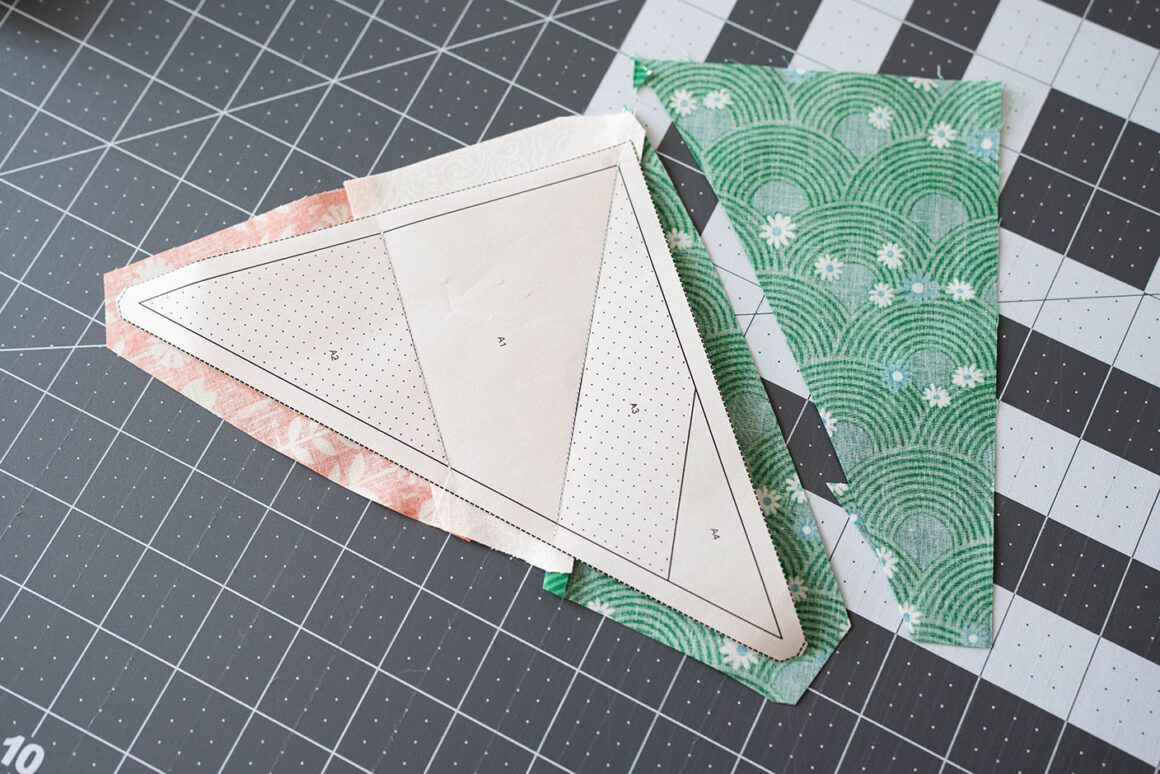
Trimming the Template
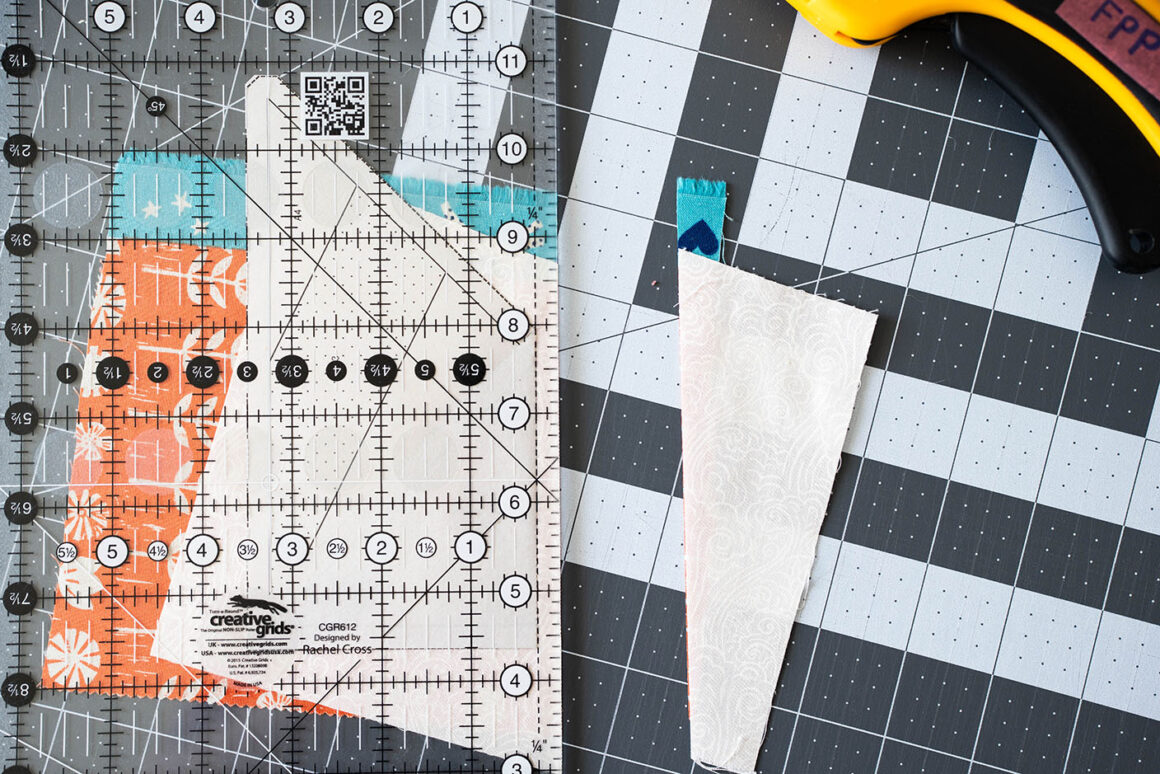
At the very end, once you’ve sewn on all sections of a specific template, you are now ready to trim it. Use your ruler to go around the edge of the template and cut directly on the outside 1/4″ seam allowance line:
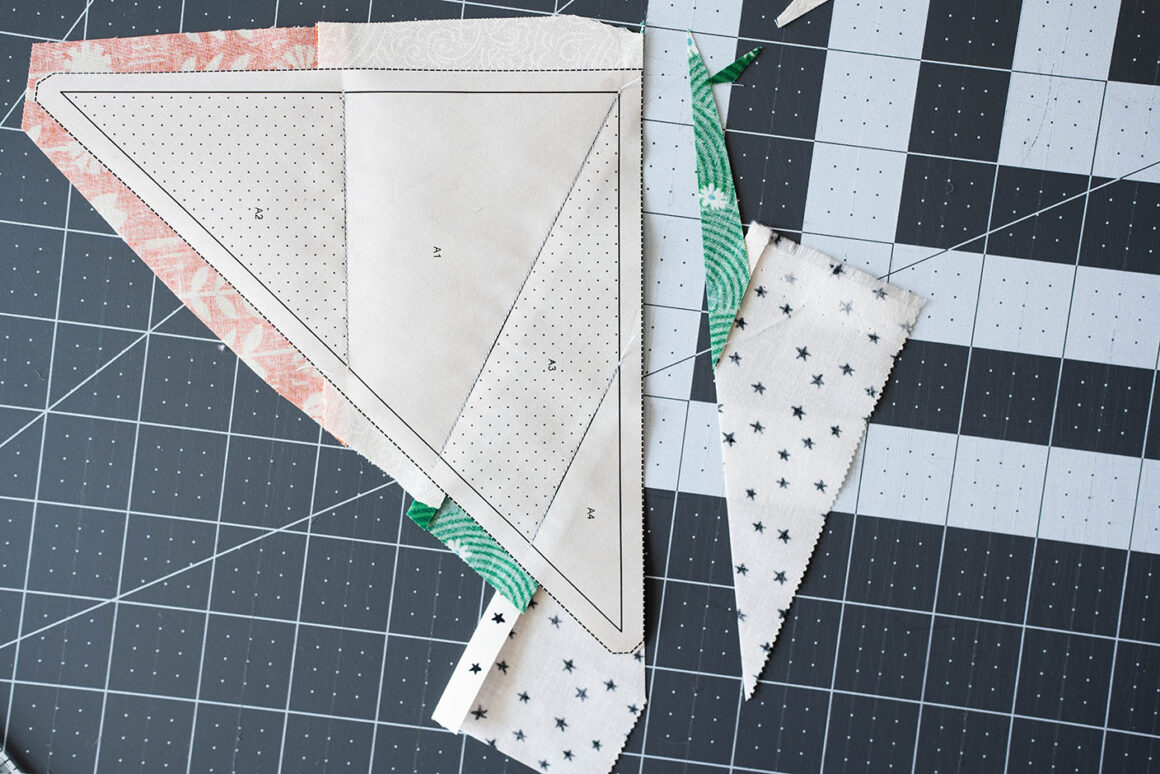
Just go slow and be as accurate as possible.
And with that, you’re done with your very first template!
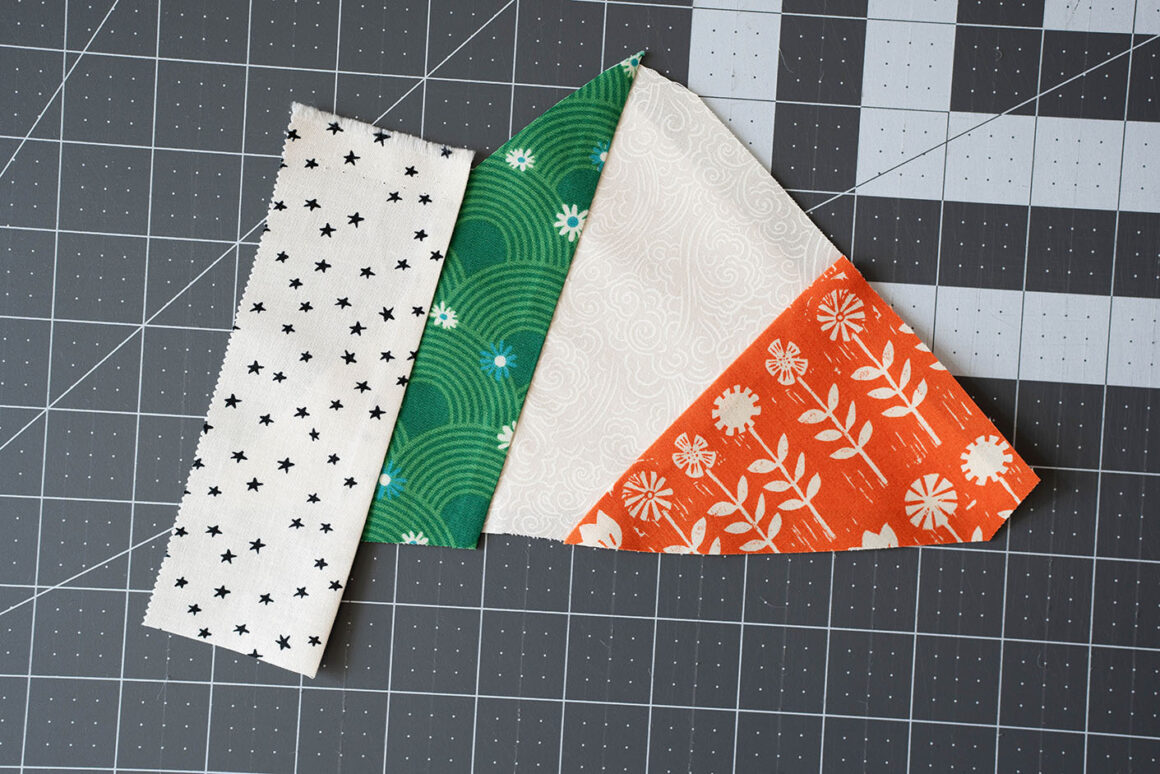
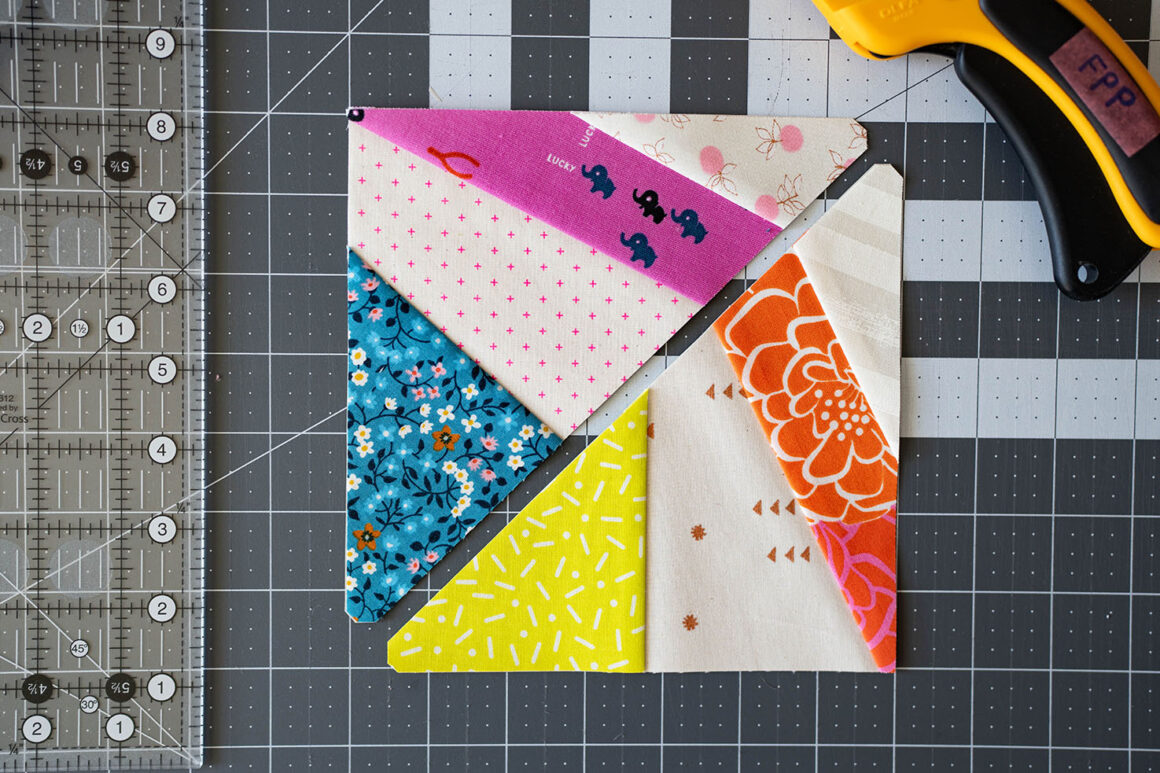
Most FPP patterns will have multiple template sections so you’ll just continue to complete all templates for your pattern. If you’re making the Lucky Spin pattern, continue on to make the B template.
Now I know some people prefer video tutorials so if you’re still needing more guidance, I recommend Fons and Porter’s FPP Basics series on Youtube. It’s an older video series but it’s great and actually the video I used to learn FPP!
Joining Templates
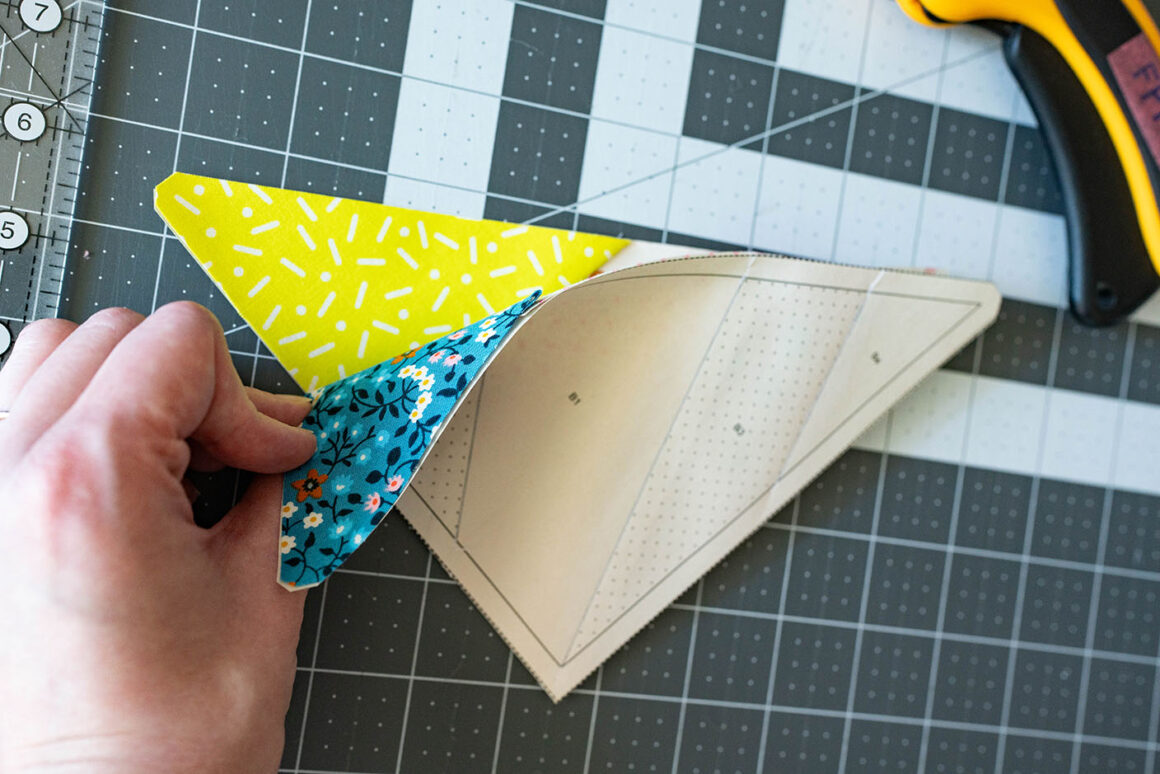
In order to finish your FPP block, you’ll have to join the templates you’ve created. If there are more than 2 sections, the pattern should tell you in which order to join them. If making the Lucky Spin pattern, you’re going to join one A template with one B template:
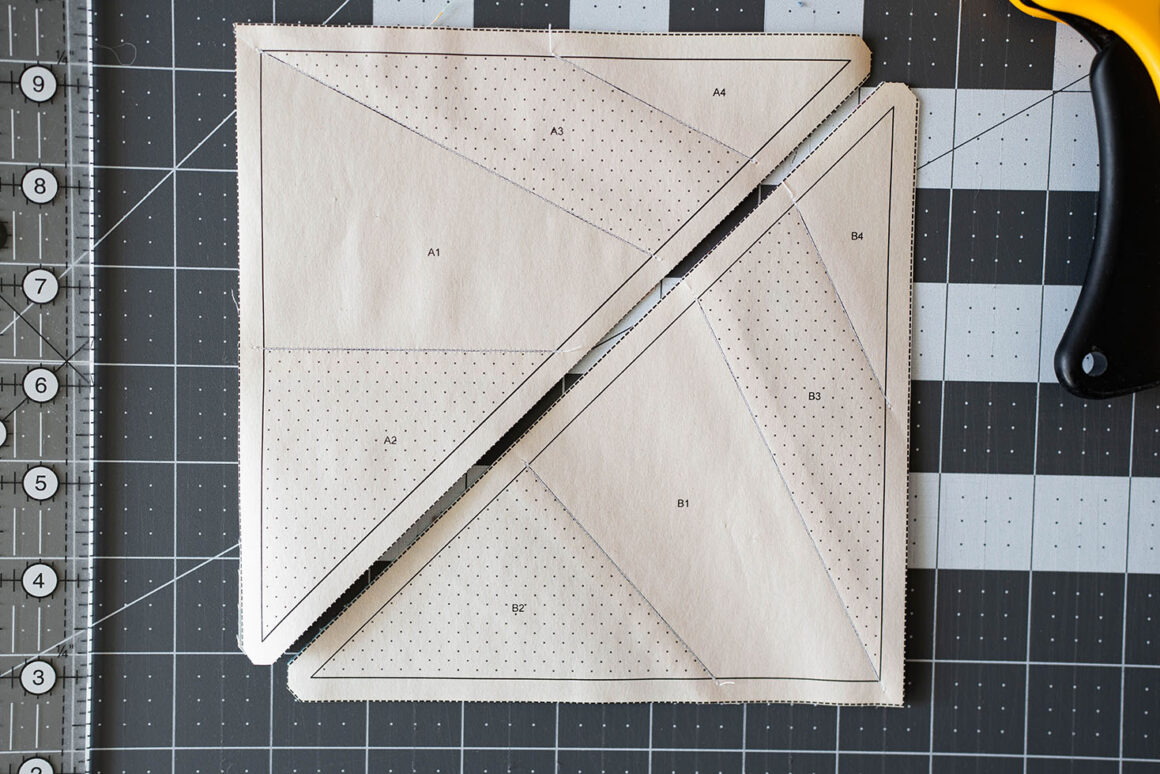
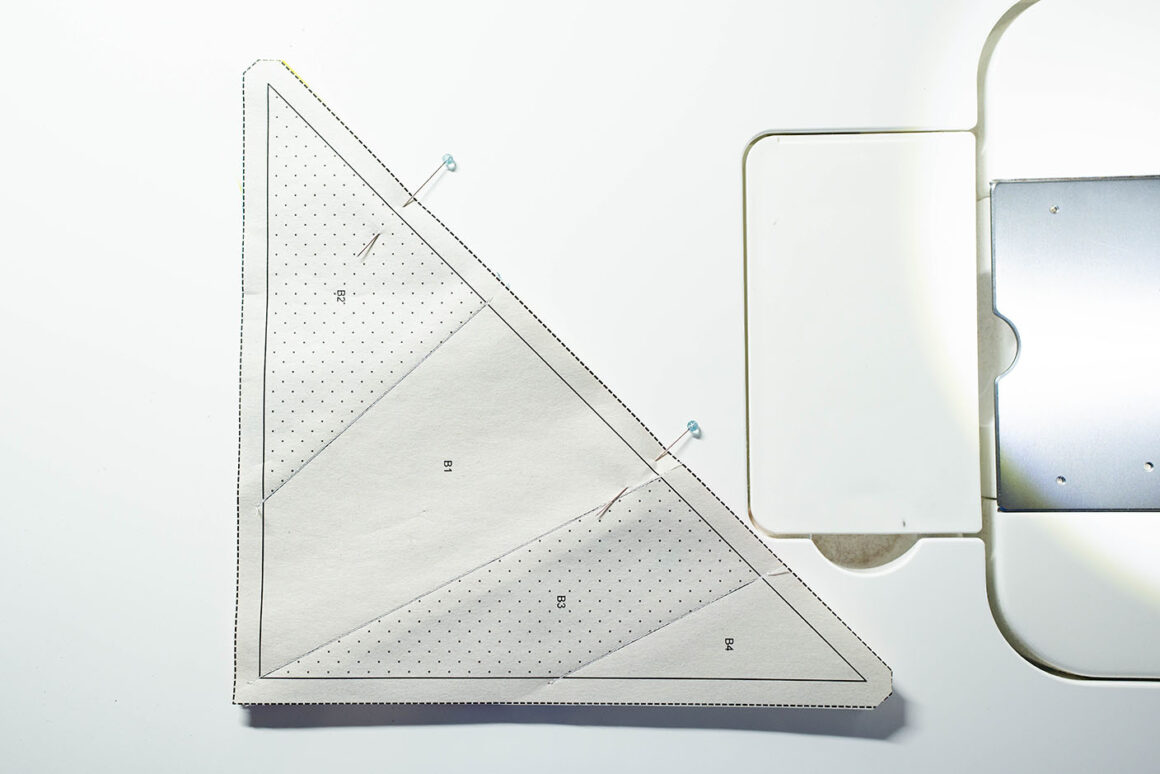
To join these two templates, simply place them so that they are right sides together and edges perfectly aligned:
Then pin them together. The paper and fabric are somewhat bulky at this point so I really do recommend pinning or your blocks may shift when sewing them together:
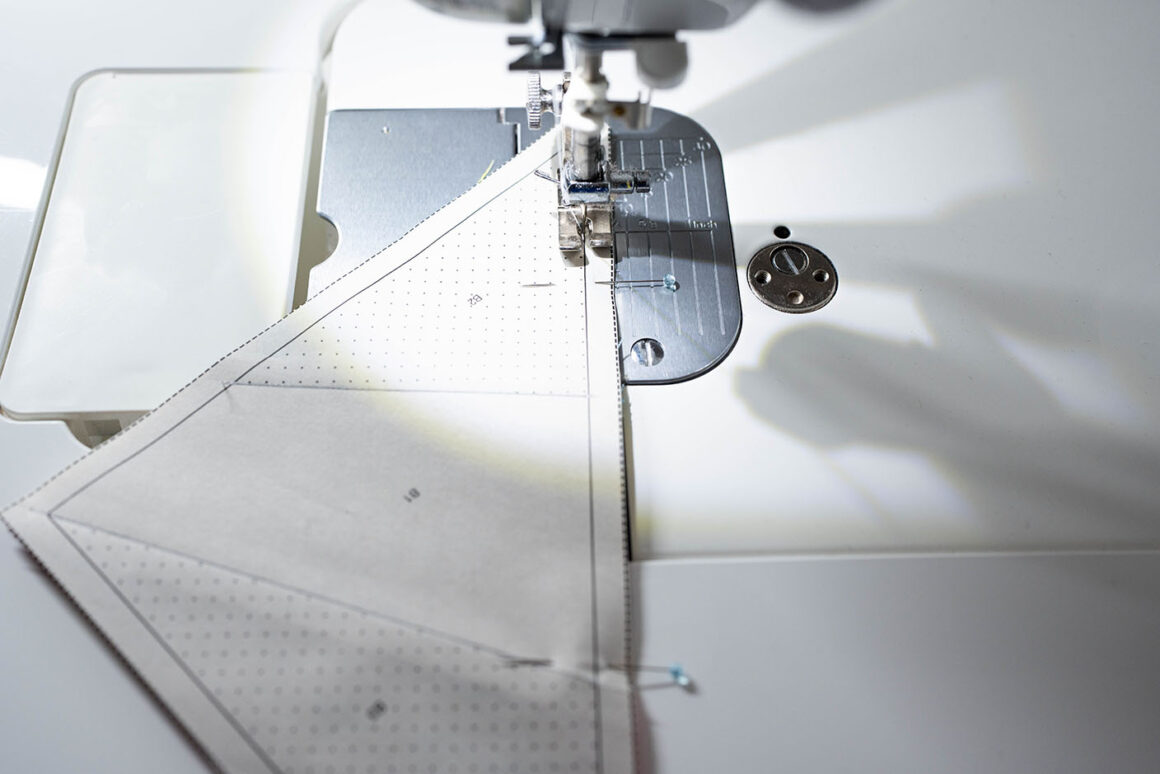
Sew along the main diagonal edge, from corner to corner, making sure to backstitch to lock stitches in at the beginning and the end:
Open the block and press the seam open due to the bulk. I will normally use my iron at this point since the seam is on the thicker side.
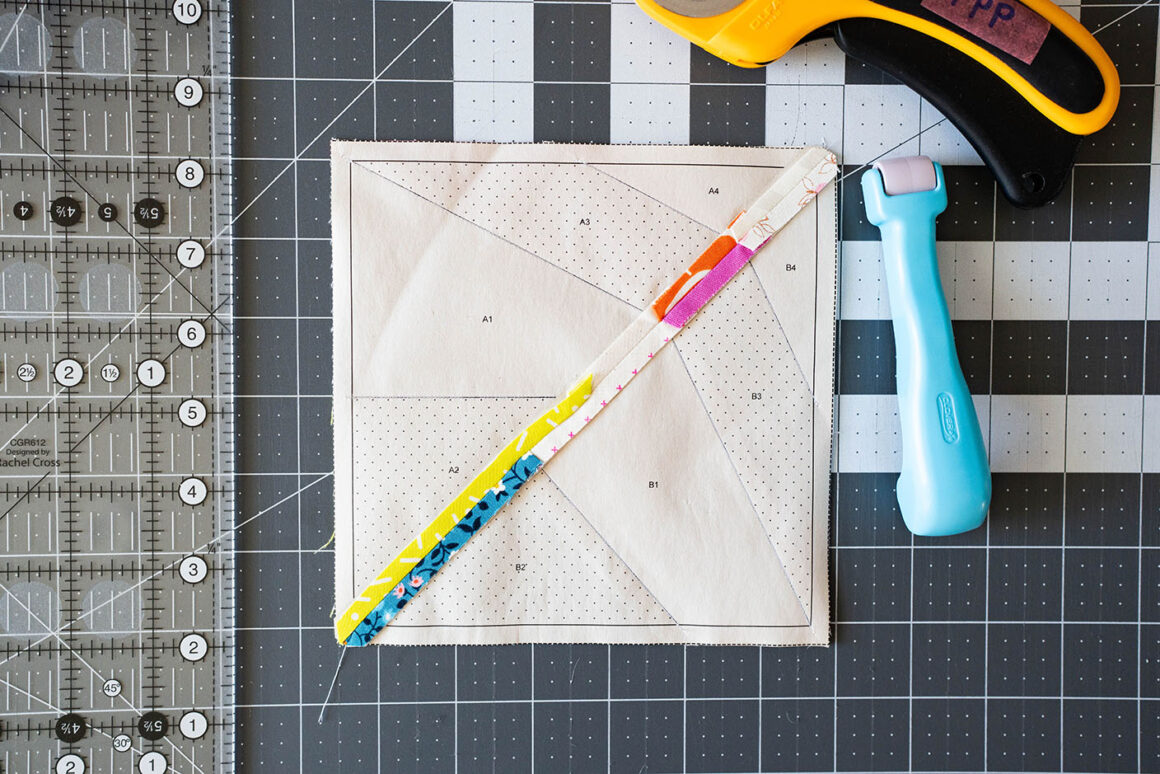
Flip it over and ta-da!
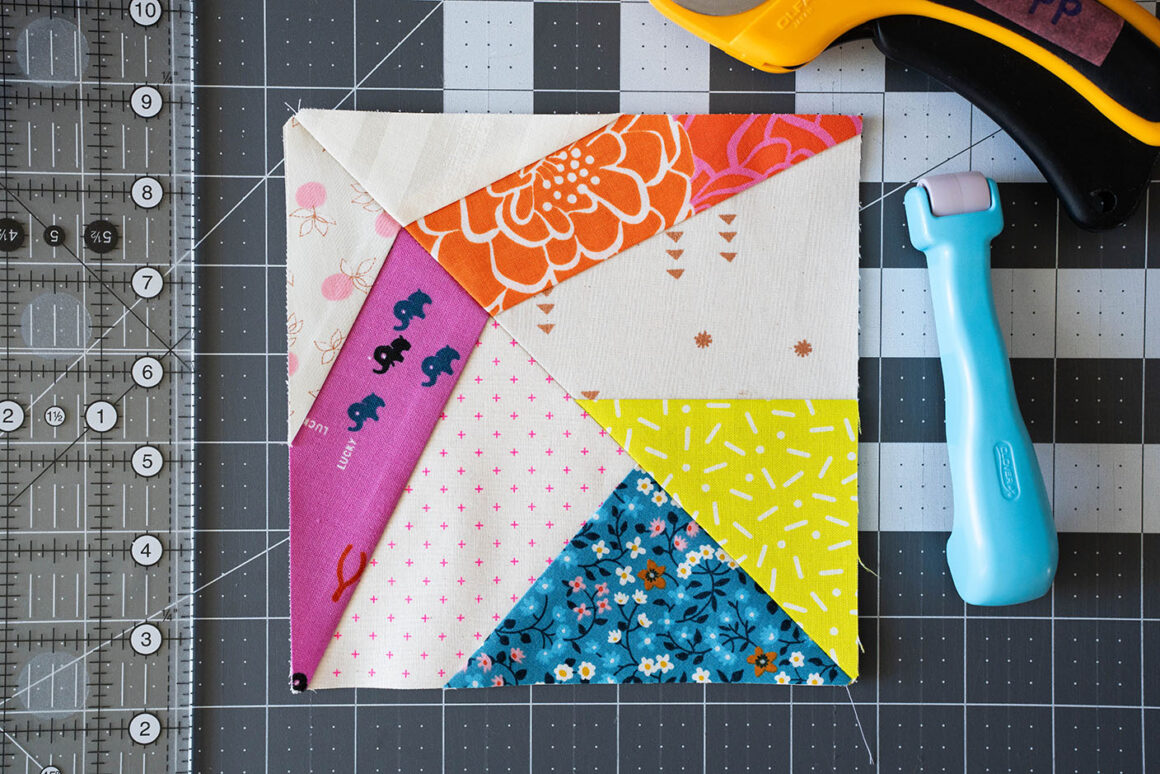
If you’re making the Lucky Spin block, the free instructions will give you more info on sizing and total number of blocks needed.
Removing Papers
There are several schools of thought on this and I prefer to keep all of my papers in until the very end when I’m done sewing the quilt top. My Juki can handle super thick seams and I love it for that. Keeping the papers in helps by keeping the fabric pieces that are cut on the bias edge from stretching out and distorting your blocks.
On the flip side, if you’re finding that your sewing machine is struggling to get through thicker seams when joining templates, you may find it easier to remove portions of the template. I would suggest only removing the paper on the seam allowances so that your machine can go through more layers easily.
When removing papers, remember to do so gently. This is when using FPP specific paper comes in handy. It’s easier to remove than printer paper and you don’t have to pull as hard. If you’re going too quickly and pulling too hard on the paper, you can sometimes break your stitches and you don’t want to do that.
And finally when removing papers at the very end, you may find it hard to remove paper sections in some of the smaller seam areas. That’s why I love fine point tweezers! They can get to places that your fingers can’t.
If there is something I haven’t covered or you have a question about, please leave me a comment! I’m happy to help in any way I can!