
Quilt, Quilt Patterns, Tutorials
Rustic Rag Quilt Tutorial
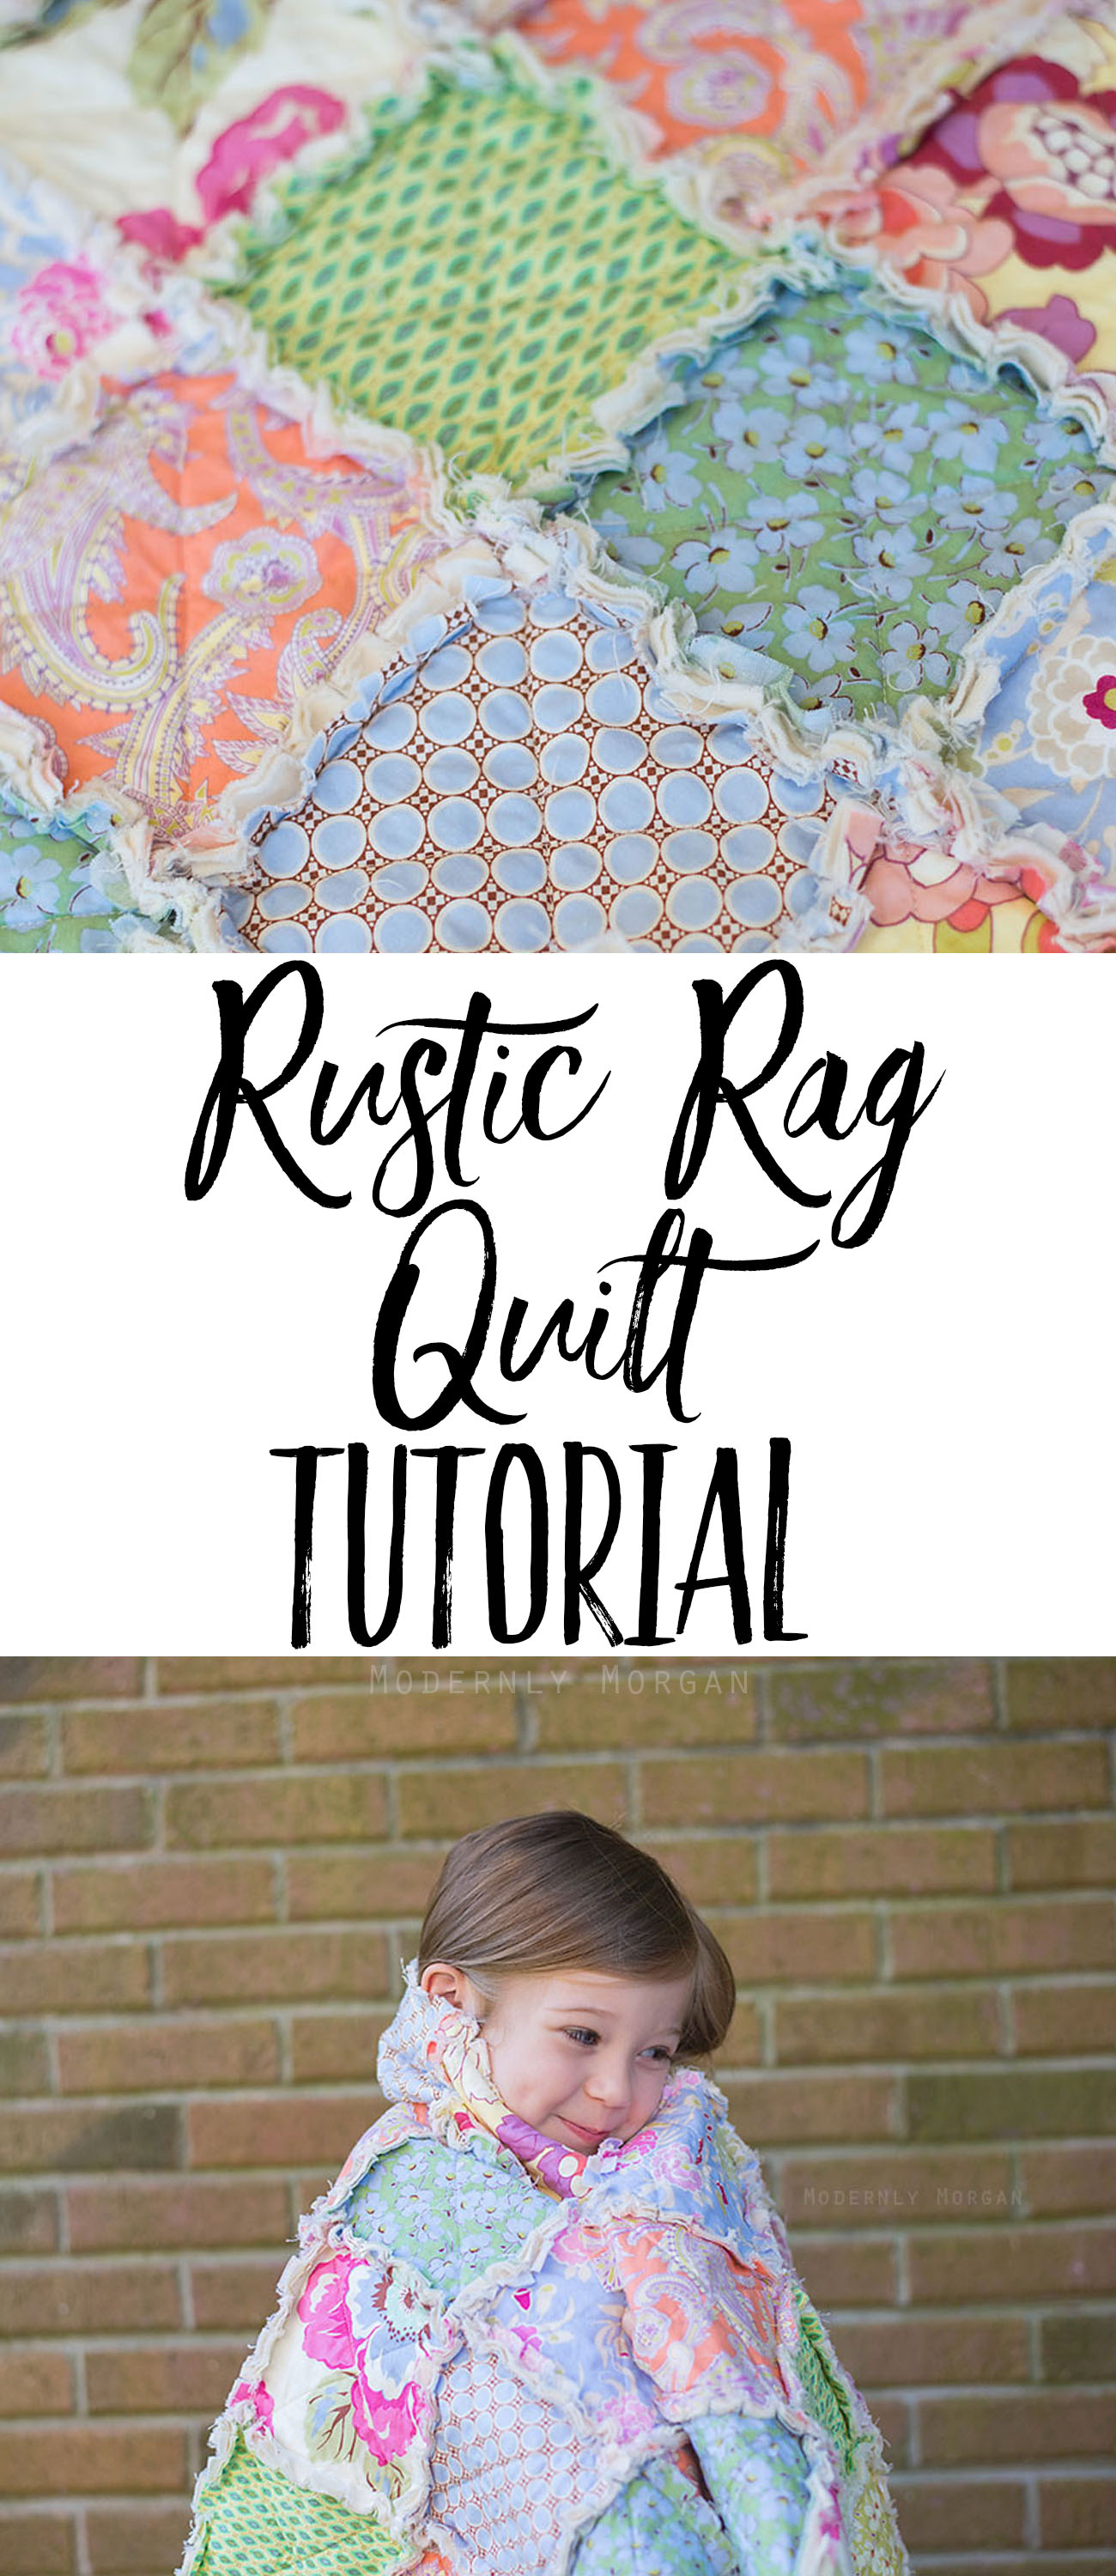
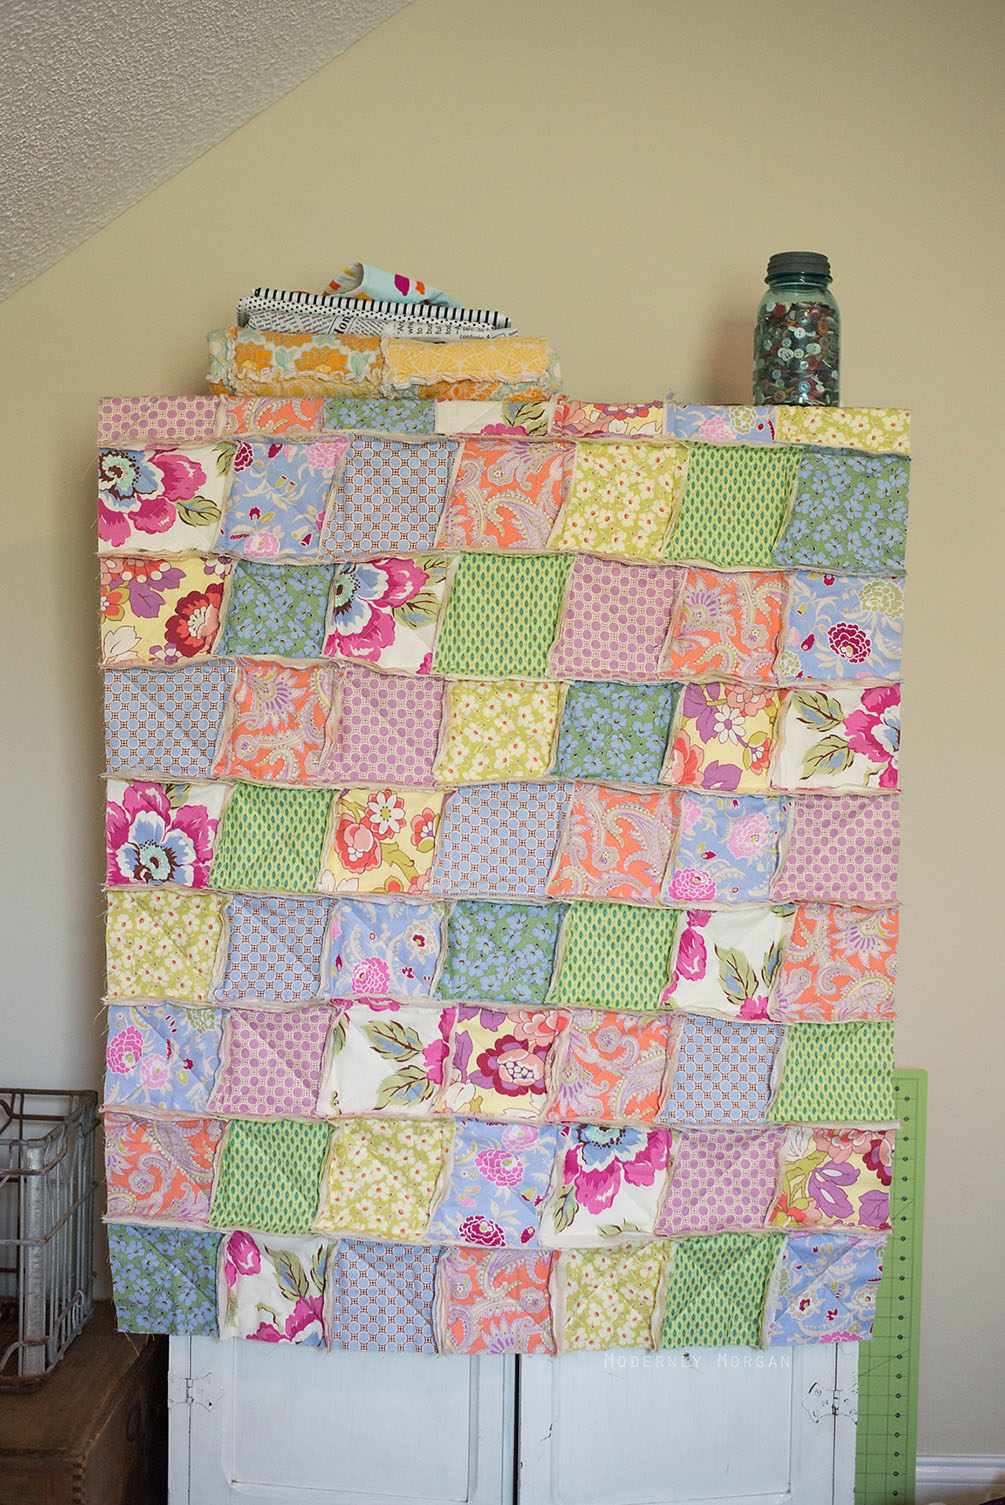
Rustic Rag Quilt Tutorial – a super easy and quick quilt (great for beginners) that looks well loved and cozy from the very first wash!
I’m a huge fan of rag quilts and today I’m sharing with you how I make my personal style of rustic rag quilts! There are a bunch of different styles of them out there…but I prefer the ones that look broken in right from the beginning. And this is one of the only projects where I will stress that imperfections actually make your quilt more successful!
I tried to write this tutorial for the absolute beginner so if you know a thing or two about sewing, bear with me. 😉
The quilt we’ll be making today is a 34×44 inches. Perfect to use as a tummy time quilt for a baby or a great throw quilt for a young child. The directions can be easily modified with a little bit of math to make a larger throw quilt by either adding more squares or making your squares larger.
So let’s get going!
What you’ll need:
- 1.75 yards of muslin for backing (I prefer natural/unbleached since it adds to the vintage feel)
- 1.75 yards of fabric for front (that’s the total amount of fabric needed but you’ll need to break that down into 5-7 different prints or solids)
- Warm and Natural Cotton Batting (this one is perfect for this size quilt…and I swear by this batting in order to achieve the rustic look).
- Walking Foot (this is the one I have, it’s generic, affordable and is a workhorse!).
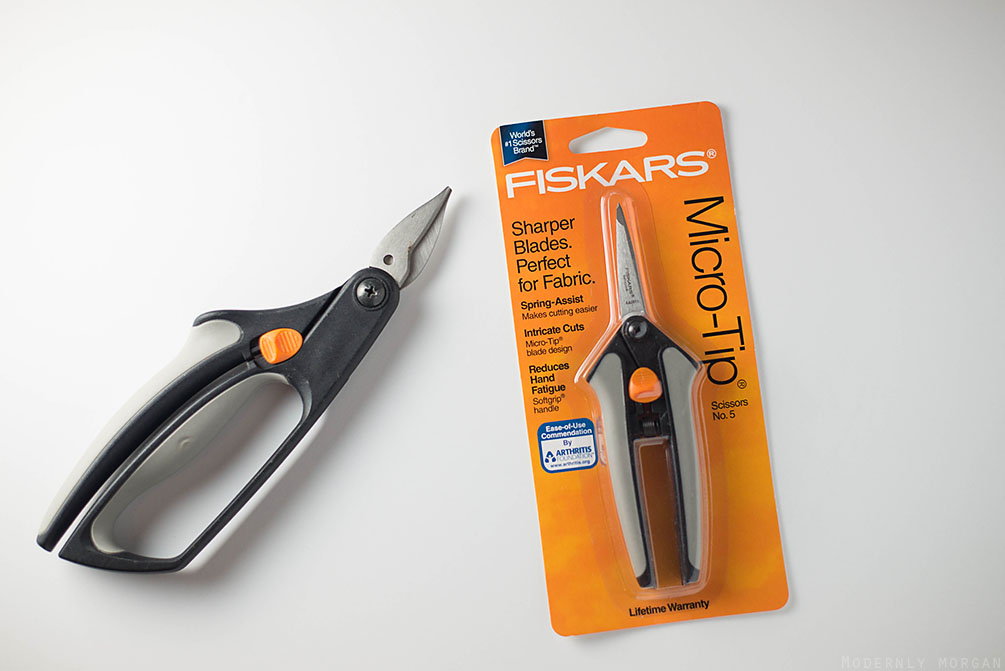
- Spring loaded scissors (another must have…either these or these will work perfectly)
- Neutral thread (Coats and Clark in 8010 matches perfectly with every unbleached muslin I’ve used)
- Rotary cutter, mat, and cutting ruler (this is a great introductory set that I started out with).
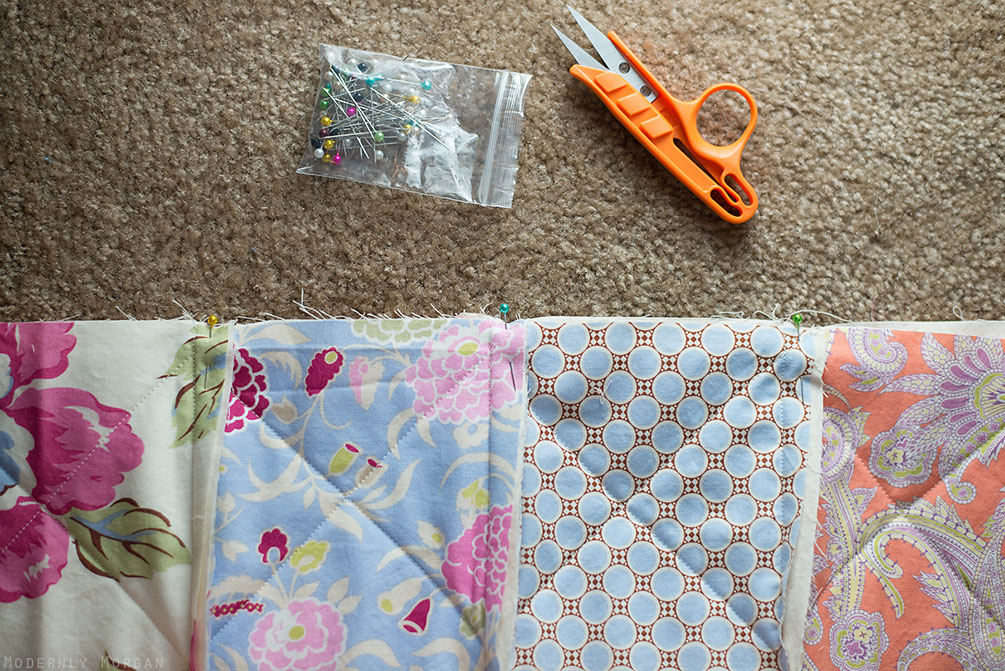
- Fabric pins
**Side note…with both the muslin and fabric, this is based off of 45″ wide fabric and you will have a small amount of leftover scraps…I prefer to be on the safe side, especially if you mess up a square or two**
***DO NOT PREWASH FABRIC/MUSLIN/OR BATTING!***
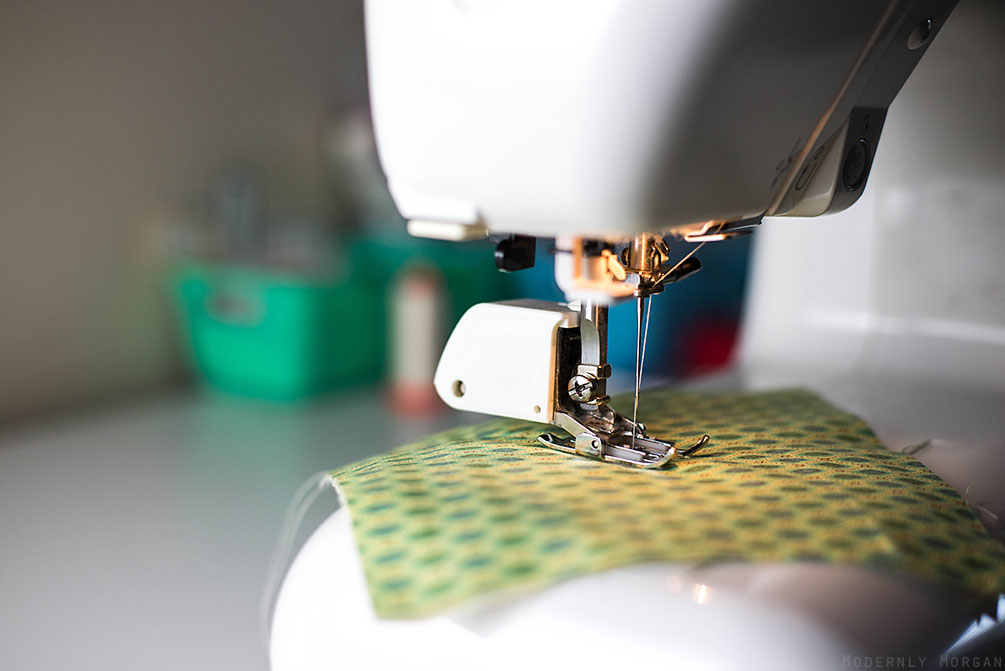
As I mentioned above, a walking foot is a must have. I tried making a few of these quilts early on without one and the multiple layers of fabric will slide around too much. Invest in one and you won’t regret it, plus you’ll get more use out of it with future projects. 🙂 Mine is a generic/universal foot that fits on pretty much every low shank machine out there.
Also…please do yourself and your hands a favor and buy spring loaded scissors. It’s not really optional, lol! Your hands will be screaming if you try to use regular scissors for all the clipping…so think about getting one of these (I personally use the ones on the left and for some reason they are showing up super expensive on Amazon but if you check out the other ‘seller on Amazon’ option, you’ll see them listed for what I paid at $16).
So I strongly encourage you to get both the walking foot and spring loaded scissors to help prevent you from wanting to throw your machine and quilt out the window. 😉
Directions:
Get ready for an insane amount of photos because I’m a very visual person!
First, you are going to cut out 63 fabric squares for the top of your quilt…I like to use at minimum 7 different patterns or colors, but that’s just personal preference.
I find it easier if I treat the whole process like it’s an assembly line. I cut long 6 inch wide strips of the fabrics I’m using.
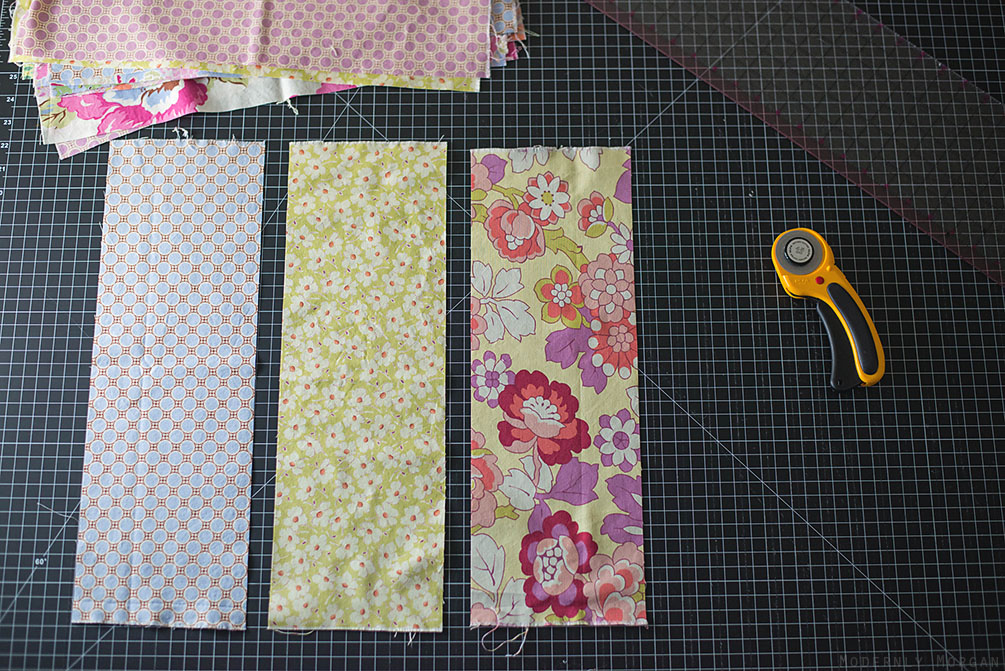
Then I stack the strips on top of one another and cut the 6×6 squares out. Way faster than cutting each 6×6 square out individually.
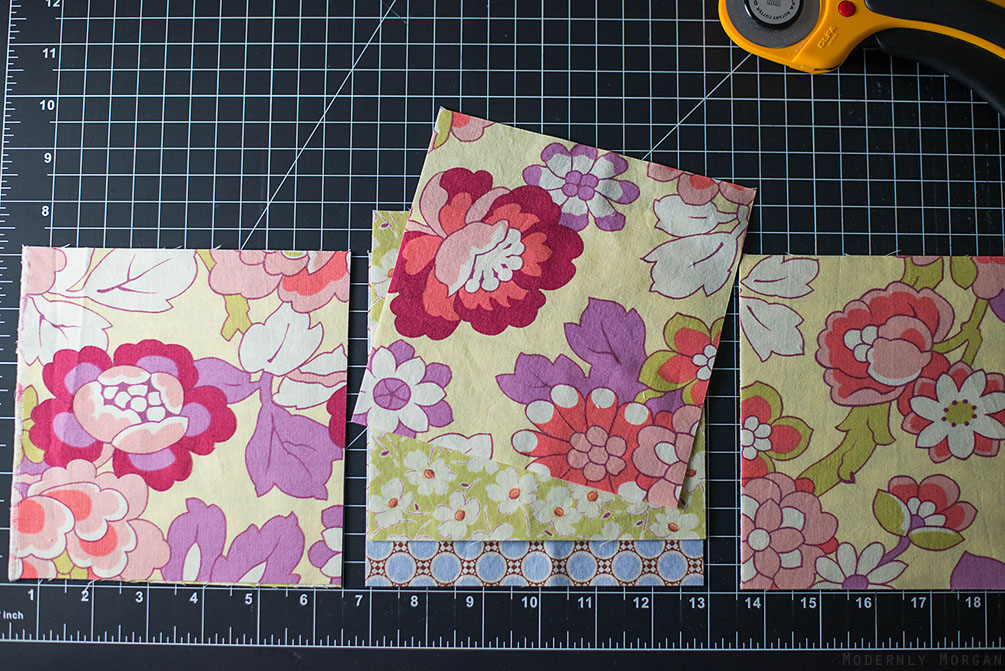
Then I just go through them and sort them by their patterns. After you have your 63 fabric squares, repeat the same process with your muslin (also 63 squares):
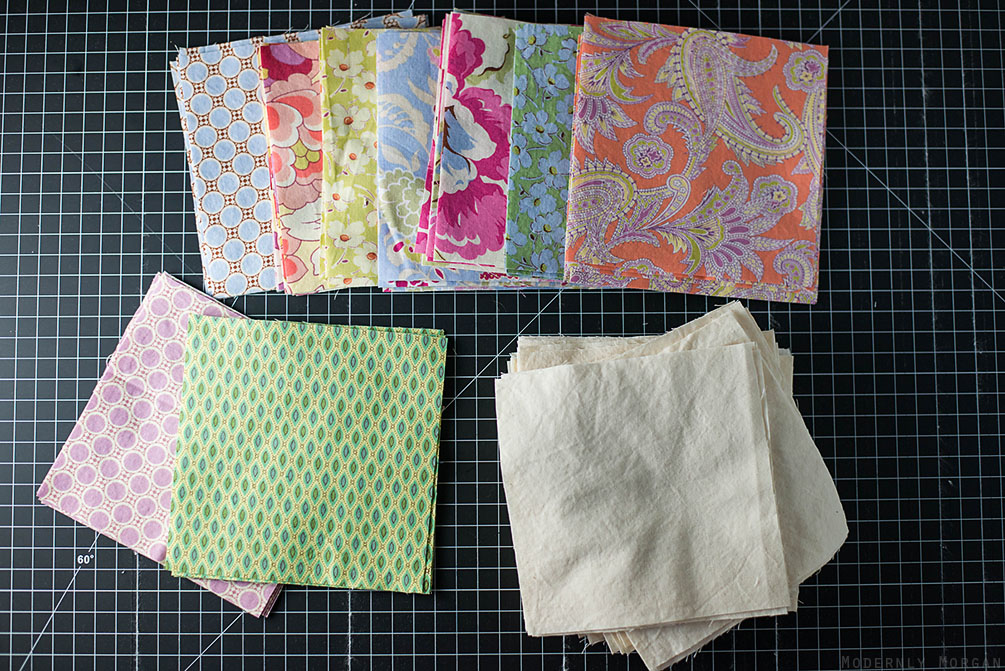
63 fabric squares and 63 muslin squares. 😉
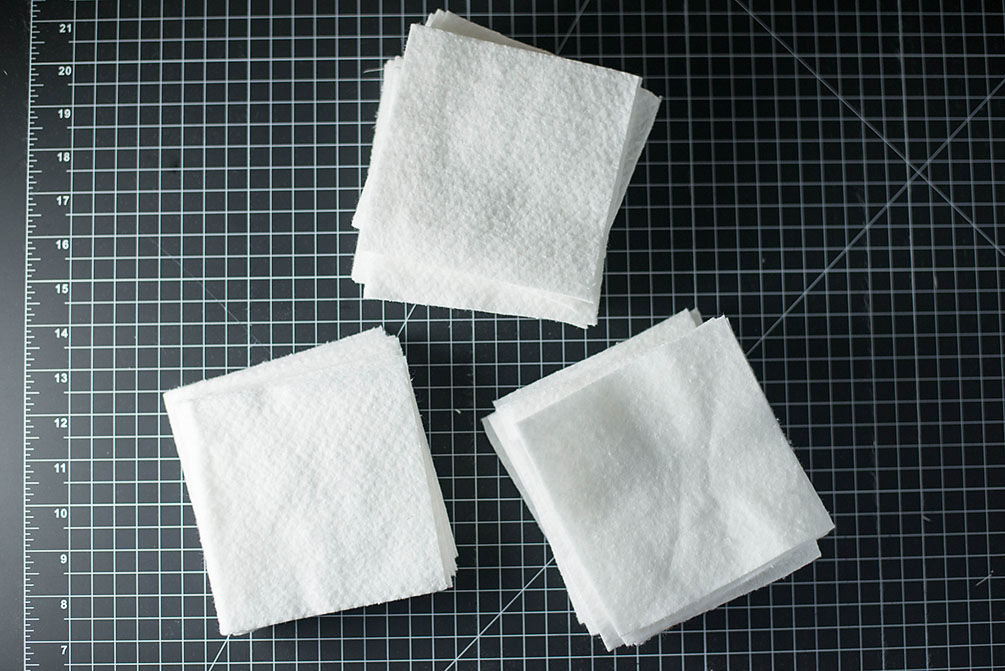
Let the fun continue…and now it’s time to cut your batting squares. As I stated in the supply list…you must go with Warm and Natural batting (there are two varieties, original, which is unbleached and white, which is bleached). I normally prefer the original/unbleached kind…but I had white on hand so I just went with that. Anyway this batting will shrink when you wash your quilt the first time…and that’s what helps to give it such an amazing look…so other batting with man made materials (most of the fluffier battings) will not work! Also, though it’s thin, it’s super warm…so have no fear!
CUT 63 5 inch by 5 inch batting squares.
Now everything you need is cut out and ready to sew! Time to piece everything together.
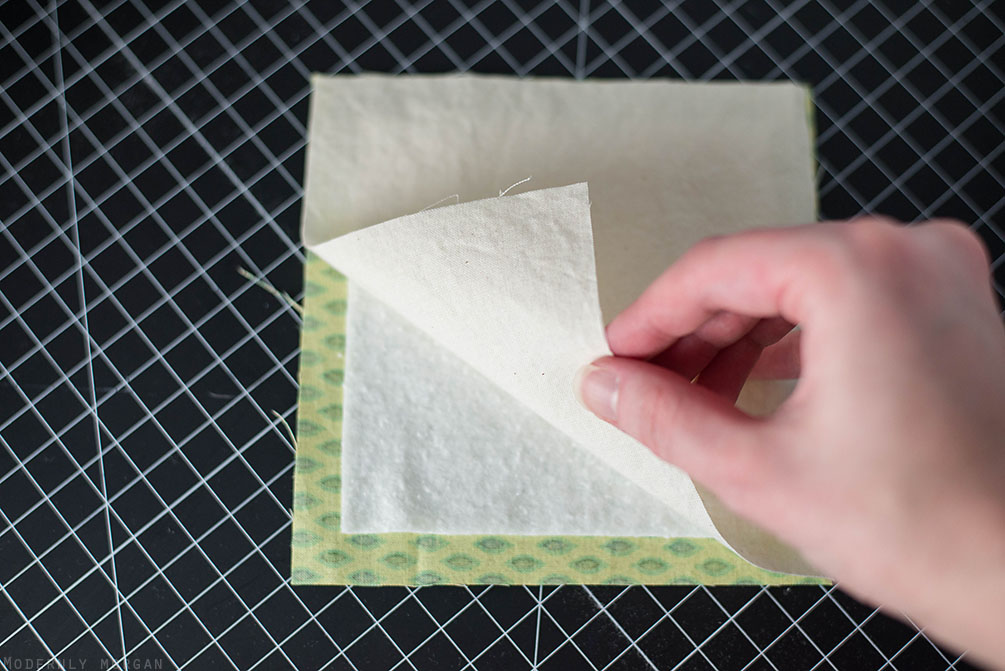
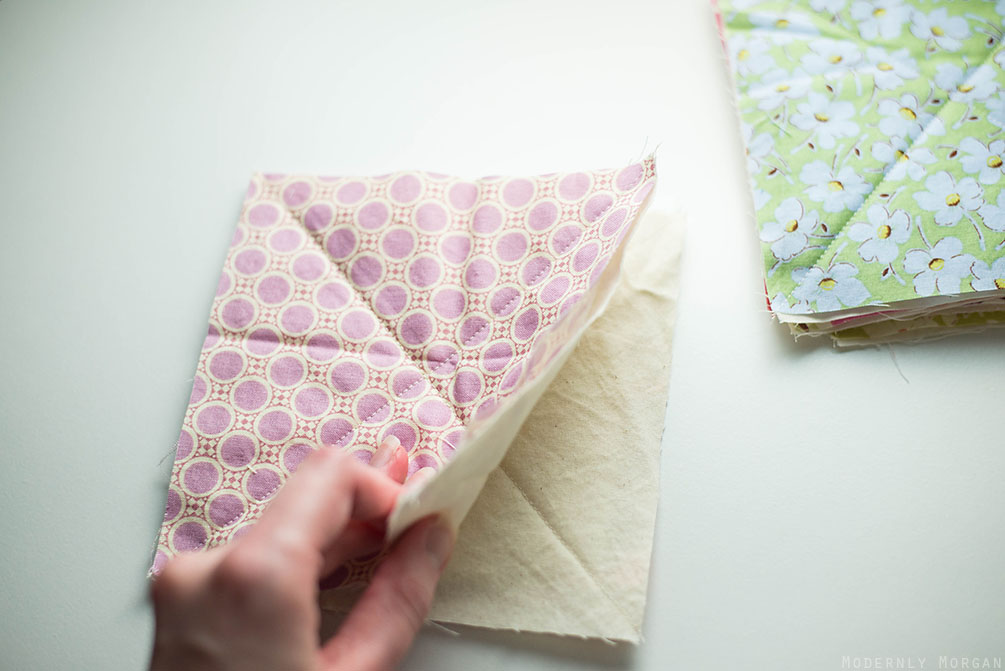
Take your fabric squares and turn them over so that you see the wrong side and place a batting square in the middle of it. Just eyeball it…no need for it to be 100% perfect but it should look like mine:

Now you’re going to lay a muslin square over the top…it’s like a little fabric sandwich. 😉
Do that to all 63 squares (it goes faster if you treat it like an assembly line again).
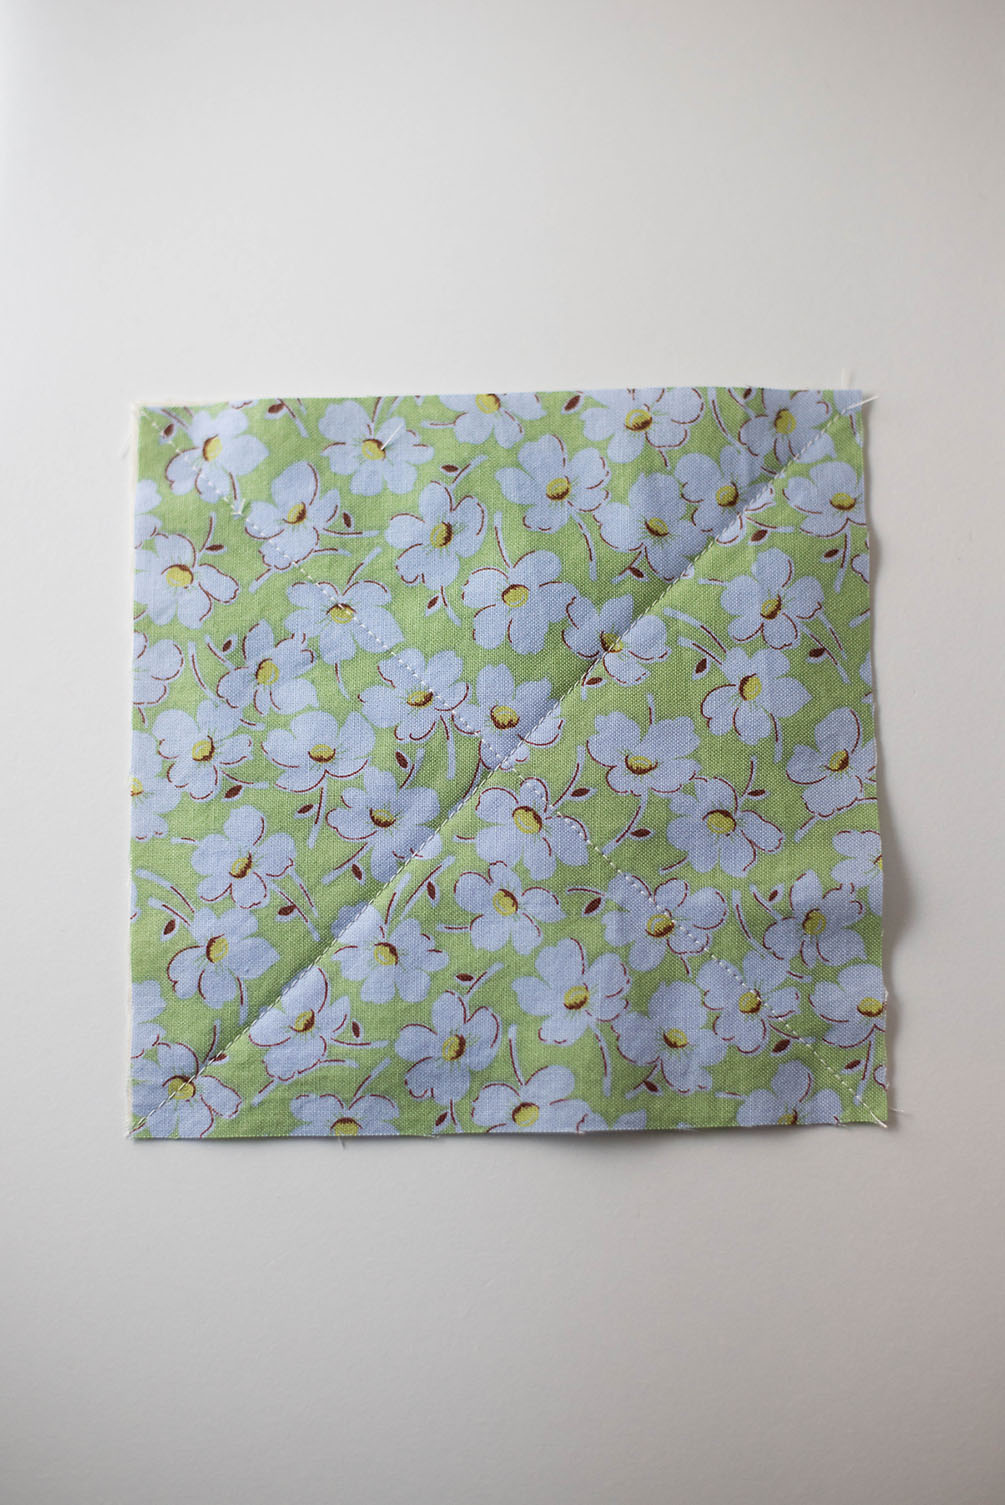
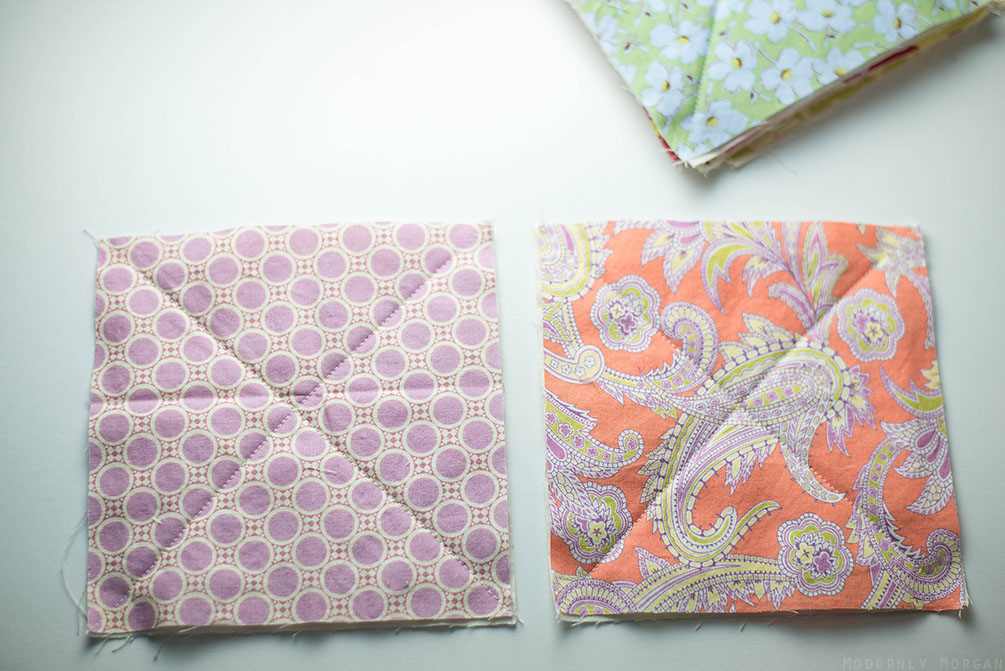
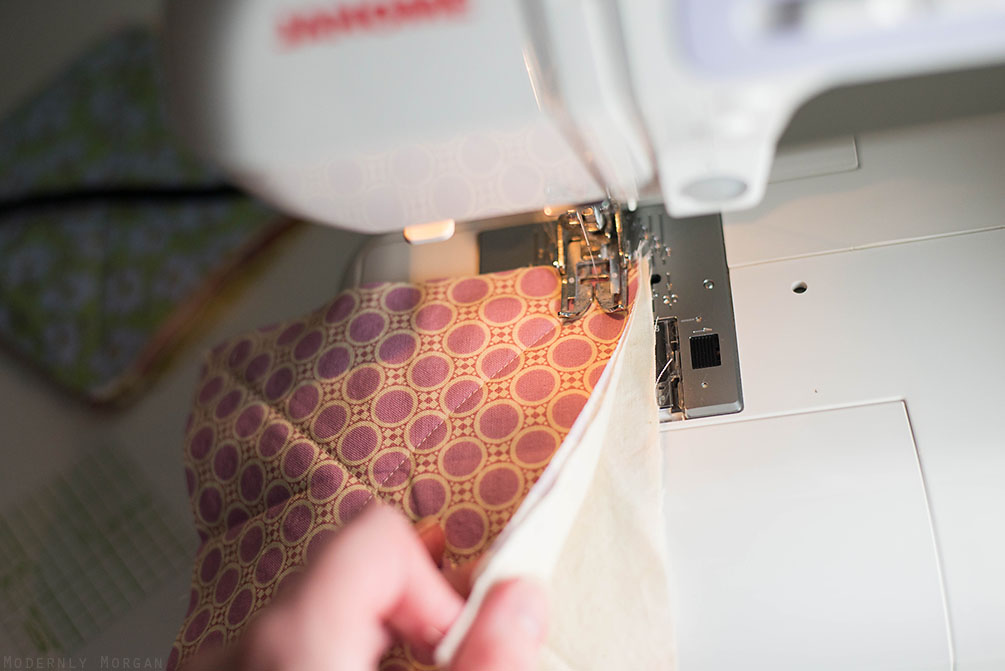
Now, it’s time to sew! Make sure you’ve attached your walking foot and you will sew a diagonal line from one corner of a square to the other:
And I like to chain piece…which means just feeding one square in right after another without clipping in between (goes much faster!). You can see what I’m talking about in the next two photos:
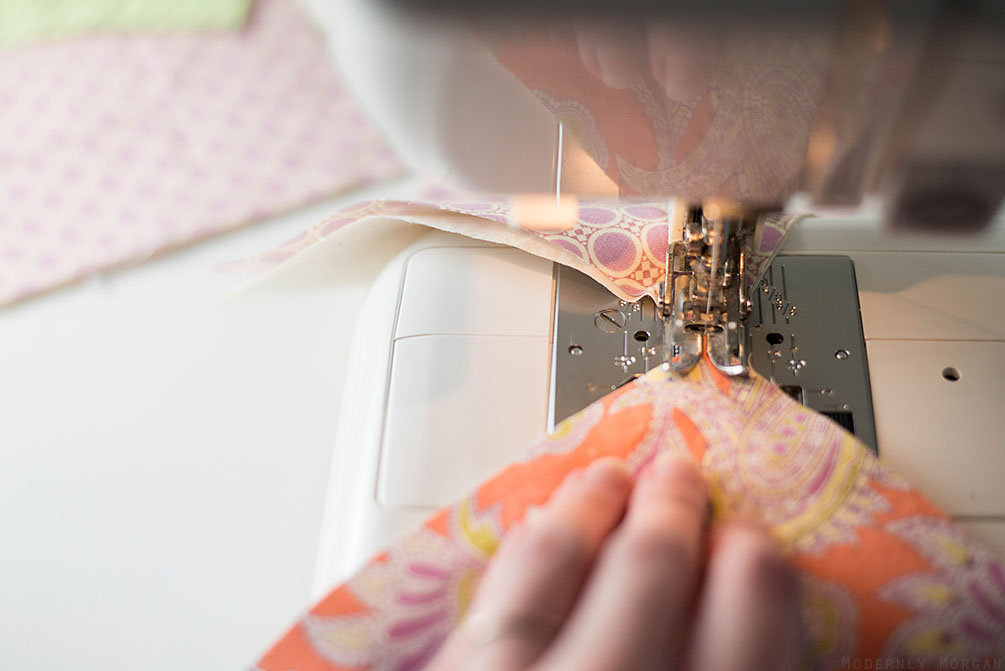
I personally like the sew one diagonal on each square for all 63 squares. Then I’ll go back and clip the threads between them from the chain piecing…Now sew the other diagonal line on each square, leaving yourself with Xs on all 63 squares. It’s actually pretty fast!
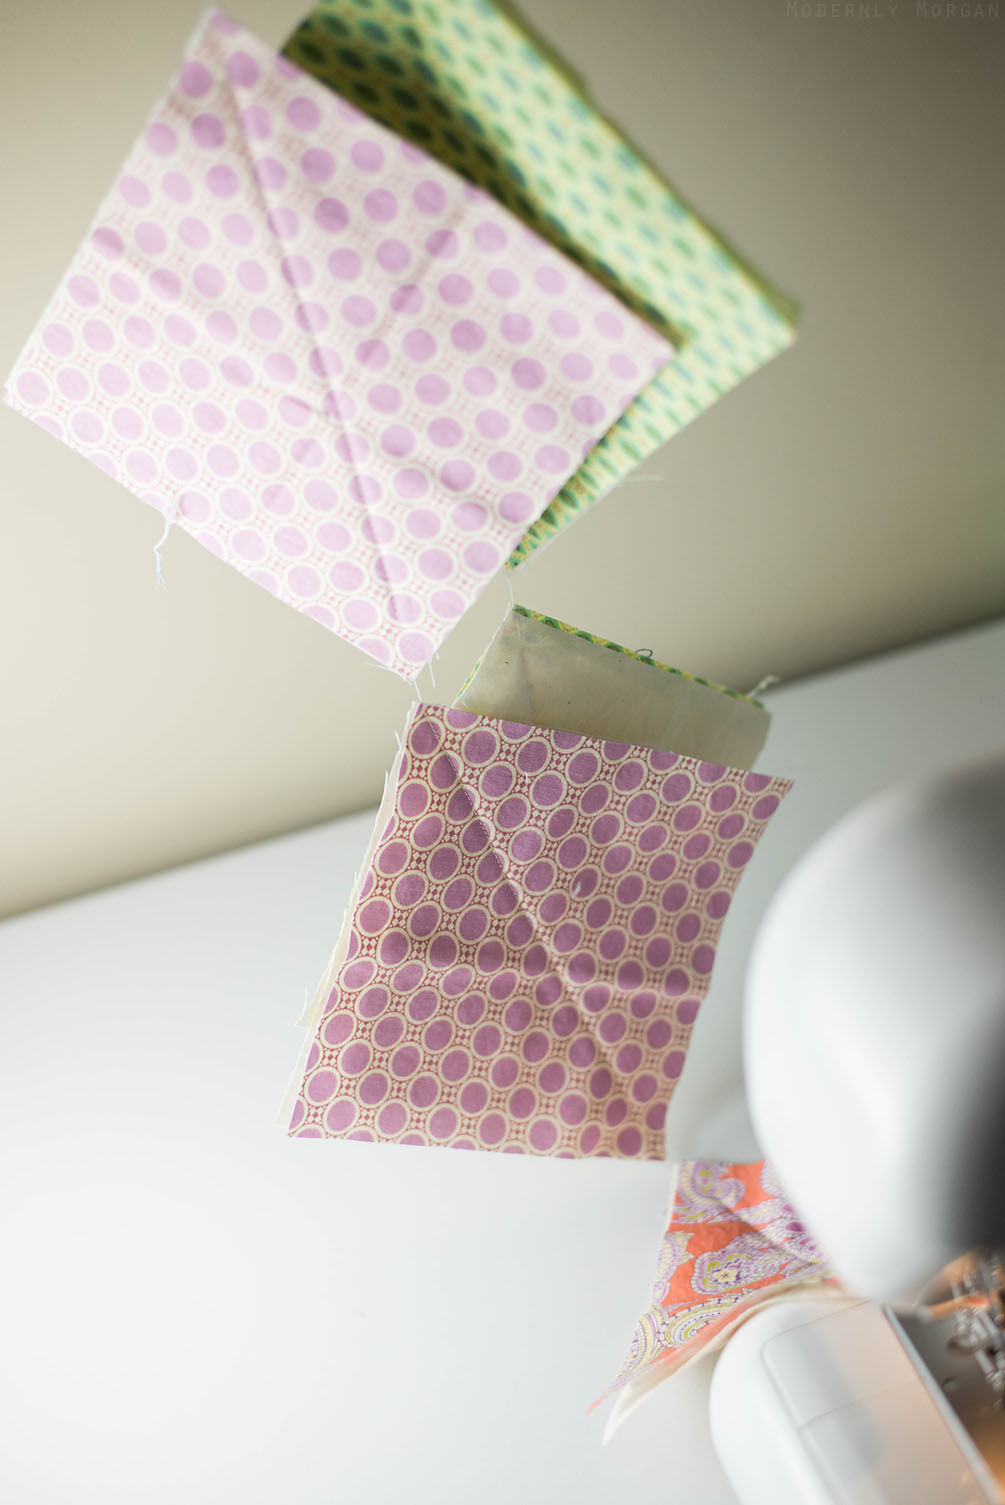
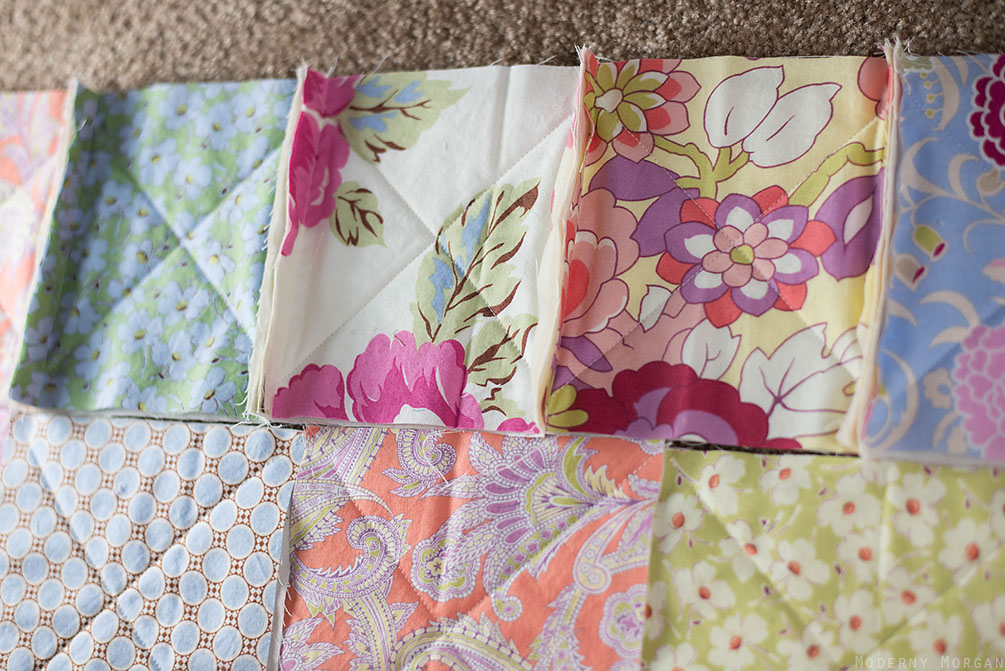
Your finished squares will look like this:
 front
front
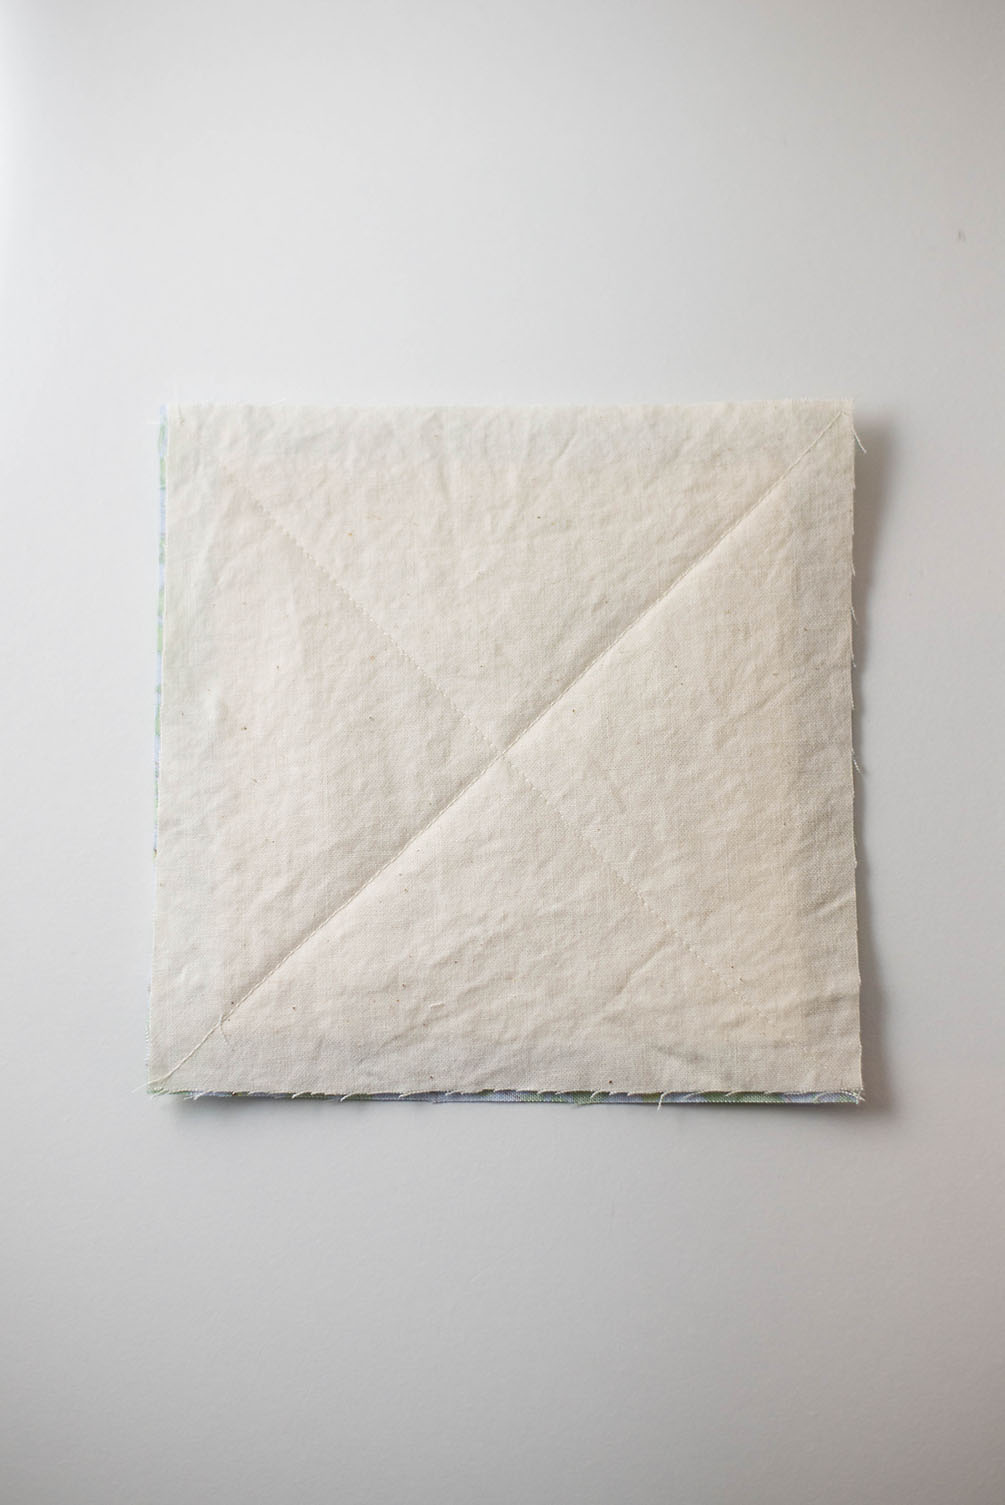 back
back
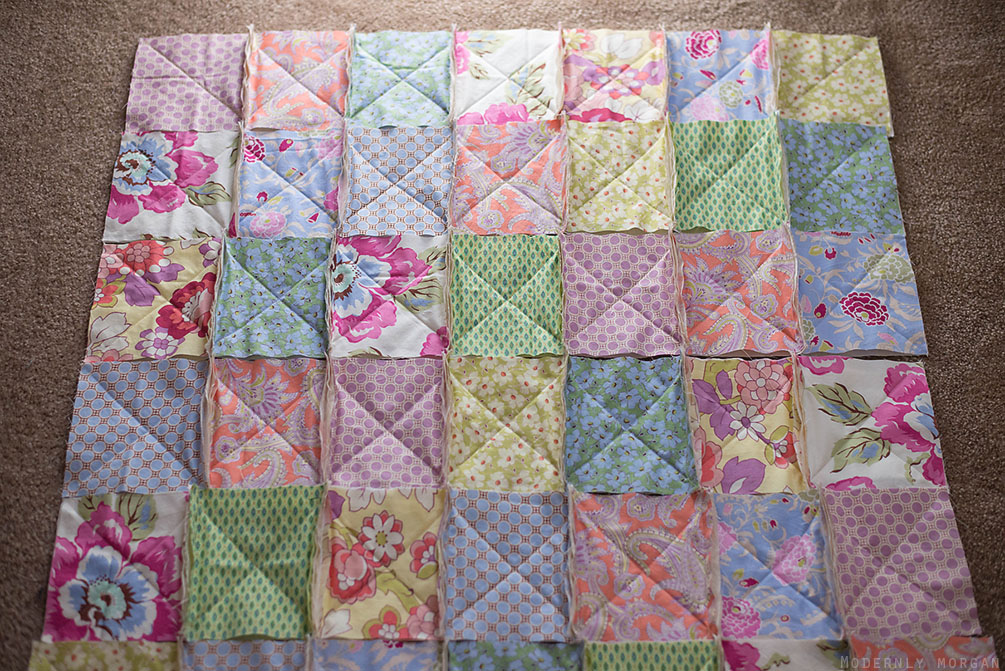
It’s time to lay out your pieces! Your quilt will be 7 squares wide by 9 squares tall. And by laying all the squares out…it will give you a preview of what the finished product will look like. I try my best to not have any of the same patterns or colors touching one another.
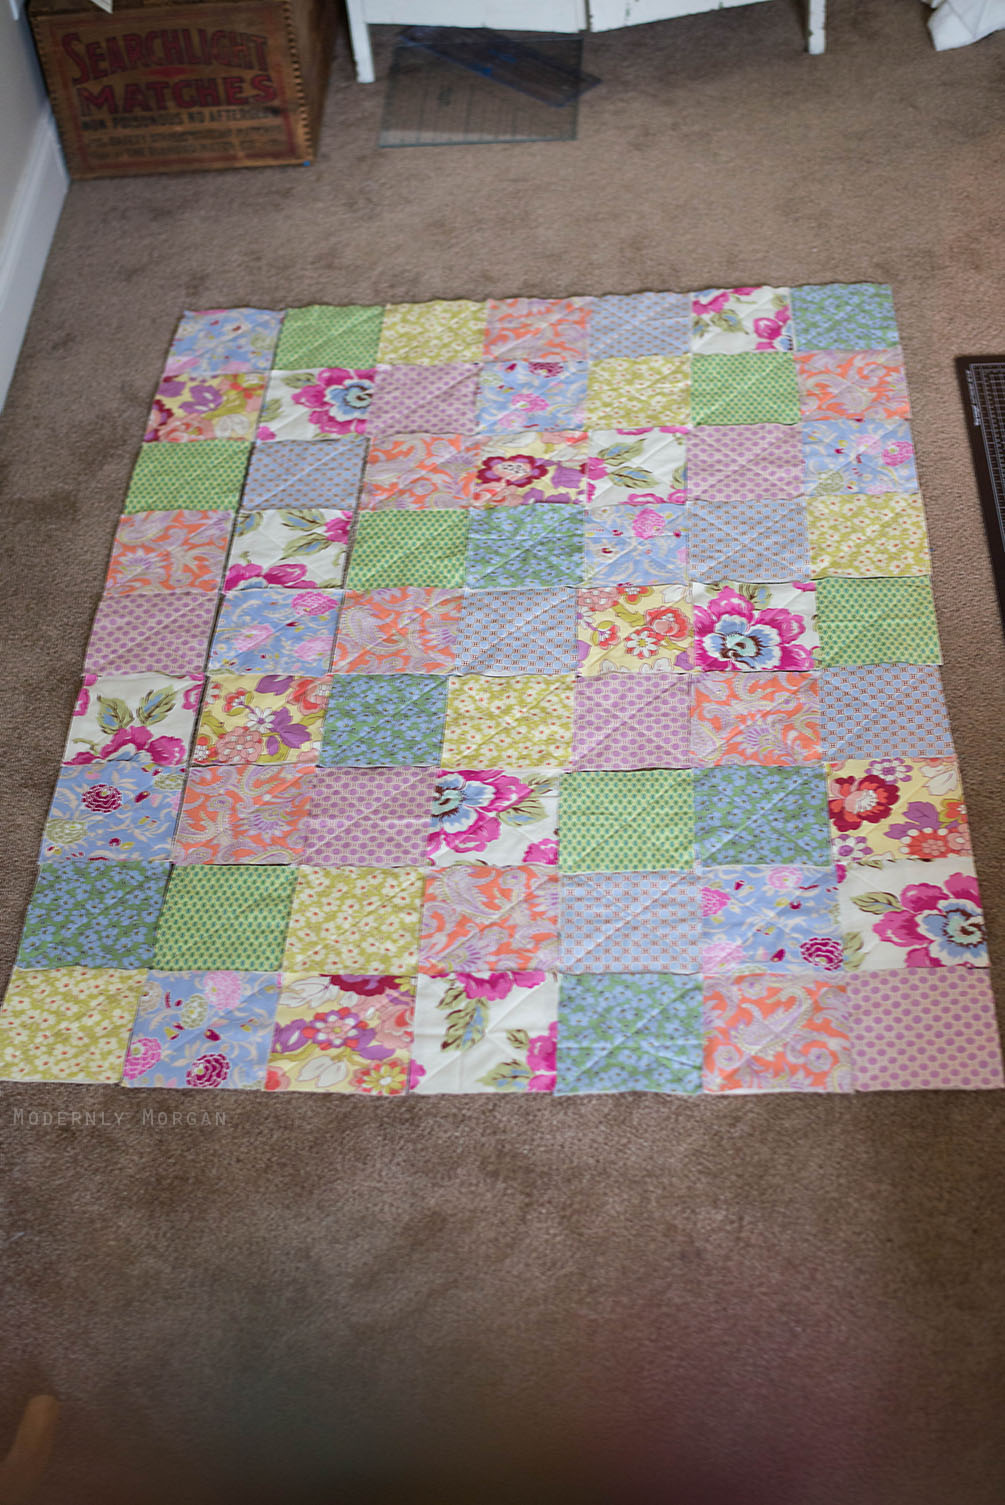
I need to apologize for that horrible photo…it is what it is, lol!
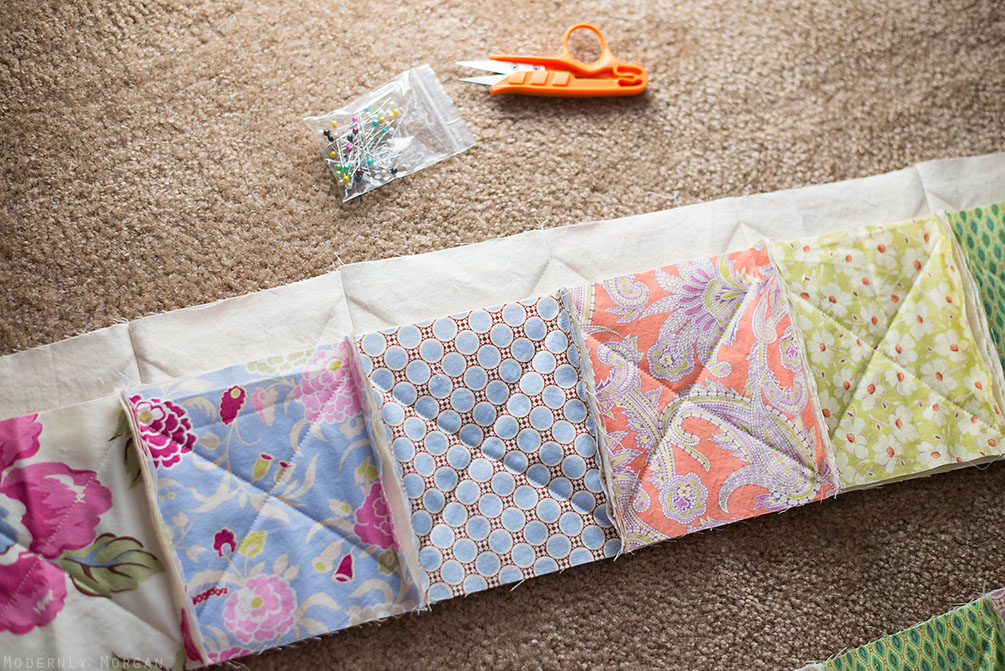
Anyway…once you have a layout that you like, it’s time to start sewing your rows.
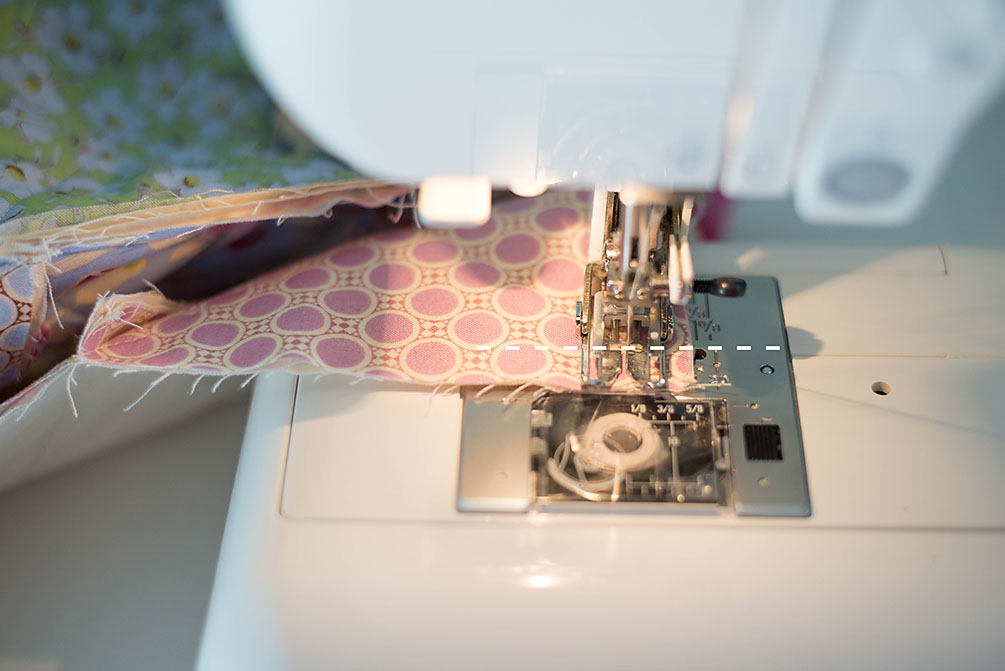
I collect one horizontal row at a time (I stack them in order and then take them over to my sewing machine). And you’re going to sew each of the 7 squares together with their backsides touching (muslin to muslin) with a 5/8 seam allowance (shown in photos below).
Side by side squares that are about to be sewn together.
Place those two squares together with backsides touching (muslin to muslin).
Sew down that side with 5/8 seam allowance (5/8 will be marked on your needle plate).
When you have all 7 squares sewn together from that row…it’ll look like this:
Continue that process with all 9 rows.
And finally…it’s time to sew all those rows together to make your quilt!
This little bit actually requires some pinning. It helps to keep everything lined up together and a few minutes of pinning will help the last little bit of your quilt go smoothly!
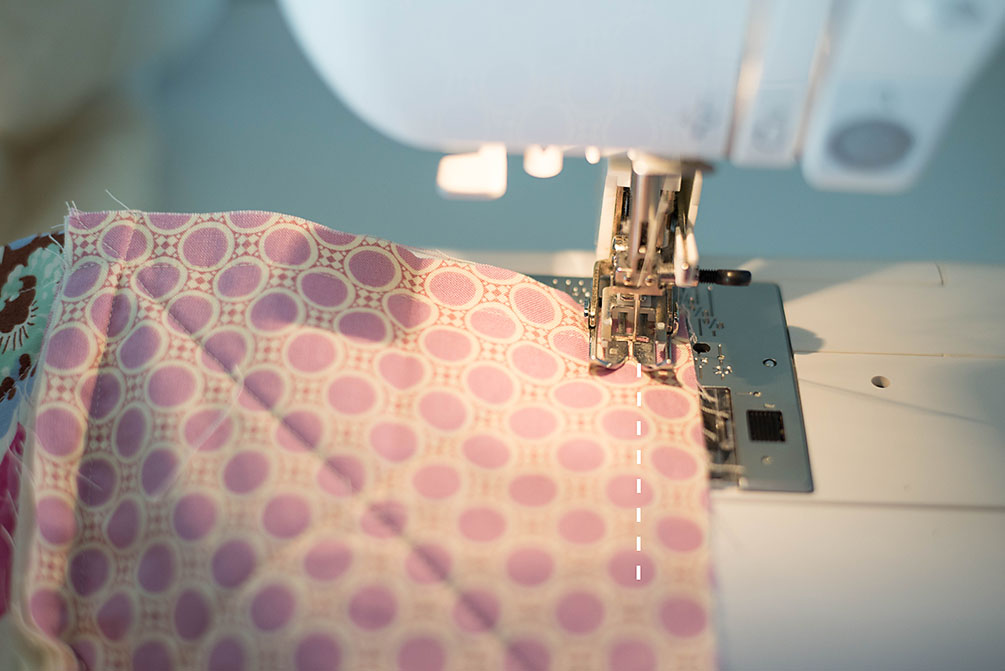
Start with two rows at a time. You’re going to put them back to back again (muslin side to muslin side) and you’re going to lineup the seams as best as you can (if they are off a tad, don’t stress).
See how I’m lining up the seams?
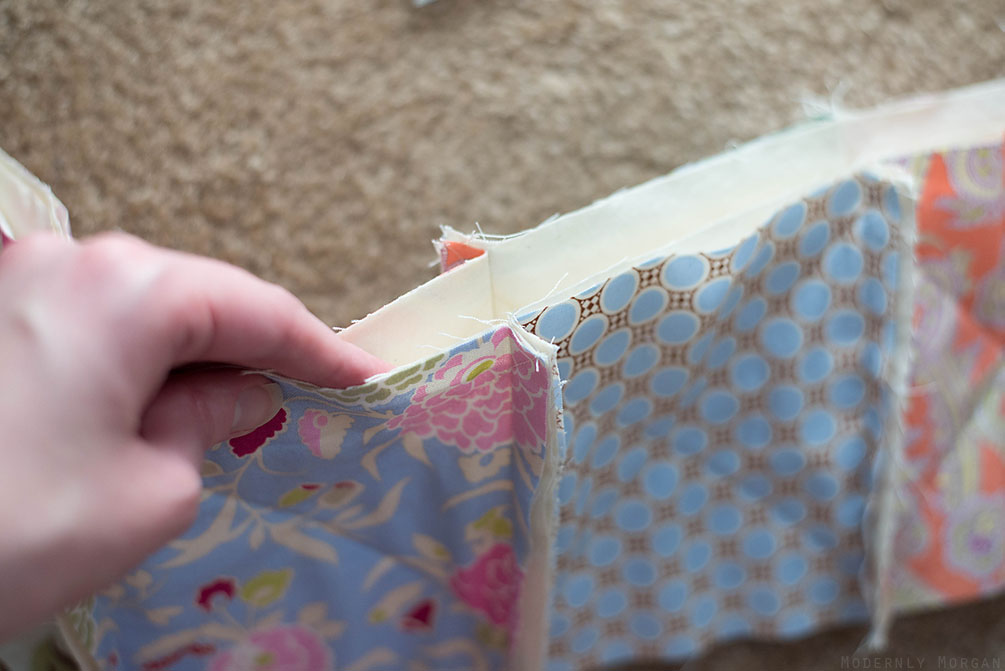
When you line the seams up, make sure the flaps are going in opposite directions (this prevents the seams from being too bulky when going into your sewing machine). Make sure you do this with every seam.
And pin through both layers to hold into place.
See how I have all the flaps closest to the camera laying to the right? All the flaps furthest from the camera (the ones you can’t see) are laying to the left.
Time to sew! Sew these rows together, once again using a 5/8 seam allowance. When feeding through your machine, make sure your top flaps are laying flat (once you have loaded the row into your sewing machine, the top flaps will be pointing towards you and the under flaps will be laying towards the machine). I’m constantly checking the under flaps to make sure they are still pointing towards the machine when they are about to go under the needle. If you don’t keep checking, you may end up with some funky seams like this guy:
I wasn’t paying attention and that one got wonky. It’s not the end of the world so don’t stress too much if this happens to you…just go slowly while sewing your rows together, check the flap direction often and you shouldn’t have too many of these little mistakes. The great thing about rag quilts is when you rag them, you won’t see these little mistakes. 😉
Pin and sew the rest of the rows together until you finally get your one solid piece of quilt!
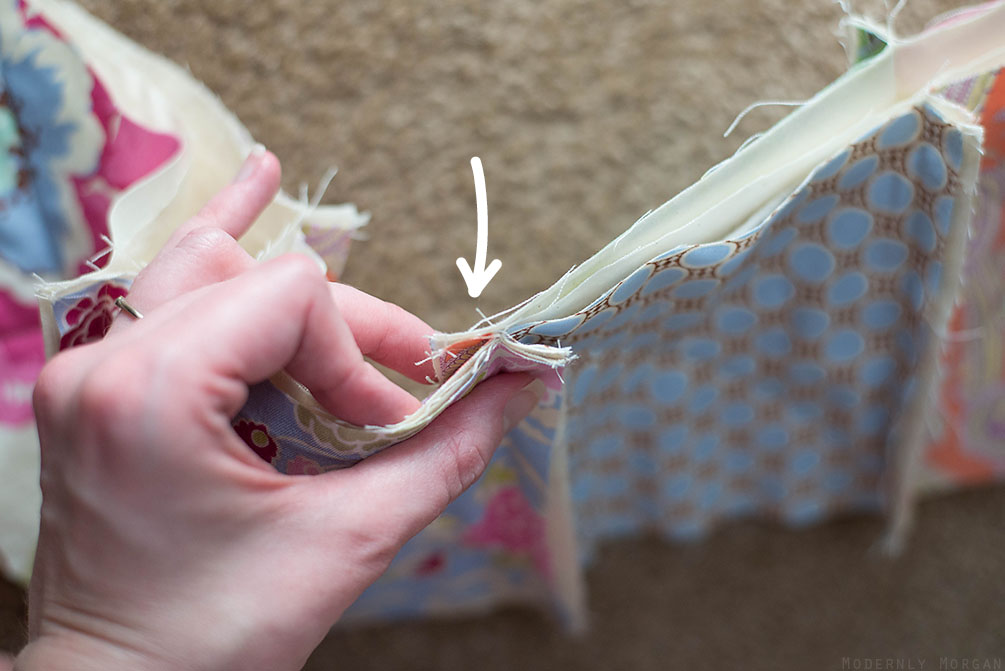
Okay, it’s edge time!
Basically, I like to find a square that closely matches my thread color or a busy patterned square and start on that square. You’re going to stitch your edging with a 5/8 seam allowance and remember to back-stitch a few stitches when you start to help lock your stitching in. Continue around the entire quilt and try to keep the flaps that are on the same sides, pointing the same direction when you sew them down.
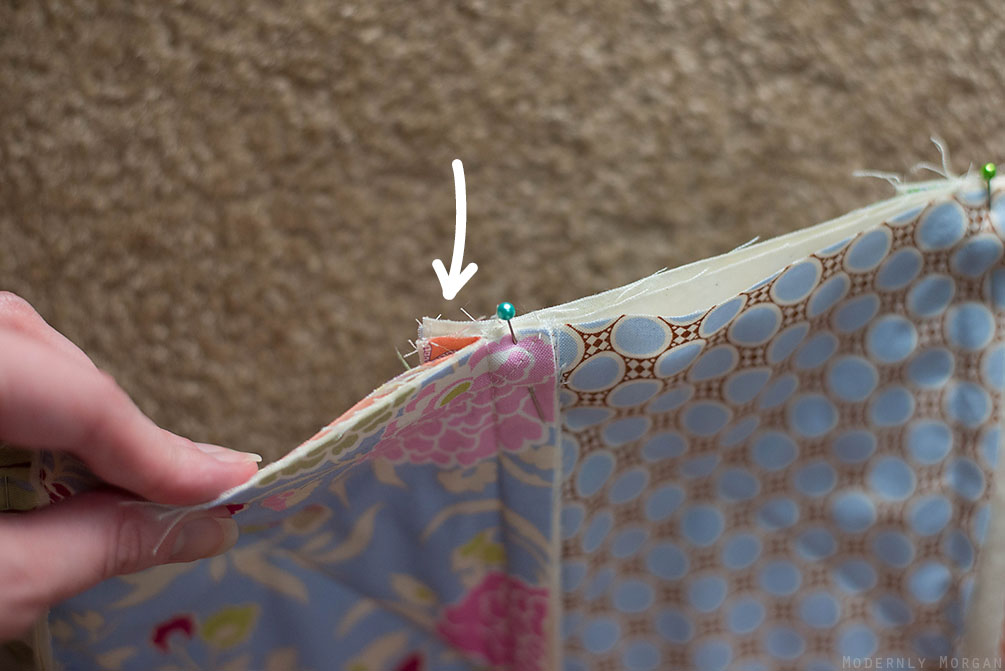
**Corners…Stop when you get 5/8 of an inch away from a corner and put your needle into your fabric (I added a dotted line to show you where I stopped):
With your needle down, lift your walking foot up and rotate your quilt. Make sure to put your walking foot back down and continue to sew your edge line. This will give you a nice, crisp corner!
Once you get back to where you started, back-stitch a few stitches to lock your stitching in and prevent your edge from unraveling.
You are done sewing! Now it’s time to rag!
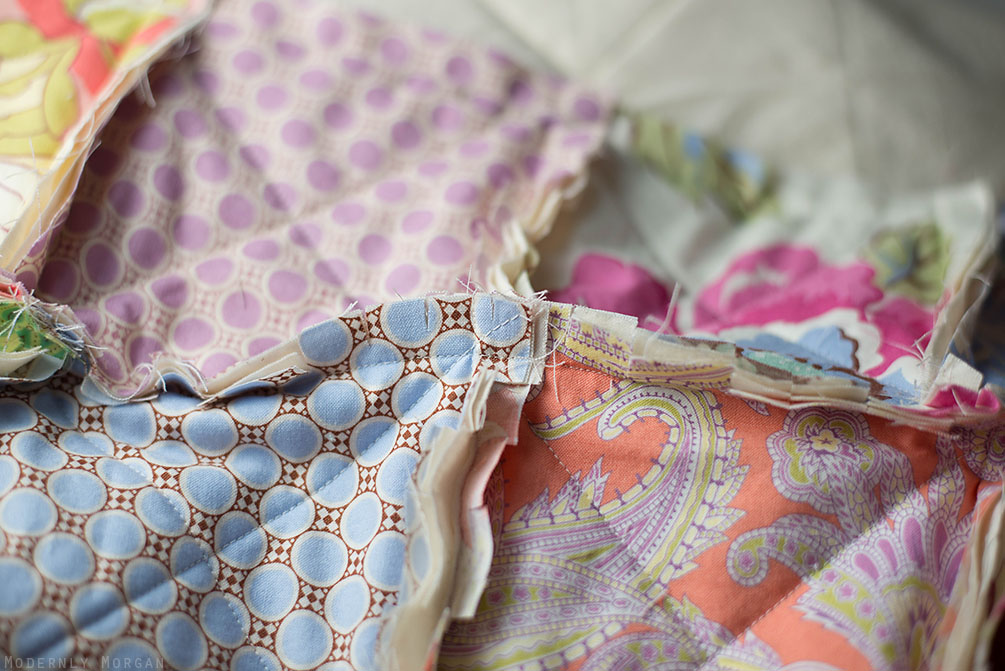
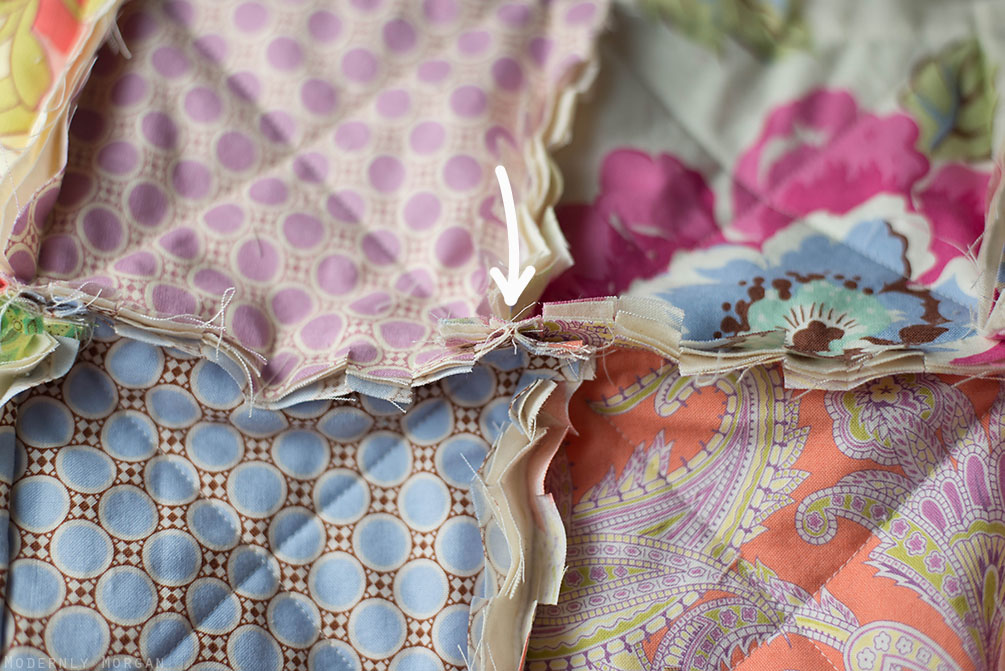
Take your spring loaded scissors and clip the edges and flaps BUT MAKE SURE TO NOT CLIP THROUGH THE SEAMS or STITCHING! If you clip through the seams/stitching, there will be a hole…so just don’t do it!
And the one thing that I think makes my version of the rag quilt look different than other tutorials I’ve seen is that my cut distances aren’t even. That’s right, I said they aren’t even. 🙂 I like to make my cuts anywhere from 1/4 of an inch to 3/4 of an inch apart.
This is what helps to achieve the more rustic look. See how they are different distances apart below?
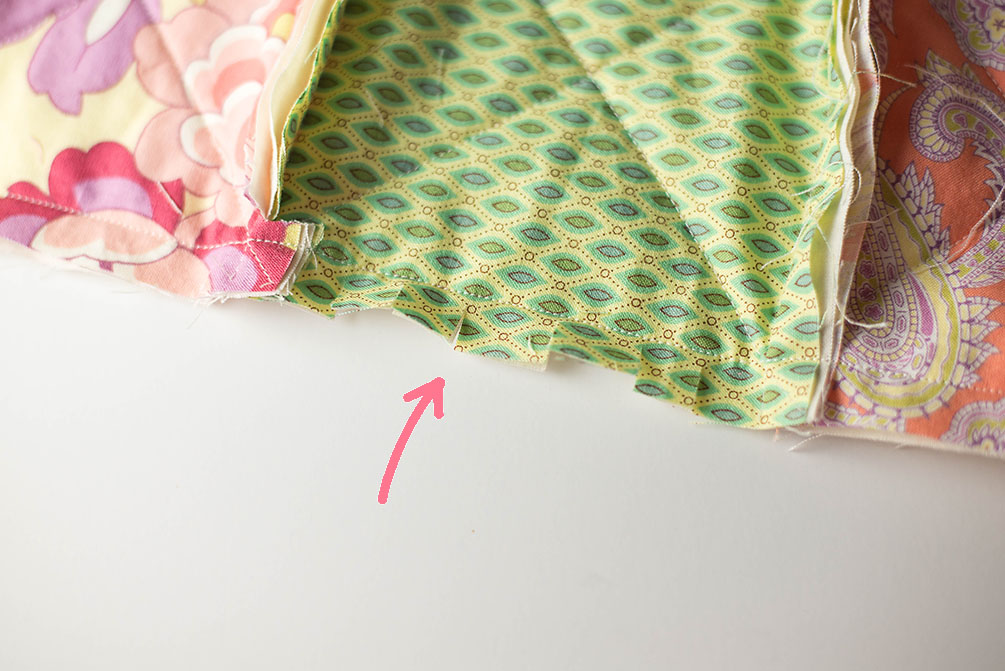
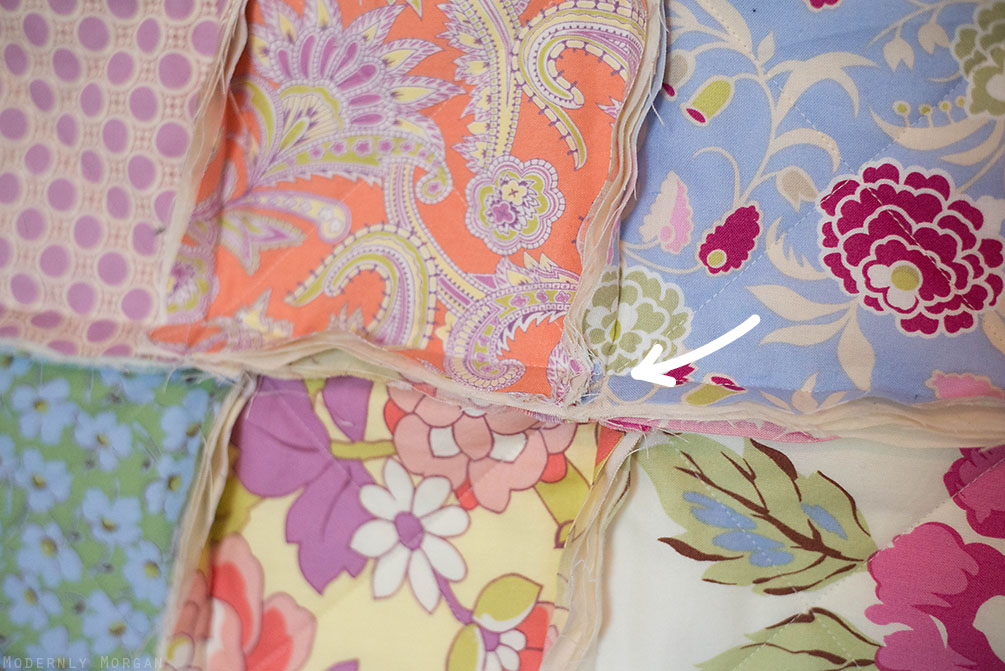
When you get to the bulkier 4 way seams, things can be a tad tricky but just make sure not to clip a seam and you will be fine!
I can’t really describe what I do but the picture pretty much shows it. Basically, just free up the flaps that I’ve sewn down without clipping through the seams/stitching.
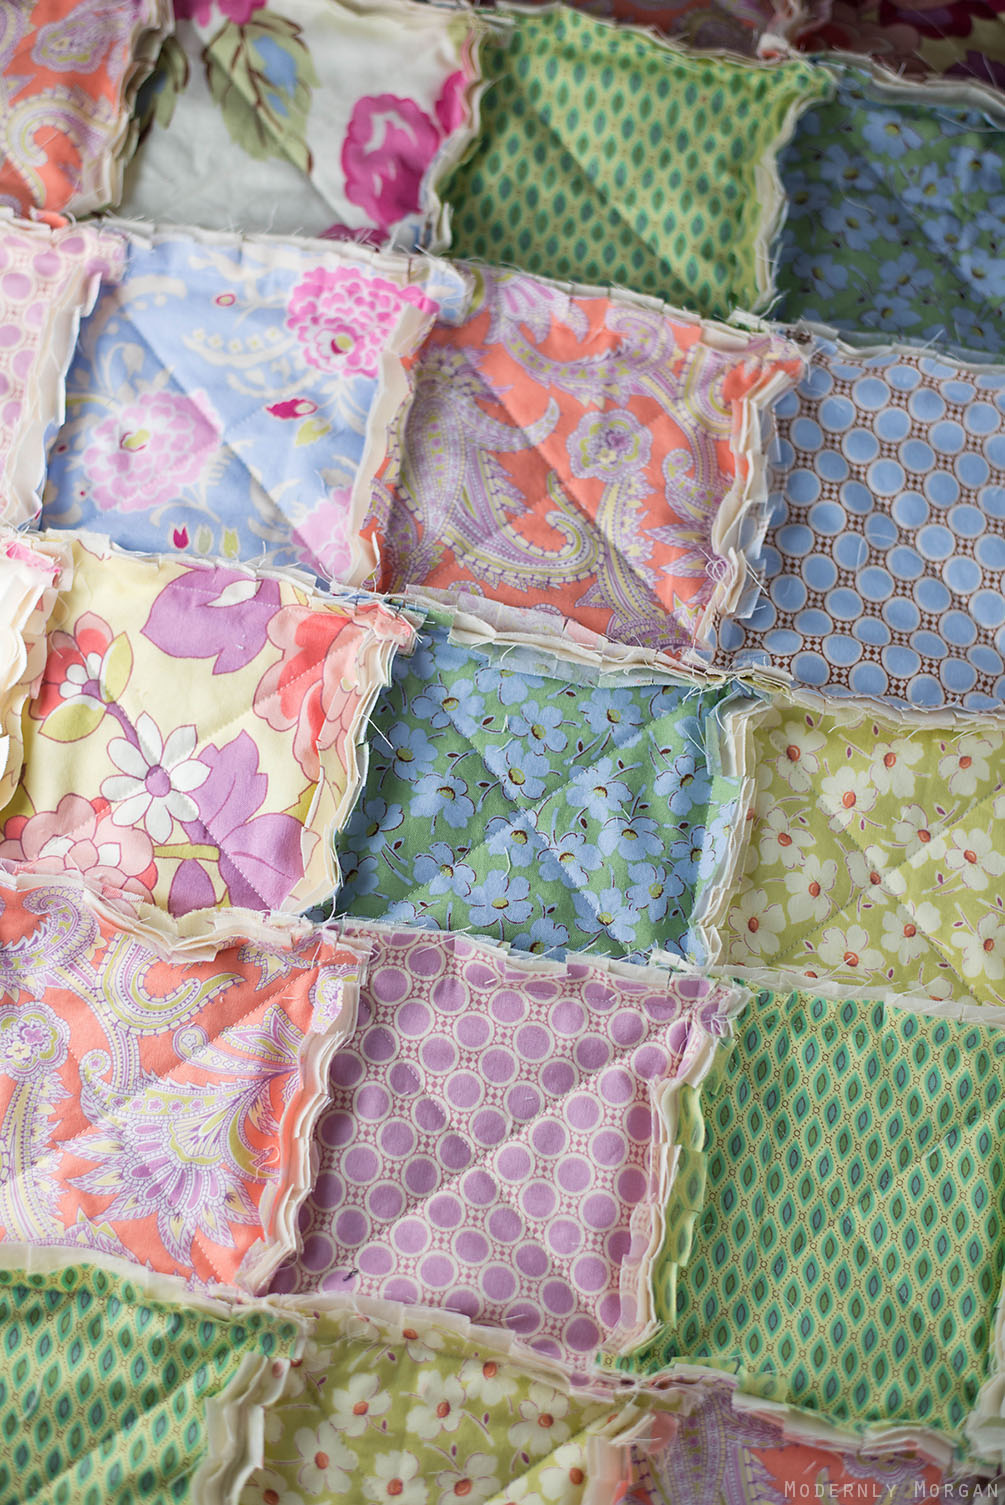
Then with a few breaks in between to give your hand a rest…this is what your quilt should look like:
Take your quilt outside and shake it like there’s no tomorrow! When you think you’re done….keep shaking it. You’ll see tons and tons of threads come flying off of it…and that’s what needs to be happening. Keep shaking until very little/no threads are coming off.
Now, it’s ready to be washed in order to help bring out its raggedy, rustic beauty!
I wash my rag quilts in my own washer…but I know some like to take theirs to the local laundromat due to the threads (so it’s up to you). Honestly, I’ve never had a problem with washing them in my own washing machine. But as I mentioned earlier MAKE SURE YOU SHAKE THAT QUILT LIKE CRAZY OUTSIDE TO GET MOST OF THREAD OFF OF IT!
I wash my quilts for the very first time on the gentle cycle and warm water (help to reduce more shedding at least in the washing machine). Then I dry it on high heat, returning to the dryer every 10 minutes or so to empty out the lint trap (there will be a ton of threads!).
When your quilt is finally dry, take it back outside and shake it again until all the remaining threads are knocked off. Your quilt will continue to shed for the first few washes as it continues to get softer and more broken in too.
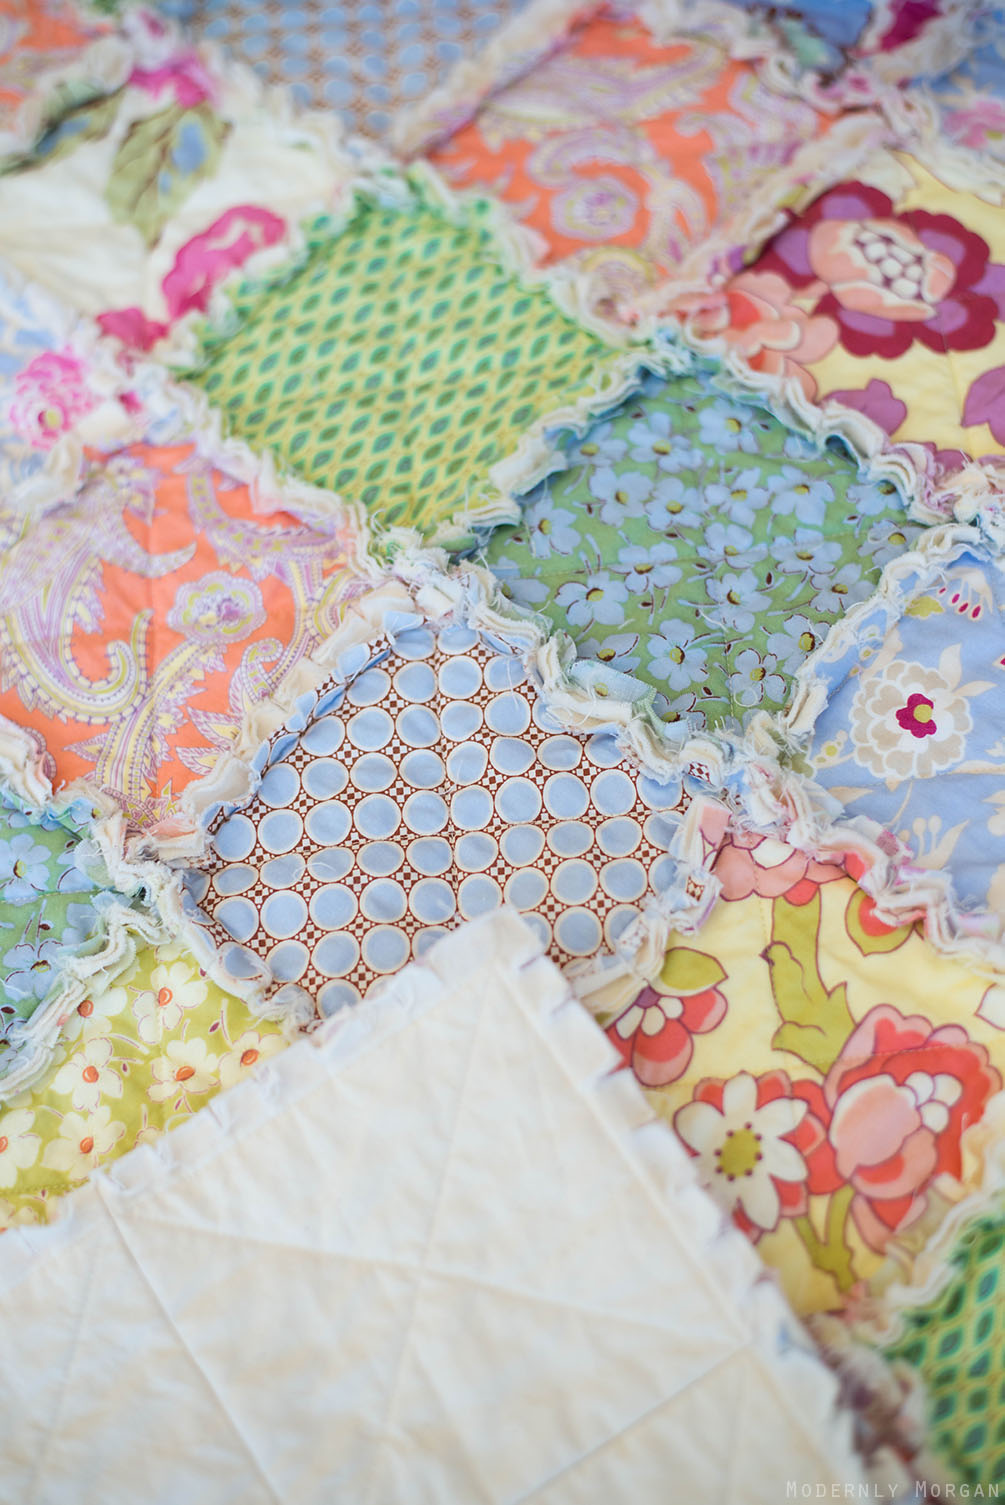
Look at all the frayed, raggedy goodness!
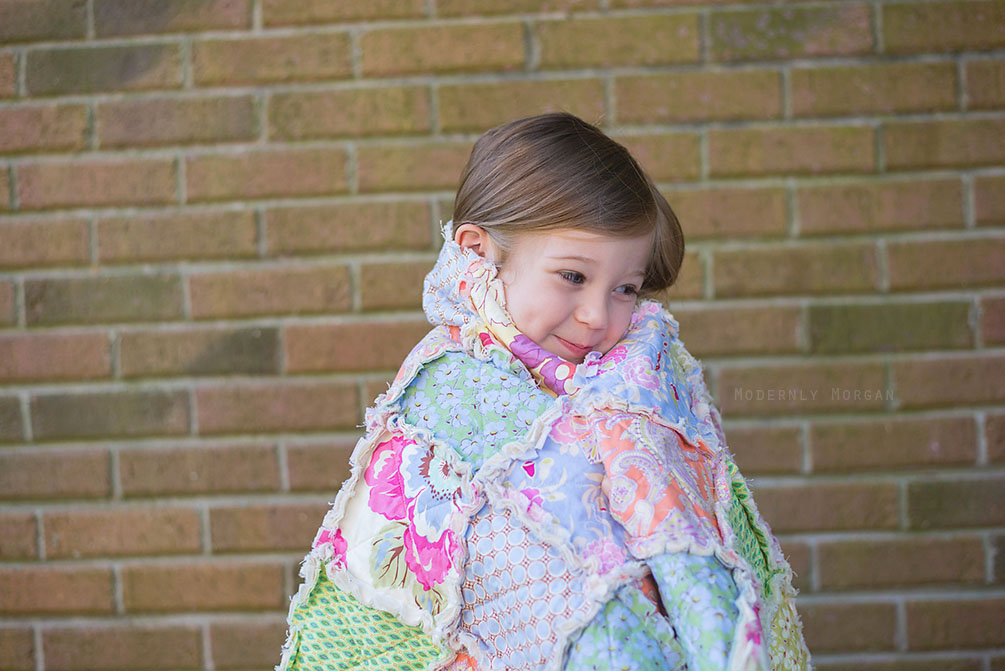
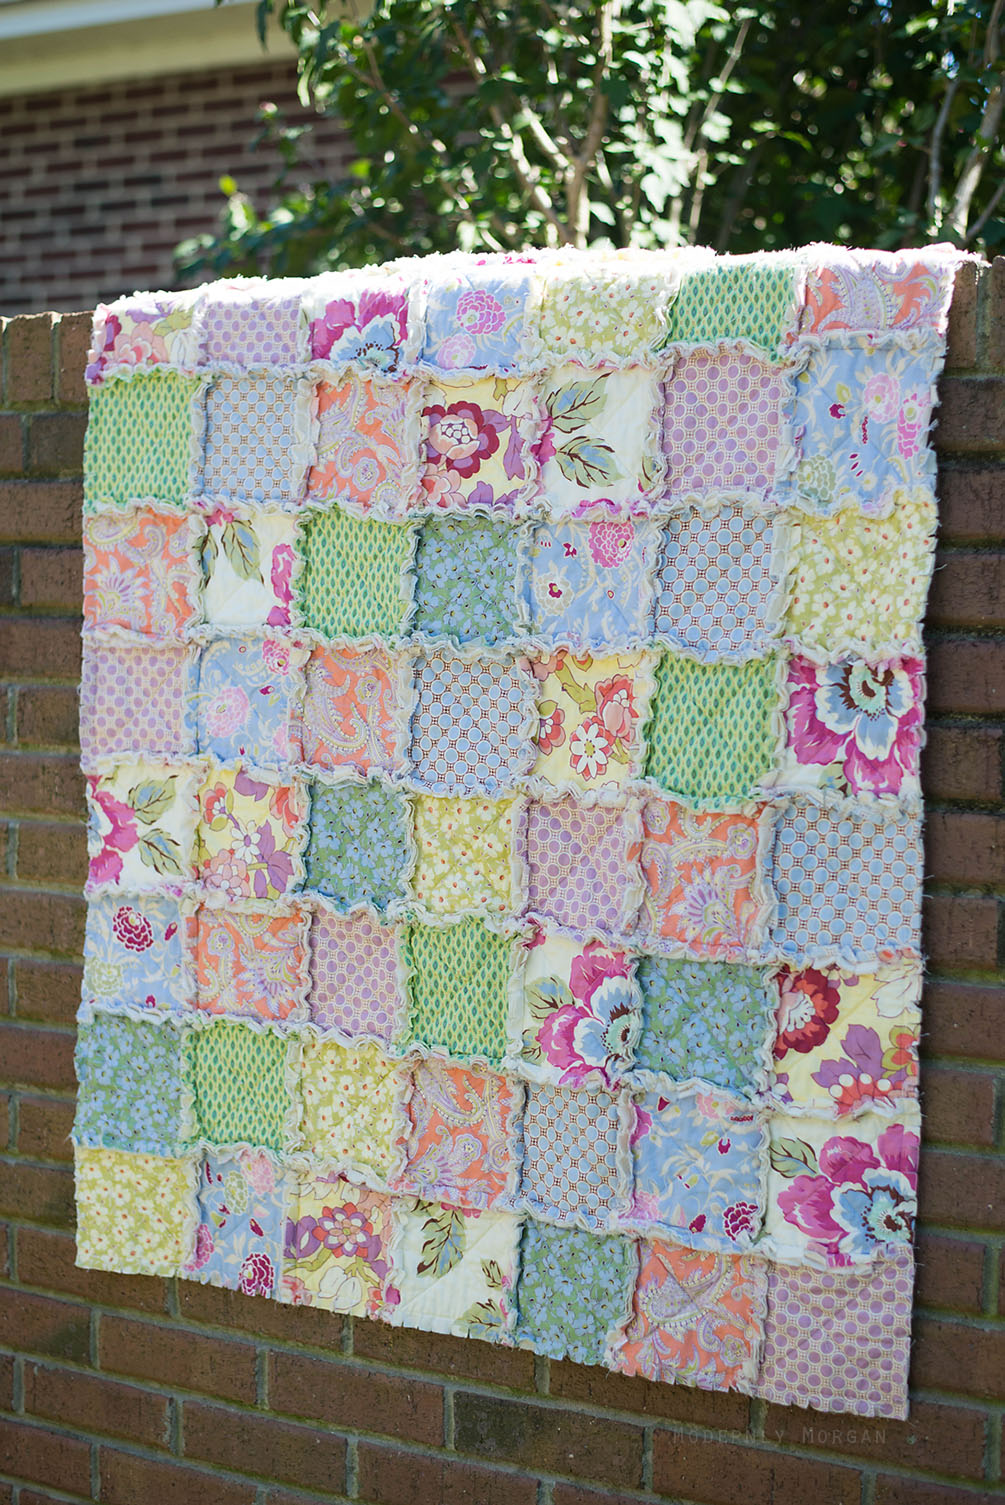
Enjoy your gorgeous rustic rag quilt!
If you have any questions or comments, please leave them below and I’ll do my best to help you out.
🙂
**Tutorial is for personal use only and you are not permitted to repackage/sell this tutorial. Please feel free to sell quilts you’ve made from it…I would love to see them!
Thank you for such a great tutorial. I believe you can never have too many pics, and you were very clear and thorough in your instructions.
I’ve always said I was going to make one of these…among all the MILLION things I say I’m going to make… nice job!!! Are you still Selling these on Etsy? I remember when you were a while back. 🙂 I’ve been following you a LONG TIME…. you don’t even want to know how I found your first blog post… (well the first post when I started following you!!) the story actually might be quite comical…maybe you do want to know! ahahahaha!
I just made my very first rag quilt last week…. I used cotton for the top, a flannel middle and muslin backing. I feel like mine is fraying excessively and doesn’t look “finished” … I’m not sure if maybe some cottons fray more than others or if I am being overly critical. Wish I could attach a photo
I’ve always wanted to make one of these! Thanks for the clear directions and all the pictures (they really helped) I’m looking forward to making one just need to get a sewing machine. Lol
Thank you so very much, Morgan, for posting this amazingly detailed tutorial! I’m a first-time grandma and I was looking for a rag quilt pattern to make for my granddaughter. I’m so happy I found your post! I’m confident I can do this, thanks to you! Hugs!
Such a gorgeous quilt and super clear instructions ! I’m so inspired !!
Pingback: Warm gebettet für Anna
Dear Morgan, thank you so much for clear and easy instructions! I made my yesterday for my lovely 4 month old daughter Anna. It looks so great! Pictures on my blog
https://elwiramachts.wordpress.com/2016/10/20/warm-gebettet-fuer-anna/
Greetings from Germany!
Thanks for sharing, I think I can actually make this quilt lol.
What a beautiful quilt! I am very new to the sewing world..where do you find your fabric? Thanks!
It’s beautiful!!! Thank you for sharing. I’ve always wanted to make my children one but was intimidated it looked so complicated! Thanks also for all the pics im kind of a visual person as well
Very nice tutorial, super clear and photos were nice and close up. Beautiful quilt, of course!
Thanks for the wonderful tutorial. I’m a sewing newbie so I really appreciate all of the photos and step-by-step instructions!
I am a beginner. Never have tried a quilt. Your tutorial was so awesome. Easy to understand. After reading your instructions I’m now not afraid to start my quilt. Thank you again and AGAIN for your tutorial.
Thank you for your very clear tutorial. I can’t wait to make one!!
Loved your tutorial can’t wait to make my rag quilt. Can I use 5″ squares? Thanks again.
Angela
I have made many flannel rag quilts and cannot wait to try out this cotton and muslin version! I always throw my quilts over a chair and lightly fray the edges with a butter knife before shaking and washing. I get an even more “well loved” finished look that I love about this style of quilting. Thank you so much for the inspiration to widen my horizons!
Thank you for the awesome tutorial! 🙂
Do you have to use flannel or can you use other fabrics?
After reading and viewing your tutorial I’m ready to go. Hope its as easy as you made it sound Thanks, Jeanette
How many squares would I need to make a king size quilt? 102X92..or somewhere around that size.
I’ve done a baby rag quilt. Almost everything looks fine. I used the thin all natural batting but on some of the squares you can see the batting. Not much just a little. My quilt was 6×6 squares and my batting I cut 5×5 squares. I put them in the middle of each square. Why can I see some of the batting. Help!!!
I just cut my batting a little smaller. I used 5″ squares and 4″ for batting.
The micro tip scissors are used to trim harvested marijuana , that’s why the price is too high (pun intended)
Hi there! The quilt I am making is for an infant. I am concerned about loose threads getting pulled off & ingested. Have you tried this with pinking shears, or a pinking rotary blade, to go around the assembled squares prior to sewing into strips? I am thinking this would help cut down thread loss a lot & still leave a fuzzy looking edge. Thanks!
I have been inspired by this post for my granddaughters quilt. I had been collecting material and thanks to you now I have a plan!
Morgan, this is the BEST tutorial I have seen for these quilts. I have been sewing since I was 12 (I just turned 50), so, I am not a beginner, but this was perfect. Just perfect! I am getting ready to make a few of these quilts and when I post them on social media, I will get questions. I am going to post a link to this page for those asking. If you are OK with that? Thanks for this tutorial! Such a blessing!
Robin, thanks for the kind words! Of course, feel free to link away! 🙂 And if you post on instagram, I hope you’ll tag me so I can see your quilts! Happy New Year!
Thank you so much for this easy to follow tutorial. I am making this little quilt now and it is turning out beautifully. I am very pleased with it and will make many more!
So excited to try this. Wonderful instructions and pictures! Thank you!